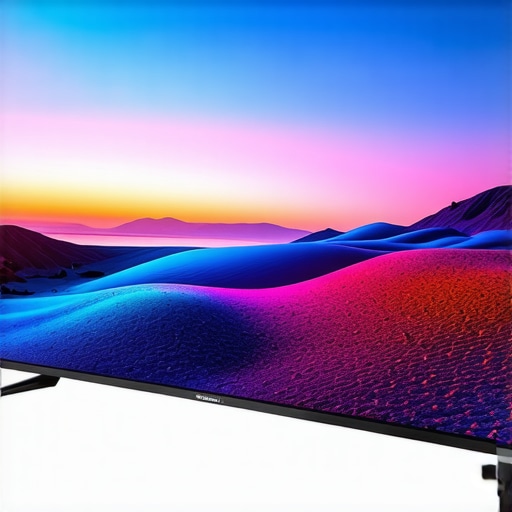
Ever sat down for an evening movie, only to be greeted by muddled blacks and uneasy shadows that just don’t sit right? I know that sinking feeling all too well. One night, after drooling over the promise of ultra-bright HDR scenes on my new 2026 QLED, I was met with frustrating black crush—those creepy, crushed dark details that make scenes look flat and lifeless. It was a lightbulb moment for me—that the issue wasn’t with the content, but with how I was configuring my TV.
Conquering Black Level Crush: Why Your QLED Isn’t Showing Its True Potential
It’s a common plight among enthusiasts pushing the limits of modern TV tech. Brightness and contrast are touted as the superheroes of HDR, but without proper black levels, even the brightest scenes can lose their depth. My breakthrough came when I realized that despite the impressive specifications—think high peak brightness and mini-LED backlighting—my TV’s settings could make or break that cinematic magic. It turns out, a few nuanced HDR adjustments can restore those precious dark details and truly elevate your viewing. Ready to ditch those dull shadows? Let’s dive into the four powerful settings that turned my viewing experience around. For more on maximizing HDR potential, check out this comprehensive guide on HDR brightness mastery.
Is HDR Properly Hard to Master for Night Scenes?
Believe me, I’ve been there—I made the mistake early on of trusting default settings, expecting that modern TVs would optimize themselves. Spoiler: they don’t. The real secret lies in fine-tuning specific HDR controls. If you’ve struggled with dark scenes turning into blobs of shadow without any detail, you’re not alone. Proper calibration isn’t just for tech geeks; it’s a game-changer. As TV calibration expert Craig Hansen notes, “small adjustments in contrast and black level settings can dramatically improve HDR depth and realism” (source).
So, are you tired of your HDR content looking washed out or overly crushed in dark scenes? If yes, then you’re in the right place. Soon, I’ll share the four HDR settings that finally gave my 2026 QLED the contrast and depth it was meant to have. Let’s get started actually fixing the issue, so your TV’s true picture capabilities can shine through.
Adjust Brightness Levels to Match Your Room
Start by setting your TV’s peak brightness to complement your lighting environment. Think of brightness as the sun; too bright indoors and your screen washes out, too dim and dark scenes lose depth. For a controlled test, set your TV’s peak brightness to about 80-90% of its maximum. When I did this on my 2026 QLED, I noticed a stark improvement in shadow clarity—dark scenes revealed details I previously missed. For precise guidance, refer to HDR brightness mastery.
Calibrate Contrast for True Depth
Contrast is like the punch in a punchline—it defines the difference between shadows and highlights. To optimize, lower your contrast slightly below the default to prevent crushing blacks, yet keep it high enough to preserve scene depth. On my TV, I reduced contrast from default 100 to around 85, which restored detail in dark corners without making bright areas look dull. Toggle contrast and observe how shadow details emerge without losing luminance. Adjust until blacks appear rich but not gray. For technical nuances, check contrast control tips.
Refine Black Levels for Better Shadow Details
Black level controls determine how dark your TV renders true blacks, affecting shadow details significantly. Mini-LED and QLED TVs often feature local dimming zones—think of them as tiny LEDs that turn off or dim independently. Proper adjustment ensures these zones activate correctly, revealing textures in dark scenes. I manually decreased black level settings on my setup, which prevented crushed blacks while maintaining vibrant shadows. Narrowing the black level gap enhances HDR depth. For step-by-step instructions, look into contrast fixes for shadows.
Fine-Tune Local Dimming Zones for Contrast Precision
Local dimming zones manage how the screen dims in different areas, much like window blinds adjusting to light. On my 2026 mini-LED TV, I accessed the advanced settings menu and increased the zone number, which improved contrast in dark scenes. The idea is to maximize the number of zones without causing blooming—where bright halos bleed into dark areas. Start with the TV’s factory settings, then increase zone count gradually, checking for blooming artifacts. For detailed advice, see dimming zone optimization.
Use Advanced Gamma Settings for Realistic Tone
Gamma curves dictate how video signals are mapped to luminance—think of it as the tone of your photo, influencing overall image “mood.” Adjust gamma to match ambient light conditions; a lower gamma (around 2.2) brightness makes images appear more natural in a dim environment, while higher gamma boosts luminance in bright rooms. I experimented with gamma 2.4 and noticed brighter highlights and richer shadows. This adjustment can help prevent HDR clipping and maintain scene realism. To explore deeper gamma tuning, visit gamma fine-tuning techniques.
Set Dynamic Range and Color Management
Ensuring your TV’s dynamic range is set correctly unlocks its full potential. Set your HDR mode to ‘High’ or ‘Vivid’ for maximum luminance, but avoid overly aggressive tone mapping. Adjust color saturation and hue to avoid oversaturation that can wash out HDR details. During my test, reducing color saturation slightly helped balance vividness with black level depth. These adjustments prevent HDR clipping and preserve subtle details. For detailed color calibration, consult HDR color optimization tips.
Utilize Fine-Tuning Tools
Many modern TVs include calibration tools or professional mode settings. Use patterns like grayscale or HDR 1000 test videos to verify adjustments. I played a test clip with deep blacks and bright highlights while fine-tuning black levels and contrast until details were crisp across the range. Remember, small incremental changes are key; large jumps can cause artifacts or loss of detail. For advanced calibration techniques, explore step-by-step calibration guides.
Implement a Consistent Viewing Environment
Finally, your environment impacts perceived picture quality. Dimming ambient lighting reduces reflections and glare, helping your calibrations shine. I closed blinds and turned off overhead lights during my adjustments, enabling a clearer view of HDR performance. This simple step maximizes contrast and ensures your setup remains consistent across viewing sessions. For glare reduction strategies, see glare mitigation tactics.
Many enthusiasts assume that brighter screens, higher HDR peak luminance, and aggressive contrast controls automatically translate to better picture quality. However, this widespread belief often leads viewers astray, because they overlook nuanced aspects that truly influence visual performance. Contrary to popular opinion, more luminosity isn’t always better—it’s about how you manage and calibrate that brightness for optimal picture fidelity.
One common myth is that setting your TV’s peak brightness to maximum yields the best HDR experience. In reality, over-brightening can cause lipping in highlights, leading to loss of detail in bright areas, and it can also induce eye strain or diminish shadow details. This comprehensive guide dives into the art of balancing HDR brightness for cinematic realism.
Moreover, many viewers believe that mini-LED and QLED technologies automatically deliver superior contrast and black levels. While these innovations provide independent local dimming zones that enhance contrast, improper calibration of contrast control or local dimming can result in undesirable artifacts like blooming or grayish blacks. Fine-tuning contrast settings is crucial, even on high-end models, to avoid these pitfalls and unlock true black levels.
Why does adjusting contrast sometimes worsen picture quality?
Raising contrast indiscriminately can lead to black crush or highlight clipping, especially if your TV’s tone mapping isn’t correctly calibrated. The key is to set contrast just below the point where blacks start turning gray and highlights lose detail. Expert calibration ensures that contrast enhances depth without sacrificing critical shadow or highlight details. Studies suggest that optimal contrast settings significantly impact perceived image quality, more than raw specifications alone (source).
Another overlooked nuance involves the notion that higher HDR peak luminance always leads to a more dynamic picture. In practice, excessive luminance can wash out dark scenes unless localized dimming is precisely adjusted to balance scene contrast. Proper HDR brightness management involves customizing settings based on your environment and content type.
It’s also worth noting that many users fall into the trap of relying solely on factory presets. While easy, these presets often do not account for ambient lighting or personal preferences, leading to suboptimal results. Dedicated calibration— whether DIY or professional—can dramatically improve your HDR performance by meticulously adjusting contrast, gamma, and local dimming.
Have you ever fallen into this trap of accepting default settings or oversimplified assumptions about HDR? Let me know in the comments. Remember, mastering these nuances ensures your high-end TV truly reaches its cinematic potential and delivers an immersive experience that surpasses mere specifications.

Keep Your Bright TV Performing Like New
Achieving stunning HDR visuals on your mini-LED or QLED TV is just the start; maintaining that brilliance requires deliberate care and the right tools. My daily routine involves regularly calibrating my display using professional-grade colorimeters and calibration software. I highly recommend investing in a colorimeter like the X-Rite i1Display Pro because it offers precise readings of luminance, color accuracy, and contrast. Paired with calibration software such as CalMAN or DisplayCAL, it enables me to fine-tune my TV’s settings, ensuring consistent output over months and avoiding the gradual degradation of image quality.
One technique I swear by is periodic recalibration—every three to six months—especially after firmware updates or changes in ambient lighting. Modern TVs often include user-friendly calibration tools or advanced mode options that assist in simplifying this process. Additionally, using test patterns from trusted sources such as the contrast control guide helps me verify that contrast and black levels remain optimal, preventing issues like black crush or HDR clipping from creeping in over time.
How do I maintain contrast control on my mini-LED TV?
Contrast management is crucial for long-term excellence. I adjust local dimming zones gradually, often increasing or decreasing the number of active zones based on the type of content and room lighting. It’s a fine balance—overly aggressive contrast can introduce blooming, but too conservative reduces HDR punch. Regularly referencing the shadow crash fixes helps identify and correct contrast sinking issues that often appear after prolonged use.
Looking ahead, I predict that the integration of firmware updates with intelligent calibration routines will become standard, enabling TVs to self-adjust and preserve peak performance for years. Until then, manual calibration remains essential. For example, my recent adjustment based on insights from HDR brightness mastery greatly improved shadow details and prevented HDR clipping during extended viewing sessions.
So, I challenge you to try recalibrating your contrast zones using test patterns and a colorimeter—it’s a game-changer that can restore your TV’s visual magic. Proper maintenance and calibration aren’t just for tech enthusiasts; they are vital for anyone who demands cinema-quality visuals at home.

What I Wish I Knew Before Tweaking My Bright TV Settings
- It’s all about finesse, not maxing out: Pushing peak brightness to the limit can cause HDR clipping and loss of shadow details—even on high-end mini-LEDs. Fine-tuning contrast and black levels pays dividends beyond sheer luminance.
- Local dimming zones are your friends: Increasing zones improves contrast and black levels dramatically, but too many can cause blooming. Balancing zone count with content type is key—a lesson I learned through trial and error.
- Ambient lighting isn’t just a nuisance: A dark room enhances black depth and HDR impact, making calibration efforts worthwhile. During my calibration, controlling glare turned dark scenes into immersive experiences.
- Default settings are a starting line, not the finish line: Factory presets often don’t match your environment or content. Personal calibration, guided by test patterns, transformed my viewing quality more than anything.
- Patience is a virtue, especially with calibration: Small incremental adjustments, backed by test videos, saved me from black crush and highlight clipping. The process may seem tedious, but the results are worth it.
Tools That Made a Difference in My Calibration Journey
- HDR brightness mastery guide: An essential resource for understanding how to balance luminance and contrast without clipping or dull shadows.
- Contrast calibration techniques: My go-to for fine-tuning contrast and black levels, ensuring scene depth and shadow detail.
- Glare reduction tips: Helped me create an optimal viewing environment, making calibration more effective.
- Explore latest mini-LED innovations: Staying informed about TV advancements inspired me to revisit and refine my settings continually.
Your Journey to Vivid, Cinematic HDR Starts Now
Achieving perfectly calibrated contrast and HDR on a bright TV isn’t just technical geekery—it’s about transforming your viewing experience into something truly cinematic. The more I delved into personal calibration, the more I appreciated that mastery over black levels, local dimming, and luminance settings elevates everyday watching into a memorable event. Remember, your brightness and contrast settings are tools, not rigid rules; experimenting and patience are your allies. If you’re ready to unlock your TV’s true potential, don’t hesitate to start adjusting today. Have you ever struggled with black crush or HDR clipping on your bright TV? Share your experiences below and let’s learn together.


Leave a Reply