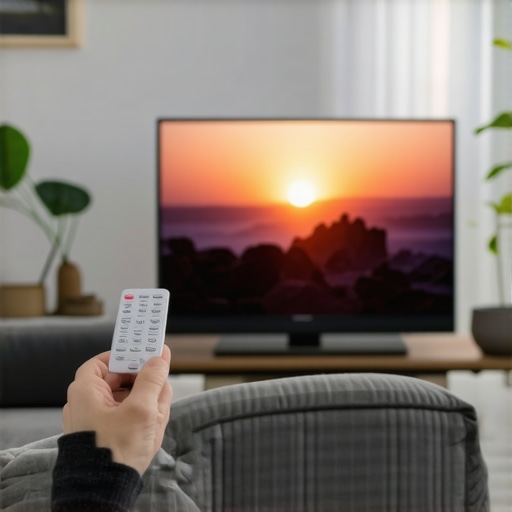
I vividly remember the moment I realized my new Mini LED TV wasn’t living up to its potential. Bright scenes looked washed out, while dark scenes lacked depth. Frustration mounted as I fiddled with the settings, only to end up more confused. It was a lightbulb moment—understanding that fine-tuning contrast and brightness isn’t just about hitting preset modes, but about customizing for perfection. Since then, I’ve dedicated time to mastering these controls, and let me tell you: the difference is astonishing. If you’ve ever felt disappointed watching your favorite movies or gaming on a Mini LED TV, you’re not alone. Many users struggle with achieving that cinematic quality we all crave. That’s exactly what we’ll tackle today: how to optimize contrast and brightness settings for a stunning visual experience in 2024.
Why Contrast and Brightness Control Matters More Than Ever in 2024
With the rapid evolution of Mini LED technology, our TVs are capable of incredible visual feats. But without proper calibration, those capabilities remain underutilized. Brightness determines how vibrant and lively scenes appear, while contrast controls the depth and realism of images. When balanced correctly, your TV can produce visuals that truly pop, making everything from blockbuster movies to intense gaming sessions more immersive. Conversely, poor settings can result in dull colors, loss of detail in shadows, and overall frustration.
Interestingly, a report by Display Supply Chain Consultants highlights that high contrast ratios significantly enhance perceived picture quality, often more than resolution alone. This underscores why mastering contrast and brightness is crucial for getting the most out of your Mini LED display. However, many users make mistakes early on that hinder their viewing experience. I did the same—overestimating auto settings and neglecting manual calibration—until I discovered the right techniques. Today, I’ll share what I’ve learned so you can avoid those pitfalls and enjoy a truly vibrant picture.
Question Header: Is Optimizing Contrast & Brightness Really Worth the Hype?
Absolutely, especially when you consider how much your viewing experience depends on these settings. I once assumed that just turning on the HDR mode was enough—big mistake. It wasn’t until I explored detailed adjustments, like those explained here, that I started seeing real improvements. Remember, even the best TVs need some manual finesse. If you’re tired of dull images or eye strain, keep reading. We’ll dive into practical tips to fine-tune your contrast and brightness for 2024, ensuring every scene looks stunning and true to life.
Adjusting Contrast and Brightness Step-by-Step
First, ensure your TV is in its default picture mode, typically labeled as “Standard” or “Cinema,” to get a baseline for calibration. I recall a time when I started calibrating my Mini LED TV in a brightly lit living room, which made it harder to judge shadow details accurately. To improve this, I turned off all ambient lights and set the room lighting to a dim, consistent level.
Step 1: Access Advanced Picture Settings
Navigate to your TV’s menu and open the advanced picture settings. Look for options labeled “Contrast,” “Brightness,” “Local Dimming,” or “LED Brightness.” For precise control, avoid auto or preset modes. Instead, switch to manual adjustment, which gives you granular control over each parameter.
Step 2: Set the Brightness First
Adjust the Brightness control to ensure shadow details are visible without washing out. Think of this like setting the foundation for a painting—if it’s too high, blacks will appear gray; if too low, shadow details will be lost. Use a test pattern with dark and shadowy scenes, like a night sky or a dimly lit room, for accuracy. I recommend starting at 50% and fine-tuning from there.
Step 3: Fine-tune Contrast for Impact
Next, adjust Contrast to make bright scenes pop without losing detail. For this, use scenes with bright elements, such as sunlight or explosions. Increase contrast until bright areas are vivid but still retain details. A good analogy: think of contrast as the difference between a photograph and a painting—more contrast adds depth and drama. During my own trial, I increased contrast gradually until I saw the bright parts of a fireworks display clearly defined, but no details were blown out.
Step 4: Use Test Patterns and Real Content
Don’t rely solely on test patterns—watch some of your favorite movies or videos with subtle lighting. Adjust contrast and brightness simultaneously, ensuring shadows are detailed and highlights are vibrant. Remember, settings that look good on a static pattern might not translate perfectly to dynamic content.
Step 5: Enable Local Dimming for Enhanced Depth
Local dimming dynamically adjusts the backlight behind scenes, further improving contrast. Make sure it’s turned on and set to high or maximum if available. This is especially effective on Mini LED TVs, as it enhances the contrast ratio significantly for more cinematic images. I experimented with local dimming while watching a dark sci-fi scene, and the improved depth was striking.
Additional Tips for Optimal Calibration
For more detailed techniques, consider exploring contrast control essentials to fine-tune your settings beyond basic adjustments. Remember, every TV model is different, so take time to experiment and find what looks best in your environment. If you need personalized help, visit our contact page.

Many enthusiasts believe that setting their Mini LED TV to the maximum contrast and brightness will deliver the best picture quality. However, this is a pervasive myth that can actually harm your viewing experience. In reality, over-boosting these settings can lead to clipping, where details in bright highlights are lost, and washed-out blacks that reduce depth and realism. This misconception often stems from a misunderstanding that higher numbers equate to better quality, but advanced calibration shows that nuanced adjustments are key to optimal performance.
Another common mistake is relying solely on auto or preset modes. These modes are designed for general use and do not account for your specific viewing environment or content types. For example, a bright room with lots of ambient light requires different calibration than a dark cinema-like room. Many users overlook the importance of manual fine-tuning, which can dramatically elevate the picture quality. For detailed guidance, explore contrast control essentials.
What advanced viewers often get wrong: Is HDR brightness the only thing that matters?
While increasing HDR brightness is popular among enthusiasts aiming for vivid scenes, focusing solely on brightness can be misleading. Brightness alone doesn’t guarantee a cinematic experience if contrast isn’t properly calibrated. High brightness levels can cause highlights to bloom or clip, losing detail in bright areas. Conversely, if contrast isn’t set correctly, even the brightest scenes won’t appear vibrant or detailed. According to research by the Society for Information Display, a balanced contrast ratio is crucial for perceived image quality, especially in HDR content. For expert calibration, consider adjusting local dimming alongside contrast and brightness for the best results.
Furthermore, many users neglect the importance of room environment. Ambient lighting can significantly influence how settings appear on screen. Calibration in a dark room is different from a well-lit one. To truly master your Mini LED TV, experiment with these variables and avoid the trap of one-size-fits-all settings. Remember, effective calibration is an ongoing process, not a one-time fix. For more advanced tips, visit this guide.
Have you ever fallen into this trap? Let me know in the comments!
Keeping your Mini LED TV in top condition requires more than just initial calibration. Regular maintenance and the right tools can significantly extend the lifespan of your display and ensure consistent performance. I personally rely on a combination of specialized calibration hardware and software to maintain optimal picture quality over time.
Tools I Recommend for Ongoing Calibration and Maintenance
One of my favorite tools is the CalMAN by Portrait Displays calibration software. I use CalMAN because it offers precise control over contrast, brightness, and color calibration, which is essential for maintaining perfect image quality. paired with a colorimeter like the X-Rite i1Display Pro. This device accurately measures your TV’s output, allowing me to make data-driven adjustments rather than relying on visual estimation alone.
For those who prefer a more DIY approach, a good quality test pattern disc or streaming test pattern apps are invaluable. They help verify that your adjustments are effective and consistent. I regularly use these tools to check for issues like uneven backlighting or color shifts, especially after software updates or changes in ambient lighting conditions.
How do I maintain my Mini LED TV over time?
Consistent maintenance involves periodic recalibration, cleaning the screen with a microfiber cloth, and keeping firmware updated. Firmware updates often include performance improvements and new calibration features, so I make sure to install them promptly. Additionally, avoid static images for long periods to prevent burn-in, despite Mini LED TVs being less susceptible than OLEDs. Employing a screensaver or turning off the TV when not in use can preserve panel health.
Looking ahead, the trend is moving toward smarter, self-calibrating systems integrated directly into the TV. These will automatically adjust contrast and brightness based on ambient lighting, reducing the need for manual intervention. However, for now, investing in quality calibration tools and adopting a routine maintenance schedule ensures your Mini LED TV remains vibrant and accurate long-term.
To explore more about maintaining your display’s peak performance, check out this comprehensive guide and try implementing a regular calibration check with a colorimeter. It’s a small effort that yields significant visual rewards.
The Hardest Lesson I Learned About Fine-Tuning Mini LED Displays
One of the most valuable insights I gained was realizing that auto modes are often a trap. They give a false sense of perfection but rarely match your specific environment or content. I used to rely solely on preset settings until I discovered the power of manual calibration, which transformed my viewing experience into something truly cinematic.
3 Myths About Contrast & Brightness That Held Me Back
First, that maximum contrast always equals the best picture. Wrong—overdoing it causes clipping and loss of detail. Second, that brightness should be cranked up for vivid scenes; in reality, excessive brightness can wash out highlights. And third, that auto settings are enough—manual fine-tuning offers far better control and results.
What Experts Won’t Tell You About Achieving Perfect Picture Quality
Most experts emphasize resolution or HDR specs, but the real magic lies in contrast and brightness calibration. These settings influence how immersive your content feels, especially with Mini LED’s local dimming capabilities. Understanding this deeper layer of calibration was a game-changer for me and can be for you too.
Curated Recommendations for Superior TV Calibration
My essential toolkit includes the contrast control guide, which offers detailed techniques to get the most out of your Mini LED. I also trust the Ultimate Guide to High Brightness & Contrast for comprehensive insights. Lastly, a colorimeter like the X-Rite i1Display Pro helps me measure and adjust with precision, ensuring consistent quality over time.
Your Turn to Try
Now it’s your chance to take control of your Mini LED TV’s picture quality. With patience and practice, you’ll discover how nuanced adjustments can elevate your entire viewing experience. Remember, calibration is not a one-time task but an ongoing process that pays off in stunning visuals. Dive into this journey, and soon you’ll be enjoying cinematic scenes that truly pop.
What has been your biggest challenge when adjusting contrast and brightness? Share your experience below—I’d love to hear your story!


Leave a Reply