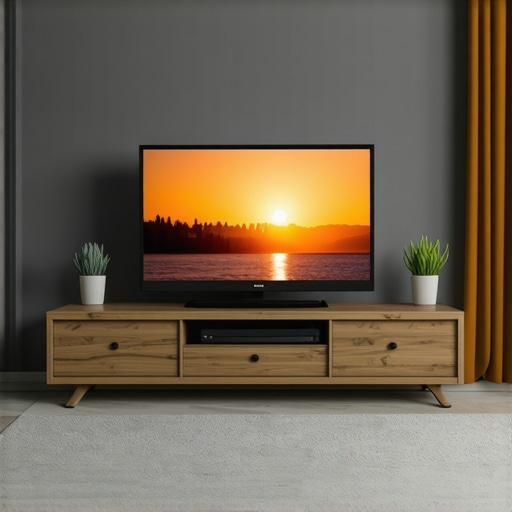
I remember the moment clearly. I was binge-watching my favorite series late into the night, only to realize that the picture looked washed out whenever I adjusted the room’s lighting. Frustration crept in—I had invested in a high-end mini LED TV, expecting stunning visuals, but the picture just wasn’t hitting the mark. It was then I discovered the crucial role that proper brightness and contrast control play in truly enjoying my TV’s potential.
Since that lightbulb moment, I’ve been on a journey to fine-tune my mini LED display for the perfect picture, and I want to share what I’ve learned. If you’ve ever felt disappointed because your TV’s picture doesn’t match the vibrant scenes you see in reviews or movies, don’t worry. Today, I’ll guide you through practical tips to master brightness and contrast controls, so you can enjoy cinematic quality right from your living room.
Why Brightness and Contrast Matter More Than You Think
When I first bought my mini LED TV, I thought just turning up the brightness would make everything pop. Turns out, it’s not that simple. Too much brightness can wash out colors, while too little can hide details in dark scenes. The same goes for contrast—balancing it correctly highlights the depth of blacks and the vibrancy of whites, making every scene look more lifelike. According to display experts, optimal contrast and brightness settings can improve visual comfort and image clarity significantly (source).
But here’s the kicker: many of us make common mistakes early on. I used to crank the contrast to maximum, thinking it would give me that punchy look, only to end up with overly harsh images that hurt my eyes. That’s a mistake I learned the hard way, and I want you to avoid it. Proper calibration isn’t just about cranking sliders; it’s about understanding how each adjustment impacts your viewing experience.
Is Over-the-Top Brightness and Contrast Really Necessary?
Honestly, the biggest skepticism I faced was whether all this tweaking was worth it. Wouldn’t it be easier just to set everything to ‘high’ and forget about it? Well, I tried that for a while, but the picture lacked nuance, and I often found myself adjusting manually during different content. That’s why I now focus on mastering the right settings for my specific environment and content type. If you’re curious, I’ve found some game-changing techniques that make a real difference, especially when watching HDR content (more here).
Before we dive into the how-to, I want to ask—have you ever been frustrated by your TV’s picture quality, despite paying good money for it? If so, you’re not alone. The good news is, with a few simple adjustments, you can elevate your viewing experience dramatically. Ready to learn how? Let’s get started with the essentials of contrast control and how to fine-tune your mini LED TV for 2024’s best picture quality.
Set the Stage with Your Environment
Before fiddling with your TV settings, evaluate your room’s lighting. I once spent an hour adjusting my mini LED TV only to realize the ambient glare from a nearby window was skewing my perception. To avoid this, control the lighting—use curtains or dimmable lights—to create a neutral environment that allows your TV’s settings to shine. This step is crucial because a well-controlled environment prevents you from overcompensating with unrealistic brightness or contrast adjustments.
Start with Basic Calibration
Begin by setting your TV to its “Standard” or “Movie” picture mode—this provides a neutral starting point. Then, locate your contrast and brightness controls—usually found in the picture settings menu. I recommend adjusting contrast first, as it determines the depth of blacks and whites. Set it to a mid-range value, then fine-tune it upwards until you notice blacks becoming richer without losing detail. For brightness, lower it slightly from maximum—around 40-50%—to prevent washed-out dark scenes. Remember, these are starting points; the goal is to avoid extremes.
Use Test Patterns and Real Content
Next, utilize test patterns or high-quality content. I used a calibration disc with contrast and brightness test patterns, which helped me see if whites or blacks were clipping or losing detail. During my first attempt, I set contrast too high, resulting in overly harsh whites. After gradually reducing it, I achieved a balanced look where highlights pop without losing shadow details. If you don’t have a test pattern, use well-lit scenes with a mix of dark and bright elements—these are perfect to gauge adjustments.
Adjust for HDR Content and Peak Brightness
HDR content demands a different approach. When I watched a HDR trailer, I noticed that my contrast was too low, flattening the scene. I increased contrast and adjusted peak brightness, which is key for mini LED TVs with high brightness capabilities. For this, I refer to peak brightness tips to ensure you’re maximizing your TV’s potential without overshooting, which can cause halos or blooming.
Fine-Tune with Advanced Settings
Once the basic adjustments are set, explore advanced options like local dimming, contrast enhancer, or dynamic contrast. These features can enhance contrast dynamically, but be cautious; overuse might introduce artifacts. I personally enabled local dimming for more precise black levels—this made dark scenes more immersive without sacrificing detail. Experiment with these features, and always revert if they introduce unwanted artifacts.
Validate and Readjust
Finally, watch a variety of content—movies, sports, gaming—to see how the settings perform across different scenes. I found that my initial adjustments worked well for movies but needed slight tweaks for fast-paced sports. This iterative process ensures your picture is optimized for your specific environment and content preferences. Remember, calibration isn’t a one-time task; revisit your settings periodically, especially after firmware updates or room changes.
Many enthusiasts assume that boosting contrast and brightness to their maximum levels will automatically produce the best picture. While this might seem logical, it’s actually a common misconception that can lead to suboptimal viewing experiences. The real secret lies in understanding the subtle interplay between these settings and how they impact your display’s performance, especially with advanced mini LED technology. Unlike traditional LCDs, mini LED TVs boast thousands of local dimming zones, which means that overly aggressive contrast or brightness adjustments can cause problems like blooming, halos, or loss of detail in dark scenes. For instance, setting contrast too high can make whites appear blown out, while dark areas lose their depth, leading to a flat and unnatural picture. Conversely, setting brightness too high may cause highlight clipping, especially in HDR content, reducing the overall dynamic range. It’s vital to fine-tune these controls carefully, considering your specific viewing environment and content type. Experts recommend using test patterns and real-world scenes to identify the optimal balance, rather than relying solely on maximum settings. This nuanced approach ensures that highlights are vivid without sacrificing shadow detail, and blacks remain deep without crushing shadow information. Achieving this balance often involves iterative adjustments and understanding how local dimming interacts with contrast and brightness. For advanced viewers, adjusting secondary settings like local dimming strength or contrast enhancer can further refine the picture quality. Mastering contrast and brightness in tandem is the key to unlocking your mini LED TV’s full potential. Remember, the goal isn’t to maximize these settings blindly but to calibrate them to produce a natural, vibrant image that’s easy on the eyes and true to the source material. Don’t fall into the trap of over-tweaking—sometimes less is more, and subtlety is the secret to stunning visuals. Have you ever fallen into this trap? Let me know in the comments.
Keeping your mini LED TV in top shape requires the right tools and regular maintenance routines. Over time, dust, fingerprints, and even subtle screen degradation can impact picture quality, making it essential to invest in specific equipment and adopt a disciplined approach. Personally, I rely on high-quality calibration tools and software to ensure my display stays sharp and vibrant, especially as new features and settings become available each year.
Invest in a Colorimeter or Spectrophotometer
One of the most valuable tools I recommend is a colorimeter or spectrophotometer. These devices measure your TV’s color accuracy, gamma, and luminance, providing precise data to calibrate your display. I use the X-Rite i1Display Pro because it offers fast, reliable readings and compatible software. Regular calibration with this tool ensures your contrast and brightness remain consistent, especially after firmware updates or room modifications.
Leverage Calibration Software and Test Patterns
Calibration discs are becoming less common, but digital test patterns are invaluable. I use CalMAN or Portrait Displays’ software, which, paired with my colorimeter, provides detailed calibration guidance. These tools help me fine-tune contrast and brightness, ensuring highlights and shadows are balanced perfectly. Remember, a good calibration isn’t a one-time event—periodic rechecks keep your picture pristine.
Maintain Your Screen with Proper Cleaning Supplies
Screen maintenance is often overlooked. I prefer using a microfiber cloth and a cleaning solution specifically made for display screens. Avoid harsh chemicals that can damage the anti-reflective coatings or mini LED layers. Regular cleaning prevents dust buildup that can cause uneven light distribution or hot spots. For delicate areas around ports and vents, a soft brush can help remove debris without risking damage.
Monitor Firmware and Settings Updates
Firmware updates often include improvements for local dimming, contrast control, and overall picture processing. I make it a habit to check for updates periodically via the TV’s menu or manufacturer’s app. Additionally, I keep a record of my preferred settings, so if an update resets or alters them, I can quickly restore my optimal configuration. This proactive approach ensures sustained performance and takes advantage of the latest enhancements.
Plan for Long-Term Performance and Scaling
Looking ahead, I believe mini LED technology will continue to evolve, with brighter panels and smarter local dimming algorithms. As these advancements roll out, maintaining your display will involve re-calibrating with updated tools or software. Investing in dual calibration devices or software subscriptions can future-proof your setup. Also, consider professional calibration services for the most precise adjustments—especially if you want the ultimate cinematic experience at home.
How do I maintain my mini LED TV over time?
The key to long-term performance is consistency and regular check-ins. Use your calibration tools at least once a year, especially after firmware updates or environmental changes. Keep your screen clean with appropriate supplies and stay informed about software updates from the manufacturer. By establishing these routines, you’ll ensure your TV continues to deliver stunning visuals for years to come, making the investment truly worthwhile.
For those eager to fine-tune their display further, I highly recommend exploring advanced contrast and HDR settings as discussed in this guide. Regular maintenance combined with precise calibration will keep your mini LED TV performing at its best, providing breathtaking visuals whether you’re watching movies or gaming in 2024 and beyond.
Over the years, I’ve realized that the key to unlocking my mini LED TV’s full potential isn’t just in buying the latest model but in understanding how to calibrate it for perfect picture quality. The journey taught me invaluable lessons, especially about the importance of nuanced brightness and contrast adjustments that go beyond simple sliders. One of my biggest lightbulb moments was discovering how local dimming zones interact with contrast settings, creating a much more dynamic and immersive picture—something I wish I had known from the start. Additionally, I learned that HDR content benefits immensely from peak brightness calibration, revealing stunning details in highlights and shadows that standard adjustments can’t achieve. This deeper understanding has transformed my viewing experience, and I want to share these insights so you can avoid the pitfalls I encountered and truly enjoy cinematic visuals in 2024.


Leave a Reply