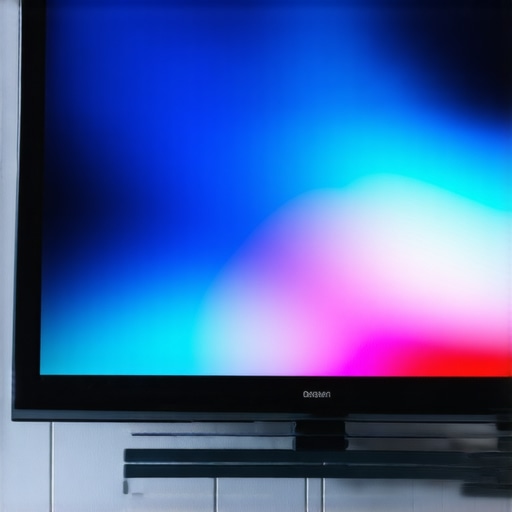
It was late at night, and I was eager to dive into the latest blockbuster on my Mini LED TV. But as the opening scene played, I couldn’t shake the disappointment—colors looked dull, shadows lacked depth, and the vibrant visuals I craved felt elusive. Frustration bubbled up. I realized I’d spent so much on this high-tech display, yet I hadn’t fully tapped into its potential for stunning visuals.
This lightbulb moment made me ask: Is there more I could do to maximize my TV’s brightness and contrast? And if you’re nodding along, wondering why your vivid scenes don’t quite pop, you’re not alone. Many TV owners face this challenge, especially with the impressive but complex Mini LED technology, which promises exceptional brightness and contrast but often requires some tuning to truly shine.
Today, I want to share how you can elevate your Mini LED TV’s visual impact. From personal missteps to expert tips, my goal is to help you achieve those cinematic scenes with vibrant colors and deep blacks that rival even the big screen. Want to learn the secrets behind unlocking stunning HDR brightness and contrast? Let’s get started.
Why Making the Most of Your Mini LED’s Brightness and Contrast Matters
Mini LED TVs have revolutionized home entertainment by offering unparalleled control over brightness and contrast. This isn’t just about sharper images; it’s about experiencing a richer, more immersive picture. When your TV’s brightness hits the right levels, highlights sparkle, and dark scenes maintain detail without turning into blobs of black. Proper contrast, on the other hand, defines the depth and realism of every scene.
However, the key is knowing how to optimize these settings. Many users simply settle for default or auto-adjusted parameters, unaware that subtle adjustments can drastically enhance their viewing experience. As I learned early on, neglecting these fine-tuning steps means leaving the best visual details hidden in shadows or blown out by excessive brightness.
If you’ve ever adjusted your TV settings and felt like something’s missing, you’re in good company. Improving HDR brightness and contrast isn’t just about turning knobs blindly; it requires understanding how these features work together to bring vivid, true-to-life images. For a comprehensive guide, check out our [ultimate guide to HDR brightness and contrast in Mini LED TVs](https://miniled.ultimatehomedisplays.com/ultimate-guide-to-hdr-brightness-contrast-in-mini-led-tvs-2024). It walks through practical tips to unlock your display’s full potential.
Are you tired of watching scenes that look flat or washed out? Do you wonder how some TVs seem to glow with life while yours feels lackluster? If so, don’t worry—you’re about to discover proven strategies to punch up those visuals dramatically. So, let’s dive into the core reasons why mastering brightness and contrast is essential—and how to do it effectively.
Dial in Your Settings for Maximum Impact
Start by accessing your TV’s picture settings menu. Locate the HDR brightness and contrast controls—these are often labeled explicitly or found within advanced settings. Begin with the default or auto modes turned off to gain full control. Adjust the brightness slider slowly, aiming to make bright scenes pop without losing shadow detail. For contrast, increase until whites look vibrant but not blown out. Think of it like tuning a musical instrument—the goal is harmony, not distortion.
Practical Tip: Use a Reference Scene
Choose a scene with a wide range of luminance—like a bright sky with dark mountains. Adjust your settings while watching this scene, fine-tuning until highlights shimmer and shadows gain depth. I once spent an hour adjusting during a sunset scene, finally noticing the golden hues appearing more vivid and shadows sharper. This direct approach prevents over-adjustment and helps you find that sweet spot.
Utilize Scene Modes and Picture Presets
Many mini LED TVs come with predefined modes such as Cinema, Game, or Vivid. While these might seem convenient, they often compromise the fine control needed for optimal brightness and contrast. Dive into the custom settings and set your preferred levels for HDR content. For instance, the ‘Cinema’ mode can usually be fine-tuned to boost contrast while maintaining natural colors. It’s like switching from a generic lens to a manual camera—gives you sharper control over the final image.
Micro-Story on Custom Tuning
Once, I experimented with the ‘Vivid’ preset, but it flooded the scene with harsh whites, washing out details. After reverting to custom settings and gradually raising contrast, I noticed textures in dark shadows reappearing. The scene transformed from flat to vibrant, but it took patience and incremental adjustments—reminding me that small tweaks matter much more than big jumps.
Layer Your Adjustments in Multiple Areas
Beyond global settings, isolate specific zones—like bright peaks or dark corners—if your TV allows local dimming adjustments. Think of it as painting: you don’t want to saturate every area equally, only the parts that need more contrast. For example, enhancing the peak brightness of fireworks makes scenes more explosive, while increasing shadow depth reveals hidden details.
Fine-Tuning with Pattern Tests
Use test patterns or HDR content with pronounced highlights and shadows. Adjust your local dimming and contrast settings while observing these patterns. I once used a scene with fireworks and moonlit landscapes, adjusting until each sparkle and shadow retained its integrity. This method ensures your TV doesn’t just look good in bright scenes but excels across diverse content.
Leverage External Calibration Tools
If you seek precision, consider calibration disks or professional tools that measure luminance levels. While a bit more technical, they help you set accurate black levels and peak brightness. I attempted basic calibration with test disks, finding minor luminance adjustments drastically improved scene depth. Think of it as giving your TV a health check—small investments, big visual payoffs.
Consistency Is Key
Once you’ve tuned your settings, stick with them. Frequent changes can hinder your ability to recognize improvements or identify issues. Over time, your eyes will become accustomed, making future fine-tuning more intuitive. Remember, virtually every scene benefits from tailored adjustments, so don’t settle for generic defaults.
For more advanced techniques, explore detailed guides like Mini LED brightness and contrast control tips to continue elevating your viewing experience. Consistent fine-tuning transforms your TV into a powerhouse of vivid, lifelike images that truly stand out.
When it comes to high-end TVs like Mini LED and QLED models, many enthusiasts believe they’ve unlocked the ultimate visual experience simply by turning on the HDR settings or selecting a ‘Vivid’ mode. However, this common misconception can hinder actual picture quality improvements. The reality is that most users overlook the nuanced details of contrast control, peak brightness calibration, and proper adaptation to specific content types. For instance, relying solely on auto settings often results in over-brightening highlights or crushing shadows, which diminishes contrast integrity. Expert calibration is essential—understanding how to fine-tune local dimming zones or peak brightness dynamically according to scene content is what truly elevates your viewing experience.
One widespread trap is believing that maximum peak brightness automatically equates to better picture quality. While high nits are impressive on paper, without proper tone mapping and contrast management, those bright highlights can appear unnatural or cause clipping in detail. Conversely, some assume that simply increasing contrast sliders will give scenes more depth. But overly aggressive contrast adjustments risk losing shadow details and creating unnatural visuals, particularly in HDR content. Effective mastery requires a balanced approach, leveraging scene-by-scene tuning rather than global defaults.
**Why is adjusting contrast with precision so critical in Mini LED and QLED displays?**
Because these technologies utilize local dimming zones to control brightness dynamically, improper contrast control can cause halos or blooming effects. Fine-tuning local dimming parameters ensures bright objects like explosions or headlights don’t bleed into adjacent dark areas, preserving scene integrity. Effective contrast management involves more than just sliders; it demands understanding how your TV’s firmware and processing algorithms interpret content. For instance, some models let you customize local dimming levels for brighter highlights without compromising black levels, leading to a more cinematic experience.
A common mistake many make is neglecting ambient lighting conditions during calibration. Bright rooms can wash out images, diminishing perceived contrast and HDR impact. Conversely, overly dim environments can make your TV’s settings seem more impressive than they actually are. It’s crucial to calibrate your display in a lighting environment similar to your regular viewing circumstances, using test patterns and HDR scenes. Considering this, **how can you optimize contrast and brightness dynamically based on your environment?**
Investing in advanced calibration tools can help measure actual luminance and black levels, providing data-driven adjustments. Some experts suggest utilizing pattern-based calibration disks or professional meter devices to refine settings beyond on-screen menus. This step ensures your display reproduces both bright highlights and shadow details faithfully, which is the ultimate goal in cinematic visuals.
Don’t fall into the trap of thinking that more brightness and contrast alone will deliver superior image quality. Instead, focus on mastering the harmony between peak luminance, local dimming, and detailed tone mapping for vivid yet natural scenes. Want practical tips to elevate your HDR brightness control further? Check out our hidden secrets to enhancing HDR brightness. Remember, subtle adjustments and understanding your TV’s processing capabilities are what distinguish an average display from a cinematic masterpiece.
Have you ever fallen into this trap? Let me know in the comments.Maintaining your Mini LED TV’s peak performance requires the right tools and a thoughtful approach to ongoing care. One of the foundational tools I personally rely on is a calibration disk like the Spears & Munsil UHD HDR Benchmark. This device provides precise test patterns to evaluate and fine-tune your TV’s contrast and HDR brightness, ensuring your visuals stay vivid and accurate over time. I use it regularly to monitor fluctuations in black levels and peak brightness, especially after software updates or environmental changes, which can subtly alter the picture.
In addition, a reliable luminance meter—such as the LightMeter PTB300—has become indispensable. It measures real-time luminance levels, allowing me to verify that my TV maintains consistent brightness, particularly in HDR scenes. Setting and maintaining correct black levels and peak luminance is crucial for optimal contrast control, which you can learn more about in our contrast control essentials guide.
Software-wise, I recommend using ONYX or CalMAN calibration software. These platforms enable detailed calibration, especially when paired with compatible hardware like the Murideo Six-G and colorimeters. They help automate adjustments for contrast, local dimming zones, and tone mapping. Personally, I calibrate my Mini LED TV every six months to prevent drift in visual quality.
Looking ahead, I predict that the trend in TV maintenance will lean toward smarter, built-in calibration systems powered by AI. These systems will dynamically adjust settings based on ambient lighting and content type, reducing the need for manual intervention. Still, having professional calibration tools on hand will remain vital for enthusiasts and content creators aiming for perfection.
How do I keep my TV performing well over time?
Regularly inspecting and recalibrating your display is key. Use test patterns and luminance meters to track performance, and reapply calibration settings when you notice a decline in picture quality or after firmware updates. Also, keep your device’s firmware up to date—manufacturers like Samsung and LG are continually improving contrast algorithms and HDR tone mapping with software patches, so staying current ensures you’re leveraging the latest advancements.
Don’t forget that environmental factors like ambient light can impact perceived contrast. Using bias lighting and controlling room lighting conditions helps maintain consistent viewing quality. For comprehensive guidance, review our contrast control maintenance article.
Finally, invest in a calibration-friendly environment: a dark room with minimal reflective surfaces ensures your measurements and adjustments are accurate. By combining the right hardware, software, and maintenance routine, you can extend your Mini LED TV’s lifespan and keep visuals stunning for years to come. For a deep dive into advanced calibration techniques, check out the insights from the latest industry experts. Start with calibrating your contrast zones tonight and experience the difference.During my journey to optimize my Mini LED TV, I encountered some eye-opening lessons that reshaped my approach to picture quality. One of the hardest truths I learned was that default settings rarely unlock the full potential of advanced contrast control—it’s a misconception that just turning up the brightness or contrast sliders will do the job. Instead, precise, scene-specific adjustments make all the difference, revealing nuances in HDR content I had previously overlooked. Another revelation was that local dimming zones require careful calibration; neglecting these can cause halos or blooming that diminish the cinematic experience. Lastly, I discovered that ambient lighting plays a more significant role than I initially thought—calibrating in a controlled environment ensures your settings translate perfectly to your everyday viewing space.


Leave a Reply