It was a quiet Saturday evening when I finally decided to kick back and watch my favorite blockbuster. As I hit play, I was greeted with a scene that was supposed to burst with color and depth. Instead, I was met with dull shadows and washed-out highlights. It was a real eye-opener—I realized my old TV just couldn’t handle the HDR content anymore. That lightbulb moment pushed me to explore the world of Mini LED TVs with High Brightness & Contrast, and let me tell you, what I discovered transformed my viewing experience entirely.
Why Brightness and Contrast Matter More Than Ever in 2024
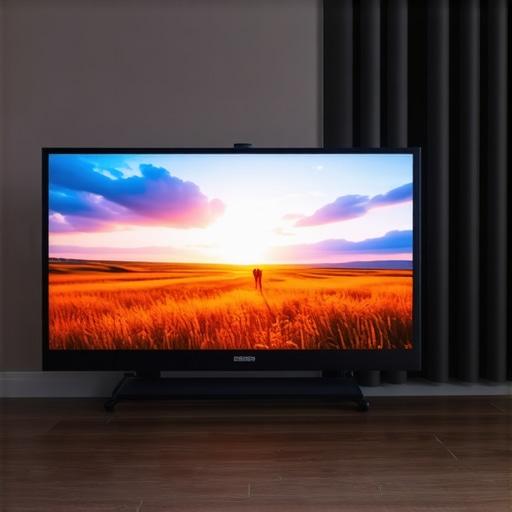
Living with a subpar display is like watching the world through foggy glasses. Brightness and contrast are the backbone of stunning visuals, especially as HDR content becomes the standard. Thanks to recent advancements, Mini LED technology now offers incredible control over lighting zones, providing deeper blacks and more vibrant highlights. This means scenes come alive with lifelike realism, drawing you deeper into the story.
If you’re like me, you probably assumed that a huge budget was the only way to get true HDR brightness and contrast. But here’s the kicker—many affordable Mini LED TVs pack enough punch to challenge pricier OLEDs when it comes to brightness and shadow detail. Yet, taming these powerful displays without falling into the trap of overexposure or unnatural colors can be tricky. In my early days, I made a crucial mistake: cranking up the brightness without adjusting contrast properly, resulting in washed-out images. That’s a common mistake I see folks repeat, and it’s why understanding contrast control is essential.
In this guide, I’ll walk you through everything you need to know—how to achieve vivid, balanced images that make your content pop without sacrificing quality. It’s time to stop settling for mediocre picture quality and start maximizing your TV’s potential. Ready to bring cinema-grade visuals into your living room? Let’s dive deeper into what makes this technology a game-changer for 2024.
Is High Brightness & Contrast Worth the Extra Investment?
One question I faced early on was whether paying a premium for these features was truly justified. Honestly, the answer depends on your viewing habits and expectations. As research indicates, adequate HDR brightness and contrast can significantly enhance your viewing experience, making scenes more lifelike and immersive. But, I also learned the hard way—overlooking proper calibration can undermine even the best specs. Trust me, avoiding common mistakes like ignoring adjustment settings can save you from frustration.
If this resonates with you or if you’ve faced similar struggles adjusting your display for optimal visual performance, you’re not alone. And good news—there are straightforward solutions to help you navigate this landscape. Want to learn how to fine-tune your settings for spectacular results? Stay tuned for the practical steps ahead.
Step Up Your Calibration Game
Start by accessing your TV’s picture settings menu and locating the contrast and brightness controls. Think of contrast as the engine that makes whites pop and blacks deepen; without proper tuning, scenes look flat, no matter how high your HDR brightness is set. When I first attempted this, I dove straight into ramping up the contrast—and ended up losing details in shadowy scenes. To avoid this, set contrast to a level where bright elements shine without washing out darker areas. Evaluate the balance with actual content, such as a scene with deep shadows and bright highlights.
Use Specific Content for Adjustment
Instead of generic static images, always calibrate with real footage—preferably HDR videos or movies with varied lighting. I made the mistake of testing with static images, which gave me a false sense of the picture quality. But real scenes reveal whether contrast and brightness settings truly enhance depth and vibrancy. Play a scene with a high dynamic range, like a sunset or a moonlit landscape, and adjust your settings until details in highlights and shadows are clear and natural.
Fine-Tune Brightness for HDR Impact
Bright HDR content is vital for immersive visuals. Bonus tip: use the ‘HDR Brightness’ feature if your TV has one—this adjusts the luminance specifically for HDR mode. When I applied this, I saw scenes explode with luminance—bright scenes became more luminous without overexposing others. Remember, setting brightness too high can cause loss of detail in glare-heavy scenes, so find a sweet spot where highlights are vibrant yet balanced with detail retention. For detailed guidance, check out this resource.
Apply Local Dimming Settings Wisely
Mini LED screens excel at local dimming—controlling zones of LEDs to enhance contrast. If your TV allows individual zone adjustments, tweak their settings for scene-specific richness. I experimented with zone brightness during a dark scene in a thriller, increasing dimming in shadowy areas while boosting brightness on illuminated objects. This technique accentuated contrast and depth. Be cautious—overdoing local dimming can introduce blooming artifacts. Use your TV’s test patterns or specific scene content to calibrate zone settings meticulously, ensuring blacks stay deep without halos or light bleed, as explained in this guide.
Leverage Expert Modes Judiciously
Many TVs come with preset picture modes like ‘Cinema,’ ‘HDR,’ or ‘Vivid.’ While ‘Vivid’ is tempting for bright visuals, it often oversaturates images. I found that switching to ‘Cinema’ or ‘HDR’ mode provided a more natural, balanced range—especially when fine-tuned further. Use these modes as starting points, then adjust contrast and brightness to suit your preferences and content type. Remember, manual calibration invariably outperforms auto settings, as detailed in this resource.
Regularly Reassess and Readjust
Picture calibration isn’t a one-and-done task. Over time, your viewing environment or content choices may change. I set a reminder to revisit and tweak my settings monthly, especially after firmware updates or new content releases. Utilizing test patterns from online sources helps maintain optimal contrast and brightness levels, ensuring scenes retain their intended depth and vibrancy. Remember, the ultimate goal is a natural picture where bright highlights pop and shadows retain detail—think of it as tuning a musical instrument for perfect harmony.
When it comes to maximizing your Mini LED or QLED TV’s performance, many enthusiasts focus solely on cranking up brightness or contrast knobs, assuming higher numbers mean better picture quality. However, this oversimplification overlooks critical nuances that can make or break your viewing experience. In my experience, most people get contrast control wrong because they believe that setting the maximum contrast level yields the deepest blacks and most vivid highlights. The truth is, pushing contrast too high can cause loss of shadow detail, leading to unnatural images—as if scenes are artificially flattened. This mistake often stems from the misconception that greater contrast equals better quality, but in reality, it can introduce clipping in bright scenes or crush blacks excessively. A better approach involves understanding the specific behavior of your display, whether it’s a LED, Mini LED, or QLED panel, and calibrating contrast to preserve details across the entire luminance range.
What advanced viewers should know about HDR brightness in high-end TVs?
Living with a high-quality HDR-capable TV requires more than just high peak brightness numbers. While manufacturers might boast 1,200 or even 2,000 nits brightness in marketing specs, achieving that in real-world scenes without losing shadow detail or introducing halo effects is complex. In fact, excessive HDR brightness can wash out the whole picture if not complemented with proper local dimming and tone mapping. Experts recommend balancing peak brightness with a careful calibration of local dimming zones—this prevents scenes from appearing artificially overexposed. According to a recent study from the Society of Motion Picture and Television Engineers (SMPTE), thoughtful tone mapping and contrast adjustment significantly impact perceived image realism, regardless of the raw peak luminance numbers. Simply put, more isn’t always better; nuanced calibration creates a more natural and immersive experience. If you’re serious about HDR, dive into detailed guides on how to adjust contrast controls to match your content and environment.
Moreover, understanding the relationship between contrast and brightness becomes even more critical with newer technologies like Mini LED and QLED. These panels offer pixel-level control and local dimming that, if tuned correctly, can produce stunning depth and vibrancy. Miscalibrating can result in blooming or halos, severely undermining their advantages. Therefore, I recommend approaching contrast and HDR brightness not as static settings but as dynamic elements to be fine-tuned for each scene type, genre, or lighting condition. Regularly revisiting your calibration can keep your display performing at its best.
Are you guilty of setting your contrast and HDR brightness randomly or based on marketing claims? If so, I invite you to examine your current setup and consider a detailed calibration session. This small step can drastically elevate your viewing experience and truly unlock what your high-end TV has to offer. Have you ever fallen into this trap? Let me know in the comments.Maintaining stellar picture quality on your Mini LED or QLED TV requires more than just initial calibration; it demands consistent oversight and the right tools. Over the years, I’ve discovered that investing in quality calibration equipment and adopting disciplined routines elevates my viewing experience and ensures longevity. One of my go-to tools is a professional-grade colorimeter like the **Calman for TV** or **DisplayCAL** with a compatible colorimeter sensor. These devices allow me to precisely measure peak brightness, contrast, and gamma levels, which is crucial because built-in calibration settings often drift over time. Regularly re-measuring ensures your display remains in peak condition, especially after firmware updates or seasonal lighting changes.
For software, I prefer **CalMAN** or **HCFR** — both offer comprehensive calibration workflows and user-friendly interfaces. These programs guide me through adjusting contrast, local dimming, and HDR peak brightness with actionable metrics. For example, using a test pattern from the **DeepColor Test Patterns** collection helps me verify that highlights retain detail without clipping.
As technology progresses, so do maintenance tools. The evolution of auto-calibration features, like **Samsung’s Intelligent Picture Mode**, hints at a future where TVs might self-optimize based on ambient conditions and content type. Still, in my experience, manual verification with external tools remains the gold standard. Regular maintenance—say, every three to six months—combines these tools with a good understanding of your viewing environment.
**How do I keep my contrast management sharp over time?** I recommend establishing a routine: schedule quarterly calibration sessions, aim for controlled ambient lighting, and take detailed notes of your adjustments. Additionally, keeping your TV’s firmware up-to-date ensures it benefits from the latest optimization features. For a more advanced approach, integrating a **colorimeter** with software like **CalMAN** can detect subtle shifts in peak luminance or color uniformity, prompting timely tweaks.
Predicting where this trend is headed, I believe in smarter, AI-driven calibration tools that adapt in real time—not only to ambient light but also to content type—saving enthusiasts hours of manual tuning. Until then, precision tools coupled with disciplined upkeep will continue to be your best allies.
Look into tools like the **ColorMunki Display** or **SpectraCal’s C6** if you want a precise start. Regularly verify your contrast and brightness settings using professional patterns, ensuring your picture stays vivid and detailed. Remember, precise maintenance isn’t just about aesthetics; it safeguards your investment and guarantees that every scene hits the high notes of HDR brilliance.
The Unexpected Lessons That Changed My Viewing Philosophy
- Initially, I believed maximum contrast and brightness settings would deliver the best picture, but I soon discovered that overly aggressive adjustments introduce artifacts like blooming and loss of detail, disrupting the immersive experience.
- My breakthrough came when I realized the importance of scene-specific calibration instead of static settings—tailoring contrast and brightness for different content types yields far more natural and stunning visuals.
- Personal experimentation taught me that local dimming zones need careful tuning; too much reduction causes halos, while too little misses the deep blacks that define contrast mastery—balance is everything.
- I learned that even premium TVs require routine calibration; ambient light, firmware updates, and content evolve, making regular re-evaluation essential for maintaining optimal visual quality.
Tools and Resources That Elevated My Calibration Game
- Colorimeter Devices: Instruments like the Calman for TV provide precise measurements, enabling me to calibrate contrast and HDR brightness with confidence, a step that drastically improved my picture quality.
- Calibration Software: Programs such as HCFR and CalMAN offered guided workflows, transforming complex adjustments into manageable, repeatable routines—crucial for sustained excellence.
- Online Test Patterns: Resources from DeepColor Test Patterns helped me verify scene-specific details, ensuring I could fine-tune local dimming and contrast zones effectively.
- Expert Blogs and Guides: Trusted sites like UltimateHomeDisplays.com kept me informed about the latest techniques and best practices, fueling my ongoing calibration journey.


Leave a Reply