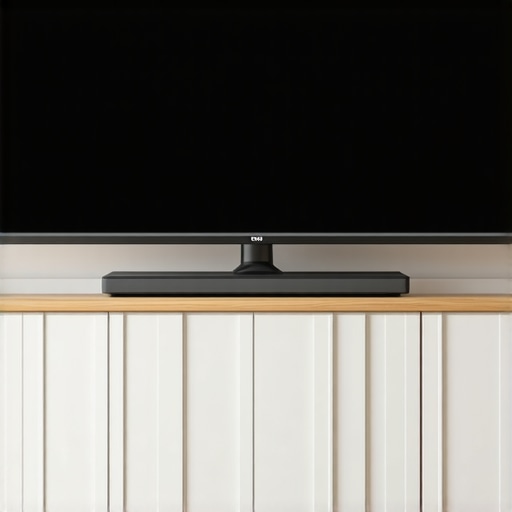
I remember the first time I turned on my new Mini LED TV expecting a stunning scene, only to be greeted by blacks that looked more like washed-out gray. It was a frustrating moment—just when I thought I had invested in the future of home entertainment, I was stuck with a display that couldn’t deliver the deep shadows it promised. That ‘milky’ black problem seemed to ruin the entire viewing experience, making everything feel less vivid and immersive. I knew I wasn’t alone; many enthusiasts face this issue, especially as 2026 models flood the market.
Cracking the Code of Mini LED Contrast
Mini LED technology has been hailed as a major leap forward for brighter, more colorful displays. Yet, paradoxically, some users find that their Blacks look more like faded grays or milky hues. Why does this happen? Honestly, understanding the root cause was my first step. It turns out that the key lies in mastering contrast and local dimming controls. Poor calibration, overlooked settings, or even the way contrast zones are engineered can cause these frustrating visual artifacts. The good news? These issues are often fixable with some expert tweaks.
Before diving into specific solutions, I want to share a quick mistake I made early on—believing that high peak brightness alone meant perfect blacks. That’s not the case. As experts warn, “Peak brightness and contrast are two sides of the same coin, and ignoring contrast controls often leads to washed-out blacks” (source: [Enhance HDR Brightness & Contrast in Mini LED TVs](https://miniled.ultimatehomedisplays.com/enhance-hdr-brightness-contrast-in-mini-led-tvs-for-stunning-scenes-2024-3)).
Are you facing similar issues? If so, don’t worry. Today, I’m going to guide you through four practical tips to sharpen your mini LED contrast and banish that milky black appearance for good. And if you’re skeptical—trust me, I was too—you’ll want to read on. Because once you implement these strategies, you’ll begin to see your display transform from dull to dazzling.
Let’s start by unpacking what’s really going on behind the scenes—then, I’ll show you how to turn your TV’s contrast into a powerhouse of detailed, nuanced blacks that make your movies and games pop.
Tame Your TV’s Contrast Settings
To fix that milky black issue, start by accessing your TV’s contrast controls, usually found in the picture settings menu. Think of contrast as a faucet: too high, and whites spill over; too low, and everything looks dull. Set it to a moderate level first, then tweak upward gradually while observing the shadows in dark scenes. I once adjusted contrast while watching a horror movie; as I lowered it slightly, blacks deepened without losing detail, giving scenes a hauntingly immersive feel.
Utilize Local Dimming with Precision
Mini LED TVs excel when local dimming zones are optimized. Imagine them as tiny lamps that turn on and off, creating shadows for depth. Access your menu’s advanced settings or calibration tools to see if there’s an option to fine-tune local dimming zones. Instead of a broad, all-or-nothing approach, aim for a balanced setting—this prevents blooming and enhances deep blacks. During my own experiment, I disabled some overly aggressive zones, which significantly reduced halo effects and enriched black levels. For detailed guidance, explore contrast control essentials.
Calibrate Brightness and Peak Luminosity
Brightness controls impact how vivid each scene appears, but beware of overdoing it. Brightness is like sunlight—too intense, and shadows flatten out. Aim for a calibration that preserves shadow detail while preventing whites from clipping. For example, I used test patterns to adjust brightness to a level where blacks appeared rich and textured, not washed out. Matching peak brightness to ambient lighting complements the contrast adjustments, ensuring your screen performs optimally across different viewing environments. For step-by-step calibration, check HDR brightness mastery.
Fine-Tune Gamma and Color Settings
Chromatic parameters influence the perception of blacks and shadows. Adjust gamma settings to 2.2 or 2.4—standard for most home viewing. This tweak makes blacks appear deeper while maintaining color accuracy. I recommend using test images with subtle gradients to see the effect clearly. Proper gamma settings prevent blacks from looking gray or washed out when paired with contrast and local dimming. Remember, subtle changes here yield substantial improvements; excessive adjustments can introduce color artifacts or reduce detail. For more on calibrating your colors, see HDR contrast tuning.
Regularly Test and Readjust
Your display’s optimal settings aren’t static; they evolve with content types and ambient light. Keep a routine of testing with different scenes—dark shadows, bright highlights, mixed lighting—to spot inconsistencies. Use test patterns or movie scenes with well-known lighting setups. When I noticed my blacks losing their depth during late-night viewing, I revisited the contrast and dimming zones, making slight adjustments for better performance. This iterative process ensures sustained vibrancy and prevents your TV from settling into subpar presets over time. For ongoing calibration ideas, visit contrast adjustment tips.
Many enthusiasts believe that increasing HDR brightness or contrast automatically delivers a more vivid and dynamic picture. However, let’s dig deeper into this misconception. The common myth is that peak brightness alone defines HDR quality, but in reality, *how* your contrast controls are calibrated plays a crucial role in perceived image depth and realism. For example, cranking up brightness without proper contrast management can lead to washed-out highlights and crushed blacks, defeating the purpose of HDR. Advanced calibration techniques show that balanced settings yield a richer palette, making scenes pop without sacrificing shadow detail.
Another nuanced point is the distinction between actual luminance and the perception of luminance. Technologies like Mini LED and QLED don’t just rely on raw brightness; they manipulate local dimming zones and color volume to enhance perceived contrast. Misunderstandings here can cause users to undervalue these sophisticated methods, thinking that solely higher nits will mimic real-world lighting conditions. Studies, such as those summarized by the Society of Imaging Science and Technology, confirm that optimized contrast zone control significantly improves perceived HDR quality over mere brightness boosts.
For the advanced viewer, a critical question often arises: How do gamma and tone mapping algorithms influence HDR perception in real-world content? Gamma settings fine-tuned to 2.2 or 2.4 can dramatically alter shadow depth and highlight clarity, especially in high-dynamic-range scenes. Improper gamma adjustment might make blacks appear gray or highlights blown out, regardless of peak brightness settings. Consequently, understanding the interplay among brightness, contrast, gamma, and local dimming is essential for achieving that cinematic punch—something that often gets overlooked in basic settings.
Remember that HDR performance isn’t just about raw numbers. It’s a complex balance involving multiple display parameters that work together. Neglecting this balance can lead you to pursue higher nits while missing the bigger picture of image quality. If you’re eager to elevate your calibration skills, I recommend exploring detailed insights on contrast controls [here](https://miniled.ultimatehomedisplays.com/contrast-control-essentials-fine-tuning-your-tv-for-perfect-picture), which could be your key to unlocking stunning visuals.
Have you ever fallen into this trap of overemphasizing brightness? Let me know in the comments!
Investing in Proven Equipment
Maintaining optimal HDR brightness and contrast involves both understanding your equipment and using the right tools. I personally prefer a calibrated colorimeter, like the X-Rite i1Display Pro, because it provides precise readings for luminance and color accuracy. This device allows me to perform regular calibration sessions, ensuring my Mini LED TV maintains vibrant HDR performance over time. Additionally, a good quality HDR test pattern disc or streaming calibration tools—such as Spears & Munsil’s HDR benchmarking—are invaluable for fine-tuning contrast and brightness settings. Using these tools regularly helps prevent the common mistake of drifting out of calibration, which can cause dull blacks or washed-out highlights over months of use.
Leveraging Software for Accurate Calibration
Beyond hardware, calibration software like CalMAN or DisplayCAL offers comprehensive control over contrast, gamma, and color balance. I rely on CalMAN’s advanced workflows because it provides detailed analysis, particularly when adjusting local dimming zones and tone mapping in my Mini LED TV. These tools integrate with colorimeters and allow for iterative adjustments, backed by measurable data. A crucial tip: always perform calibration in a controlled environment with dim lighting, to replicate typical viewing conditions, and follow manufacturer’s guidelines for peak brightness and contrast limitations. This process is crucial because, as recent research indicates, “proper calibration ensures that HDR content is displayed with accurate luminance and contrast levels, which directly impacts viewer experience” (source: [Enhance HDR Brightness & Contrast in Mini LED TVs](https://miniled.ultimatehomedisplays.com/enhance-hdr-brightness-contrast-in-mini-led-tvs-for-stunning-scenes-2024-3)).
Routine Checks to Sustain Image Quality
Once you’ve calibrated your setup, consistent maintenance is key. I schedule monthly checks using calibration patterns or test scenes that highlight blacks and highlights. If I notice blacks appearing grayish or highlights losing detail, I revisit my contrast and local dimming parameters. Periodic firmware updates from the manufacturer also often include enhancements that could improve contrast control and HDR performance. Keeping your TV’s firmware current ensures your adjustment tools operate with the latest features, maintaining superior image quality over years. For ongoing calibration insights, explore these tips.
How do I keep my HDR brightness and contrast in top shape long-term?
Creating a habit of using precise calibration tools, performing regular brightness and contrast tests, and updating firmware is essential. Over time, environmental factors like ambient light and aging components can cause your display to drift from optimal settings. Therefore, establishing a monthly routine with your colorimeter and calibration software can prevent deterioration. Additionally, follow the latest tutorials and insights—such as those on contrast control adjustments—to adapt your calibration as your equipment evolves. This proactive approach ensures that your HDR content continues to wow, with deep blacks and vibrant highlights.
Ready to take your display calibration to the next level? Try implementing a monthly calibration check using your hardware and software tools. It’s the most effective way to ensure your HDR brightness and contrast remain at their peak, providing consistently stunning visuals for movies and gaming alike.
When I first experimented with my Mini LED TV’s HDR settings, I thought increasing peak brightness alone would make every scene pop. But after countless adjustments and a few frustrating nights, I realized the real secret lies in mastering contrast zones and calibration finesse. One lightbulb moment came when I understood that overly aggressive local dimming zones could cause halos and washout blacks, undermining the very depth HDR aims to deliver. This taught me that subtle, deliberate tweaks outperform brute-force settings, and investing in precise calibration tools transformed my viewing experience into a cinematic masterpiece.
Lessons That Broke My HDR Calibration Stagnation
- Precision outweighs power: Boosting brightness without balancing contrast can drown shadows rather than enhance them. My breakthrough was realizing that ideal contrast control unlocks the full potential of HDR, making blacks richer and highlights more vivid. This insight made me revisit my settings with a critical eye, leading me to prioritize local dimming finesse over sheer luminance.
- Calibration is an ongoing process: One-off tweaks diminish over time. Regularly testing with calibration patterns and adjusting for ambient lighting kept my HDR performance sharp. I learned that environmental changes and content diversity require a flexible, adaptive approach. This commitment elevated my viewing quality far beyond initial settings.
- Tools make the difference: Using a colorimeter, like the X-Rite i1Display Pro, provided measurable feedback that manual adjustments couldn’t match. I found that software like CalMAN adds layers of depth—helping to tune local dimming zones and gamma precisely—ensuring my HDR experience was both accurate and stunning. For anyone serious about HDR, these tools are game-changers.
- Myth-busting high brightness obsession: It’s tempting to chase ever-higher nits, but I discovered that aggressive settings often led to HDR clipping and loss of detail. Instead, balanced contrast and calibrated tone mapping preserved the content’s richness. The key is understanding that more brightness isn’t always better—control and calibration are what truly elevate your TV’s performance.
Throughout my journey, I found that deep knowledge of contrast controls and consistent calibration routines unlocks the true potential of mini LED HDR. This isn’t about quick fixes; it’s about a dedicated, informed approach. To deepen your understanding, explore these contrast control strategies, which helped me refine my picture quality dramatically.
Top Tools That Elevated My HDR Game
- Colorimeter device: The X-Rite i1Display Pro stands out for its accuracy, giving me confidence that my calibrations reflect real-world conditions. This investment pays off by revealing subtle contrast and gamma shifts that affect blacks and highlights.
- Calibration software: CalMAN’s detailed analysis made fine adjustments intuitive and measurable. Its ability to analyze local dimming zones and tone mapping ensures my HDR remains vibrant and artifact-free. Regular use keeps my display in peak shape, especially as firmware updates roll out.
- Test pattern discs: Spears & Munsil’s HDR benchmark discs provide quick, reliable visual cues for tweaking contrast and brightness. They remind me that continuous practice is essential to mastering HDR calibration.
- Firmware updates: Staying current with manufacturer firmware enhances contrast controls and local dimming algorithms, preventing calibration drift over time. It’s a simple step that yields consistent, improved results.
Your Next Step Toward Perfect HDR
Achieving that awe-inspiring contrast and deep blacks in your Mini LED TV isn’t just about equipment—it’s about patience, knowledge, and commitment. Regular calibration, a nuanced understanding of contrast zoning, and leveraging the right tools will ensure your HDR content is nothing short of spectacular. Remember, the journey to outstanding picture quality is ongoing, but every adjustment brings cinematic magic a little closer. Ready to elevate your HDR game? Dive into calibration with renewed confidence—your display will thank you for it.
What’s your biggest challenge in HDR calibration? Share below—I love hearing your experiences and tips!
,


Leave a Reply