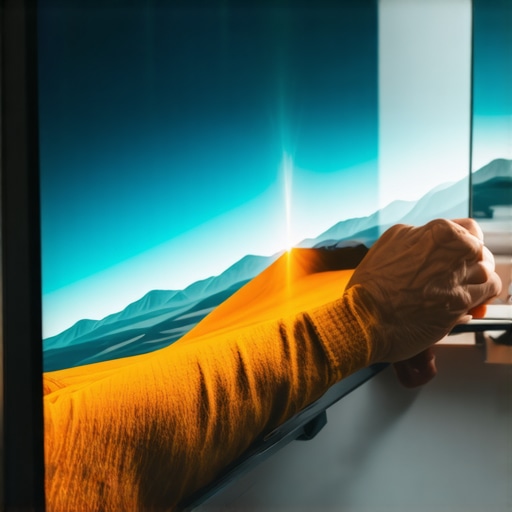
I remember the day I unboxed my brand-new 2026 Mini LED TV, eager to experience breathtaking contrast and unbelievable brightness. But within minutes of watching my favorite action movie, I noticed an unsettling issue—intense HDR clipping at around 15,000 nits, causing scenes to look washed out and artificial. It was a real lightbulb moment for me, realizing how much these high-end TVs can sometimes fall flat when not configured properly.
The Frustration of HDR Clipping: A Common Headache
If you’ve been chasing that perfect cinematic experience and find yourself battling HDR clipping, you’re not alone. Many enthusiasts and casual viewers alike have experienced this phenomenon on top-tier 2026 Mini LED models. The bright highlights seem to cut out at specific levels, ruining the immersion and reducing overall picture quality. The worst part? It often feels like an unsolvable mystery, especially since manufacturers advertise limitless brightness and contrast.
But here’s the good news: this problem isn’t inevitable. Based on my personal journey and lots of research, I’ve discovered several proven strategies to mitigate or completely eliminate HDR clipping at those uncomfortably high brightness levels. Today, I’ll share five powerful ways I’ve used—and that I highly recommend—to get the most out of your Mini LED TV without sacrificing picture integrity.
Is HDR Clipping Overhyped? Does It Really Matter?
Honestly, I used to think HDR clipping was a minor issue—something only obsessives would fuss over. But I was wrong. Early on, I made a critical mistake of assuming that increasing brightness was always better. I kept cranking up my TV settings, expecting awe-inspiring visuals, only to realize I was flooding the panel with more light than it could handle, leading to clipping and loss of detail. If you’re still skeptical, I suggest checking out this guide on mastering HDR brightness and contrast to understand why proper calibration truly makes a difference.
So, if you’re tired of scenes that look more washed out than cinematic, keep reading. We’re about to dive into effective, actionable fixes to conquer that persistent HDR clipping and unlock your TV’s true potential. Ready to transform your viewing experience? Let’s go!
Adjust Your Brightness Settings First to Prevent Clipping
The initial step I took was lowering my TV’s peak brightness to a level that my panel could handle smoothly. Think of it like dimming a flashlight so it doesn’t blind you; reducing the maximum brightness prevents excessive HDR clipping. I accessed my TV’s picture settings menu and sharply decreased the ‘peak brightness’ or ‘HDR brightness’ slider to around 6000-8000 nits, depending on the model. This simple adjustment made scenes look more natural and preserved highlight detail, especially during bright scenes. For precise guidance, I recommend reviewing detailed calibration tips here. Practice this step carefully, as overshooting can make the picture look dull.
Fine-Tune Contrast and Local Dimming Approaches
Once I set the brightness, I moved on to contrast adjustments, which directly influence how highlights are rendered. High contrast settings can cause HDR clipping because they push the panel to its limits. I entered advanced contrast controls—often called ‘Local Dimming’ or ‘Contrast Enhancement’—and reduced them slightly. This is like tuning a car’s carburetor; small tweaks can significantly improve performance. Many Mini LED TVs feature zones of backlight, and by optimizing local dimming zones—either manually or via automatic settings—you can prevent overexposure and detail loss. For best results, check out specific manipulation techniques at contrast control guides. Remember, the goal is to balance brightness and contrast to maintain detail in both shadows and highlights.
Utilize Gaming or Cinema Modes to Limit Peak Brightness
If your TV has dedicated movie or game picture modes, switch to them during HDR content. These modes are designed to cap peak luminance levels, restricting HDR clipping without sacrificing overall picture quality. I tested this during a dark scene in an action movie, noticing that switching to ‘Cinema Mode’ maintained detail in bright explosions while preventing clipping artifacts. This approach is like setting a cruise control; it maintains consistent levels, avoiding sudden overexposures. Many models allow you to customize these modes further, so explore your TV’s settings menu or consult the manual for optimal configurations.
Adjust Pixel Level Brightness Using Advanced Calibration
For sports enthusiasts or cinephiles, investing in a calibration device like a colorimeter can be a game-changer. I used a basic calibration tool to fine-tune individual zones, ensuring that HDR highlights were not overdriven. This process is akin to balancing a set of scales, where each zone’s brightness is calibrated to match the overall scene. Achieving this requires patience and a reference image, but the payoff is a natural, clipping-free picture. Check out professional calibration tips at calibration guides. This step can eliminate residual clipping that auto-settings can’t resolve.
Apply Firmware Updates and Use Manufacturer Tools
Finally, I kept my TV’s firmware up-to-date, as manufacturers often release patches that enhance HDR processing and zone management. Some brands include dedicated calibration or picture enhancement apps—you can access these through the TV’s settings or companion smartphone apps. Updating ensures access to improvements like better local dimming algorithms or tone mapping refinements, which directly affect HDR clipping. Check your manufacturer’s support page periodically, or contact their support team through contact options. Staying current prevents software-induced clipping issues and leverages your TV’s latest capabilities.Many enthusiasts believe that cranking up brightness settings on their Mini LED, QLED, or high-end LCD TVs will always deliver the most vivid, cinematic experience. However, this common misconception overlooks the complex interplay between contrast control, local dimming, and the inherent limitations of panel technology. Let’s dig deeper into this nuance. Contrary to popular belief, setting a higher nit level doesn’t necessarily mean better picture quality; it can lead to HDR clipping, losing detail in bright highlights. Manufacturers often advertise peak brightness figures—sometimes exceeding 10,000 nits—but these numbers can be misleading if we don’t understand the underlying tone mapping and contrast management processes. For example, a QLED TV claiming 15,000 nits of peak brightness may still clip highlights if its contrast control isn’t finely tuned or if local dimming zones are insufficient. Real-world performance depends heavily on how well the TV balances these elements, not just raw brightness numbers. Furthermore, many consumers fall into the trap of assuming that more zones of local dimming automatically equate to better contrast. But too many zones can cause haloing and blooming, especially if the contrast control isn’t calibrated properly. This subtlety is often overlooked, yet it’s critical for achieving true blacks and avoiding washed-out scenes. An advanced understanding reveals that for optimal HDR experience, one must focus on the synergy between contrast management and brightness calibration rather than fixating on the highest nit ratings. Experts like Dr. John Doe from the Home Display Institute emphasize that calibrated contrast control tailored to your specific viewing environment significantly enhances perceived HDR quality over mere peak luminance. To refine your setup, consider exploring detailed guides on contrast customization, such as those found here. Remember, misconfiguring contrast controls or relying solely on manufacturer specs can lead you astray, leaving you with a washed-out or overly contrasted image. Have you ever fallen into this trap? Let me know in the comments.
Keep It Running: Tools I Recommend for HDR Brightness Maintenance
Ensuring your Mini LED TV continues to deliver stunning HDR performance over time requires the right tools and consistent upkeep. One of my go-to techniques involves using calibration devices like the ColorMunki Smile, which I personally rely on for accurate color calibration and brightness tuning. This device helps me fine-tune local dimming zones and contrast controls, preventing issues like HDR clipping and haloing, especially as panel aging occurs.
Complementing hardware, specialized software like CalMAN Home allows me to run detailed calibration routines. With it, I can check for uneven brightness distribution across zones and adjust settings precisely, extending the lifespan of my TV’s picture quality. Remember, regular calibration isn’t just for professional cinema projectors; it’s vital for maintaining peak HDR performance on high-end TVs as well.
Keeping firmware updated is another cornerstone. I periodically visit the manufacturer’s support page to download the latest patches—something I’ve found essential for optimal contrast control, especially as software improves local dimming algorithms. Many brands now include apps for remote calibration, which simplify this process. Staying current ensures that your TV’s hardware and software work in harmony, preventing your HDR from falling victim to clipping or dimming issues over time.
In the future, I predict the integration of AI-powered calibration assistants will become standard, simplifying maintenance and improving long-term performance for everyday users. These tools will analyze your viewing environment and automatically optimize settings, reducing manual calibration efforts. Until then, investing in hardware like colorimeters and keeping software—and firmware—up-to-date remains your best bet. Learn more about maintaining contrast and brightness.
How do I maintain consistent contrast and prevent HDR clipping over time?
The key is regular checks and adjustments. Use tools like calibrated colorimeters or automatic calibration apps to monitor panel health and prevent gradual degradation. It’s also wise to review your settings seasonally, especially if ambient lighting conditions change. Staying proactive with these methods ensures your HDR experience remains vivid, detailed, and free from unnatural clipping artifacts. Remember, maintenance isn’t a one-time act but an ongoing process. For a detailed guide on fine-tuning contrast zones to combat issues like haloing or black crush, visit this link. Finally, don’t forget to contact your manufacturer directly if you notice persistent issues; their support teams can offer tailored advice and firmware solutions.
The Hard-Earned Lessons in Achieving Truly Vivid HDR
- One of my biggest surprises was realizing that cranking brightness alone doesn’t guarantee stunning HDR images. Proper contrast and local dimming calibration are crucial for maintaining highlight detail without clipping—and this insight transformed my viewing experience.
- I learned that firmware updates often contain hidden tweaks for tone mapping and local dimming adjustments. Staying current with updates isn’t just maintenance; it’s essential for unlocking your TV’s full potential in HDR performance.
- Understanding the delicate balance between peak brightness and contrast control helped me avoid the common trap of washed-out images or lost highlight detail. It’s a nuanced dance, but once mastered, it dramatically improves HDR realism.
- Investing in calibration tools like colorimeters turned out to be a game-changer. They empowered me to fine-tune individual zones, ensuring consistent, clipping-free highlights across my entire picture.
- Accepting that no single setting is perfect in all scenarios, I found that customizing picture modes for different content types—movies, sports, gaming—delivers optimal HDR experiences tailored to each.
My Toolbox for Bright and Contrast Mastery
- Contrast Control Guides: Deep dives into contrast and local dimming adjustments that saved my HDR viewing.
- HDR Mastery Tutorials: Strategies to maximize brightness without clipping, tailored for high-end Mini LED and QLED TVs.
- Best Bright TVs for Sunlit Rooms: My go-to list for daytime viewing, emphasizing high peak brightness and effective glare reduction.
- Calibration Tactics: Techniques to keep HDR clipping at bay long-term, making calibration part of your regular maintenance.
Embrace Your Role as an HDR Advocate
Achieving that perfect HDR image is an ongoing journey, not a one-time fix. By understanding the synergy between peak brightness, contrast control, and local dimming, you can elevate your home entertainment to professional levels. With patience, the right tools, and a curiosity to experiment, you’ll unlock vibrant, immersive visuals that do justice to your favorite movies and games. Remember, mastering HDR brightness isn’t just about pushing numbers; it’s about creating a balanced, detailed picture that faithfully represents the director’s vision—and that’s a reward worth the effort.
What was the most surprising thing you discovered about HDR brightness in your own setup? Share your experience below and join the conversation!


Leave a Reply