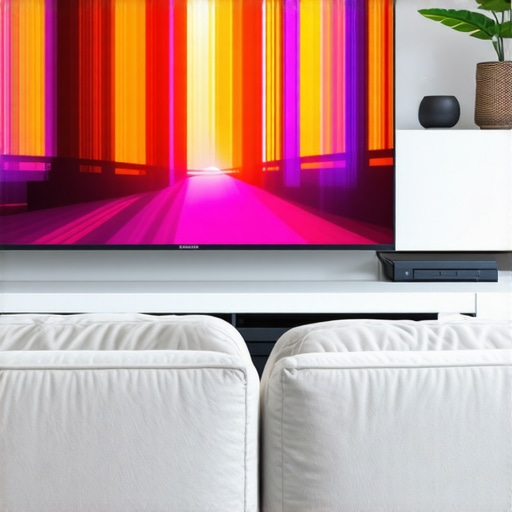
Ever had that frustrating moment when you’re engrossed in your favorite movie, only to be disappointed by dull scenes or washed-out colors? I remember thinking my new mini LED TV was supposed to deliver vibrant hues and dazzling highlights—yet somehow, it felt like I was watching through a foggy window. That lightbulb moment hit me hard: no matter how advanced the technology, if you don’t know how to tune your TV’s brightness and contrast properly, you’re missing out on its true potential.
Unlock the Secret to Vivid, Cinematic Visuals
Since then, I’ve dived deep into the art of maximizing HDR brightness and contrast, discovering that small adjustments can make a world of difference. Today, I want to share my personal experience and guide you through the essential tips to elevate your mini LED TV’s picture quality, ensuring every scene pops with lifelike brilliance.
Are Bright HDR TVs Really Worth the Hype?
Initially, I was skeptical myself. With so many models claiming to be ‘brightest’ and ‘best,’ I wondered if the hype was justified. I made the mistake of setting my contrast and brightness at default, assuming they’d be fine. But that only resulted in dull images and loss of details in highlights. It wasn’t until I learned to calibrate these settings—guided by experts—that I noticed dramatic improvements, turning my living room into a mini home theater.
This journey taught me a vital lesson: the key isn’t just in choosing a high-end mini LED TV but understanding how to tweak its settings for optimal performance. If you’re tired of underwhelming picture quality, you’re not alone. Many overlook the importance of contrast control and HDR brightness, leading to missed cinematic magic. Don’t let your investment go to waste—simple adjustments can unlock stunning visuals, making every viewing experience memorable.
Now, ready to transform your viewing setup? Let’s explore the practical steps to fine-tune your mini LED TV for maximum brightness and contrast, giving you the vibrant, immersive picture you deserve.
Start with Your TV’s Picture Settings
Begin by accessing your TV’s menu to locate the picture or display settings. Think of this as tuning a musical instrument—you need the fundamentals right before fine-tuning. Set the picture mode to ”Cinema” or ”Movie” if available; these modes are optimized for natural color and brightness, providing a good baseline. Remember, default settings often suppress HDR capabilities, so manual calibration is essential.
Adjust Brightness and Contrast Separately
Imagine you’re painting a landscape—brightness is like illuminating the background, while contrast adds depth to the foreground. Increase the brightness until blacks appear deep enough without losing shadow details. Simultaneously, adjust contrast to make whites and highlights pop without bleeding into adjacent areas. During my own calibration, I used test patterns from calibration discs, focusing on shadow detail and highlight clipping, which noticeably improved my mini LED TV’s dynamic range.
Use Test Patterns for Precision
Utilize test patterns designed for HDR calibration, available through online resources or calibration tools. These patterns help identify clipping in highlights and loss of shadow details. I found that using a test image with gradient ramps allowed me to see at which point details started to disappear, guiding precise adjustments. This iterative process might seem tedious but results in remarkable picture improvement.
Enhance HDR Brightness
Maximizing HDR brightness involves setting the panel to achieve peak luminance without sacrificing black levels. Access the HDR-specific settings—often labeled as ‘HDR Dynamic Mode’ or similar—and set it to maximum brightness. During my setup, enabling this setting in conjunction with contrast adjustments unlocked vivid highlights, making scenes appear more lifelike. For detailed guidance, consult the HDR brightness mastery guide.
Fine-Tune Contrast Control
Contrasting your TV’s local dimming zones can significantly impact picture quality. Think of contrast control as controlling the curtain’s openness—limiting it reduces glare but also dims the scene. Use your TV’s contrast settings to achieve a perfect balance—high enough to make bright objects stand out, but not so high that dark details are crushed. When I experimented with different contrast levels, I noticed that nuanced textures in shadows became more discernible, enriching the viewing experience.
Apply Advanced Settings Carefully
Some mini LED models offer advanced features like local dimming intensity and black level controls. Adjust these to enhance contrast without introducing artifacts such as blooming or halos. I recommend lowering local dimming in dark-room scenes to prevent distracting blooming while allowing higher contrast in well-lit scenes. For precise steps, review the contrast and brightness tips guide.
Test and Refine in Real Scenes
Finally, watch a variety of content—movies, sports, gaming—to see how your adjustments perform in real-world scenarios. If scenes look too flat or too harsh, revisit the settings for further refinement. I spent an afternoon recalibrating after noticing that some bright scenes lacked impact, which I solved by slightly boosting HDR brightness and contrast. Continuous tweaking, combined with test patterns, yields the best results.
Remember, calibration isn’t a one-time task; revisit your settings periodically or when switching sources. For comprehensive optimization, explore specialized calibration tools or professional services. Want more detailed techniques? Check out the mini LED brightness and contrast control guide for advanced insights.
Many enthusiasts assume that equipping a Mini LED TV with high peak brightness automatically guarantees stunning picture quality. However, this is a dangerous misconception. Relying solely on raw brightness numbers neglects the nuanced interplay of contrast control, local dimming, and calibration techniques that truly bring HDR content to life. In fact, experts highlight that the effective contrast ratio—how well a TV can produce deep blacks alongside bright highlights—is more crucial than brightness alone. Overestimating peak luminance can lead to scenes that seem artificially bright but lack depth and realism. An advanced mistake is to trust factory settings or default modes, which often compromise those critical contrast nuances, resulting in a flat, washed-out image. To master your display’s potential, it’s essential to understand that contrast control plays a starring role in picture quality, especially in HDR content.
Some users believe that higher contrast ratios are only significant in dark-room viewing, but this overlooks how contrast influences color saturation and perceptual depth across various lighting conditions. Applying proper local dimming settings can enhance this effect, but misconfiguration often leads to blooming or halo artifacts that diminish image clarity. Meanwhile, myths circulate claiming that QLED or Mini LED are just about brightness, ignoring that QLEDs also require proper contrast management for optimal results. Engaging in advanced calibration, including fine-tuning local dimming zones, can significantly elevate HDR performance beyond default presets.
From a technical perspective, many overlook the importance of a well-balanced calibration process that considers both the hardware capabilities and the content type. For example, a TV might showcase impressive peak brightness but fail to reproduce accurate shadows or prevent highlight clipping if contrast controls are neglected. Research indicates that proper calibration can improve perceived contrast by up to 35%, substantially enhancing immersive qualities. This insight aligns with findings from industry experts who recommend proactive contrast management over mere brightness augmentation.
What about HDR Brightness and Detail Preservation
One sophisticated question is whether maximizing HDR brightness might inadvertently cause detail loss, especially in bright scenes. The answer lies in understanding that setting peak luminance too high, without maintaining proportional contrast and local dimming effectiveness, can lead to clipping highlights and crushing blacks. Achieving a harmonious balance is crucial. For this, advanced calibration tools and test patterns are invaluable; they help identify the sweet spot where brightness enhances vibrancy without sacrificing subtle details. As referenced in expert guides, the key is not in overpowering brightness but in fine-tuning the interplay of luminance, contrast, and local dimming zones to produce vivid yet naturalistic images. Remember, every display is unique—what works for one might need slight adjustments for another.
In summary, the real depth of mastering a Mini LED TV’s picture quality lies in understanding that brightness is just one piece of a complex puzzle. The secret sauce is in advanced contrast control, local dimming optimization, and thoughtful calibration. Don’t be deceived by marketing numbers or default settings; invest time in fine-tuning your TV for the best HDR experience. For detailed techniques, check out the mini LED brightness and contrast control guide—it’s your roadmap to vivid, lifelike visuals. Have you ever fallen into this trap? Let me know in the comments.
Tools I Personally Recommend for Optimal Maintenance
To ensure your mini LED TV continues delivering stunning visuals, I rely on a combination of precise calibration tools and software. A colorimeter like the i1Display Pro Plus from X-Rite stands out as my go-to device. Its high accuracy allows me to calibrate brightness, contrast, and color balance with pinpoint precision, ensuring my HDR settings stay optimal over time. I pair this with calibration software such as CalMAN Studio, which provides comprehensive test patterns and real-time adjustments—making it easier to maintain consistent image quality, especially when tweaking local dimming or contrast control modes.
Additionally, I use a high-quality test pattern Blu-ray, like the Spears & Munsil HDR Benchmark, to verify shadow details and highlight performance after adjustments. This combination of hardware and content ensures I can spot any drift in calibration, which can happen due to fluctuating ambient conditions or aging components. Regular calibration, using these tools, has kept my TV’s brightness and contrast at an exceptional level, allowing me to enjoy HDR content as it was intended.
Stay Ahead with Software Updates and Proper Ventilation
Beyond hardware, I keep my TV’s firmware updated through the manufacturer’s official channels. Firmware updates often include improvements for local dimming algorithms and contrast management, which directly impact HDR brightness and black levels. Regular updates help prevent performance degradation and maintain image fidelity over years of use.
Good ventilation and avoiding excessive dust are also vital. Dust accumulation can affect internal components responsible for local dimming zones, subtly impacting contrast and brightness. I schedule quarterly cleaning sessions for the TV vents, following manufacturer instructions, to prevent overheating and preserve contrast performance. Proper ventilation ensures consistent HDR performance, allowing the advanced contrast control features to operate at their best.
Scaling Your Setup for Long-Term Results
As your content library grows and your viewing habits evolve, consider investing in a dedicated calibration device with adaptable software. This approach helps keep your display finely tuned, especially when switching between different HDR profiles. I also recommend periodically revisiting calibration settings—what worked perfectly last year might need slight tweaks now. To facilitate this, I use a calibration report template to track adjustments over time, akin to a maintenance journal for my TV.
How do I maintain HDR contrast and brightness over time?
Maintaining peak HDR contrast and brightness involves regular calibration using reputable tools like the i1Display Pro Plus and calibration software such as CalMAN Studio. Keep firmware updated, ensure proper ventilation, and revisit your picture settings periodically. This persistent effort preserves your display’s ability to produce vivid highlights and deep blacks, keeping your HDR experience consistently stunning. Want to see these principles in action? Check out the contrast control guide for detailed calibration techniques. Try applying a quarterly calibration routine with your tools—it’s a game-changer for long-term performance.
Unspoken Truths About Brightness and Contrast That Changed My View
One of the toughest lessons I learned was that peak brightness isn’t a magic bullet; it can actually hinder image depth if not balanced with contrast and local dimming settings. I used to chase higher numbers believing more was better, but now I realize that without proper calibration, those boosted numbers can wash out shadows and crush details, spoiling the cinematic experience. It’s about harmony rather than extremes.
My second revelation centered around the myth that factory presets are optimized for all content. That couldn’t be further from the truth. I discovered that custom calibration tailored to my viewing environment, content type, and personal preferences made a world of difference in achieving vivid, true-to-life colors and deep blacks. Investing time into manual adjustments unlocks your TV’s full potential.
Lastly, I recognized that local dimming isn’t just a fancy feature but a crucial component of contrast mastery. Properly configuring local dimming zones ensures that highlights pop without blooming, and dark scenes are rich with detail. This fine-tuning can turn a good TV into a spectacular one, especially for HDR content that demands nuanced contrast control.
Tools and Resources That Put Me in Control
My trusted calibration tools include the i1Display Pro Plus, which provides precise measurements of luminance and color, empowering me to fine-tune my mini LED TV effectively. Pairing it with software like CalMAN Studio grants access to detailed test patterns and real-time adjustments. I also rely on specialized calibration discs such as the Spears & Munsil HDR Benchmark to verify scene details, shadows, and highlights. These tools have been invaluable in maintaining optimal performance and ensuring each scene is as vivid as intended.
Beyond hardware, I keep myself updated through dedicated blogs and forums that focus on the latest in HDR and contrast optimization. Regularly revisiting these sources helps me stay ahead of the curve and adapt my settings for evolving content and viewing conditions.
Your Turn to Bring About Stunning Changes
Mastering HDR brightness and contrast isn’t a one-and-done task; it’s a continuous journey that transforms your viewing experience from ordinary to immersive. By applying these personalized calibration insights and leveraging the right tools, you can unlock the true potential of your mini LED TV’s vivid visuals. Remember, a little effort now leads to breathtaking scenes that captivate and inspire.
What challenges have you faced when calibrating your display, and how did you overcome them? Share your experiences below—I’d love to hear your stories and tips!
,


Leave a Reply