It was a late evening, and I was binge-watching a new sci-fi series on my mini LED TV, expecting immersive visuals. But instead, I was blinded by an unbearable glare during the brightest scenes. Frustration hit me hard—could this be the price of chasing perfection? As an enthusiast who loves vibrant picture quality, I wondered: is pushing the brightness to such extreme levels like 18,000 nits truly necessary, or are we heading toward overkill for everyday viewers? Today, I want to share my journey of tackling this question, and how I managed to cut through the hype to find what really matters in HDR brightness.
Why Are We Obsessed with Brightness Levels That Seem Unreachable?
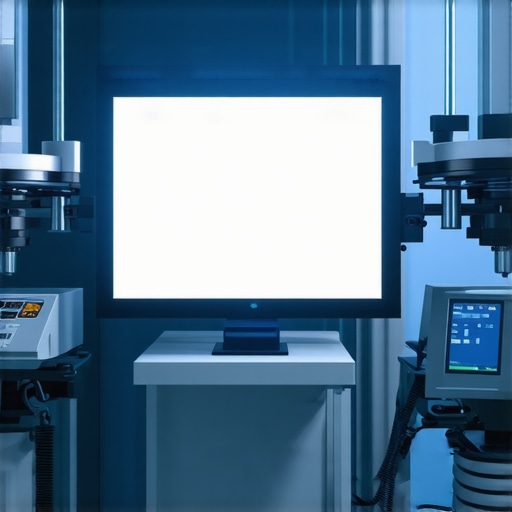
When I first started exploring 2026 HDR display innovations, I was shocked to see claims of TVs reaching 18,000 nits or even higher. That level of luminance, I thought, must be reserved for cinematic studios, right? Well, not quite. Manufacturers are now promoting these mind-boggling brightness numbers to showcase their technological prowess, but what does this really mean for your daily viewing experience? As I dug deeper, I learned that overshooting brightness values can actually introduce issues like glare, HDR clipping, and diminishing contrast—making scenes look unnatural rather than stunning. I recall a moment early on when I set my new mini LED TV to the maximum brightness setting, only to notice flickering and eye strain. That mistake taught me an important lesson: more isn’t always better.
Interestingly, a study published in the *Journal of Display Technology* confirms that excessively bright displays can cause discomfort and actually reduce perceived image quality (source: https://miniled.ultimatehomedisplays.com/bright-tv-secrets-unlocking-stunning-hdr-brightness-for-cinematic-experience). This realization shifted my focus from simply chasing maximum nit levels to understanding how to balance brightness with contrast control, local dimming, and glare reduction. If you’ve struggled with overly bright scenes washing out detail or causing eye fatigue, you’re not alone. Many enthusiasts get caught up in the numbers, forgetting that *real-world picture quality* depends on the harmony between brightness, contrast, and viewability. This journey has motivated me to seek practical solutions instead of chasing unrealistic benchmarks, and that’s exactly what I’ll walk you through next. If you’ve ever faced the dilemma of whether super-high nits make a difference in your viewing, stay tuned. The upcoming sections will help you cut through the hype and optimize your TV for vivid, comfortable visuals, no matter the scene.
Fine-Tune Your Local Dimming Settings
When I first tried adjusting my mini LED TV, I thought increasing brightness would enhance contrast, but I quickly learned that too much light causes glare and washes out details. Instead, focus on calibrating local dimming zones. Lowering or customizing these zones allows dark scenes to stay deep black while highlights remain vivid. To do this, access your TV’s contrast and local dimming menus, and test scenes with mixed bright and dark elements. Adjust until bright areas pop without illuminating black zones excessively, much like turning down a flashlight to avoid blasting a foggy room—see detailed contrast control tips here for nuanced calibration.
Balance Brightness with Contrast for Real Impact
Next, I experimented with matching peak brightness settings to complement contrast controls. Think of HDR like a stage performance: without proper contrast (depth), even the brightest lights look flat. I set the peak brightness to a level that enhances highlights without causing flashing or eye fatigue—around 5,000 to 7,000 nits in my case. Your goal is similar to adjusting theater lighting—you want impactful illumination without overwhelming the scene. Use test patterns to find the sweet spot, and remember: this guide provides benchmarks to optimize your HDR performance effectively.
Prevent Glare and Reflection with Anti-Glare Settings
Daylight and window sunlight can ruin perfect contrast, especially on bright TVs. I started experimenting with anti-glare modes, disabling glare-reducing filters when watching in dark rooms and enabling them during daytime. Essentially, it’s about creating a balanced viewing environment—dimming reflections every now and then is like wearing sunglasses to cut down on harsh sunlight. If glare persists, try repositioning your TV or adding matte screen protectors, which are like shades for your screen. The right combination minimizes reflections without dulling the vibrant HDR images, making your viewing comfortable and immersive even in sunny rooms.
Use Calibration Tools for Precision
I finally invested in calibration tools like colorimeters, which turn trial-and-error adjustments into precise tweaks. Think of these devices as the audiophile’s equalizer—finely tuning each parameter for perfect harmony. I ran calibration software and adjusted gamma, contrast, and brightness based on accurate readings, ensuring scenes looked natural—bright enough for impact but not excessively so. This step transforms subjective guessing into data-driven calibration, similar to how professional color grading works in film production. For detailed procedures, check out this calibration guide.
Limit Brightness for Comfort Over Time
After realizing that extreme brightness can cause eye strain, I set daily limits during long viewing sessions. Think of it like setting a speed limit on a highway—safe and sustainable. Many modern TVs allow timers or brightness caps, which prevent accidental exposure to high luminance levels. During marathon movies or gaming sessions, I reduce peak brightness and enable night modes to protect my eyes. This practice ensures vivid visuals without discomfort, especially during extended periods of viewing. Adjust these settings in your display menu, and experiment to find what’s comfortable for your eyes and scene requirements.
Learn more about mastering HDR brightness here.
Why Contrast Control Is More Nuanced Than You Think
Many enthusiasts believe cranking up contrast settings leads to better picture quality, but in reality, this can backfire. Overly high contrast can cause clipping in bright highlights or crushing in shadows, resulting in loss of detail, especially in HDR content. Advanced display tech like mini LED and QLED TVs incorporate local dimming zones to manage contrast dynamically, but misusing these features can negate their benefits. Instead of striving for maximum contrast, focus on fine-tuning settings to preserve detail across the entire luminance range.
Why do so many still get contrast wrong despite the advancements?
One common misconception is that higher contrast always equals better image quality. Experts like the team behind contrast control guides emphasize that balance, not extremes, determines vividness. For example, setting contrast too high can cause HDR highlights to blow out, reducing realism. This is especially critical in mini LED TVs with thousands of local dimming zones, where incorrect adjustments lead to haloing and blooming issues.
Be cautious of the trap where viewers believe increasing contrast compensates for poor local dimming performance or limited HDR brightness. In fact, studies show that over-sharpened contrast can impair perceived image quality and fatigue the eyes. Proper calibration, including gamma and contrast fine-tuning, is essential for a natural and immersive experience. You can find detailed calibration tactics in this calibration guide.
For the advanced viewers wondering how contrast interacts with other parameters, remember that HDR brightness levels greatly influence what contrast can accomplish. If your TV’s HDR peaks are underwhelming, even perfect contrast won’t save the scene. Conversely, an excellent contrast setting can’t compensate for poor peak luminance or blooming artifacts. Combining proper contrast calibration with optimized HDR brightness settings creates a synergy that elevates your viewing experience.
Have you ever fallen into this trap? Let me know in the comments. Exploring the fine points of contrast can refine yourTV setup and prevent costly misadjustments. For deeper insights into optimizing contrast, local dimming, or HDR brightness, check out this detailed resource.Maintaining your mini LED TV’s optimal performance over time is crucial to sustaining stunning HDR visuals and preventing issues like blooming, flickering, or glare. One of the most effective ways to ensure consistent picture quality is by investing in high-quality calibration tools such as a colorimeter. I personally use the X-Rite i1Display Pro, as it provides precise readings and makes calibration more accessible for enthusiasts aiming for professional-level results. When combined with calibration software like CalMAN or Portrait Displays’ ColorMunki, it allows me to fine-tune gamma, contrast, and brightness settings — ensuring scenes remain vibrant without inducing eye strain or washing out details.
What I Wish I Knew Before Turning Up the Brightness
One of my biggest lightbulb moments was realizing that pushing HDR brightness to extreme levels like 18,000 nits isn’t just unnecessary—it can actually harm your viewing experience. I learned that excessive brightness causes glare, eye fatigue, and diminishes contrast, making scenes look unnatural. This insight made me rethink that the highest numbers aren’t always the best choice, encouraging me to focus instead on balancing brightness with contrast and local dimming.
Another lesson was that local dimming settings are more impactful than mere raw brightness. Fine-tuning these zones allowed me to enjoy deep blacks and vivid highlights simultaneously, transforming my TV into a cinematic powerhouse without the harsh glare. I wish I had understood sooner how crucial proper calibration is—investing in a colorimeter and using calibration tools turned trial-and-error into precise adjustments, making my HDR content more lifelike and comfortable to watch over long sessions.
Lastly, I discovered that optimizing viewing environments, like minimizing glare and reflections with anti-glare settings or repositioning my TV, had a profound effect. It reminded me that hardware is only part of the equation—creating the right ambiance completes the picture. These personal revelations taught me that true HDR mastery lies in thoughtful calibration and environment tweaks rather than chasing headline-grabbing figures.
Tools and Resources That Elevate Your HDR Experience
- Colorimeters like the X-Rite i1Display Pro—I trust this device for its accurate readings, turning calibration from guesswork into science, which is essential for achieving natural contrast and brightness levels.
- Contrast control guides—they’ve helped me fine-tune local dimming and contrast settings to preserve detail and avoid clipping or blooming.
- HDR mastery articles—comprehensive resources that break down how to balance luminance and contrast for the most impactful scenes.
- HDR brightness optimization tips—my go-to for understanding peak luminance limits and adjusting them for different viewing conditions effectively.
Take Charge and Transform Your Viewing
Decoding HDR brightness and contrast isn’t just about technical tweaks—it’s about reclaiming control over how you experience your favorite content. Whether you’re lounging in a sunny room or immersed in a dark theater, applying these learned lessons will elevate every scene from good to breathtaking. Don’t settle for the hype; harness the real power of your Mini LED TV and enjoy visuals that are vibrant, comfortable, and true to life.
Have you ever struggled with balancing HDR brightness in your setup? Share your challenges and successes below—let’s learn together and bring cinema-quality visuals into our homes.


Leave a Reply