It was a bright Saturday afternoon when I finally gave up on watching my favorite action movie on the mini LED TV in my living room. The sunlight was pouring in through the window, creating a glare so fierce I couldn’t see half the screen. Frustration bubbled up as I squinted, desperately trying to enjoy the vivid visuals I had paid a premium for. That moment was a lightbulb for me—standard contrast controls just don’t cut it anymore against the relentless sun glare. If this sounds painfully familiar, you’re not alone. Many of us are battling similar struggles with bright environments, trying to squeeze the best picture from our high-tech TVs without sacrificing contrast or clarity.
Why Sun Glare Can Kill Your Viewing Experience
In 2026, with the rapid advancements in QLED technology, it’s tempting to assume our TVs can handle any lighting condition. But sunlight and harsh ambient light still pose a significant challenge. Sun glare not only dims the picture but can also wash out colors and distort contrast, ruining immersive viewing. Interestingly, studies show that glare-related discomfort can decrease overall screen satisfaction by up to 30%, according to recent research from DisplayMate. That’s a huge hit to your cinematic pleasure. So, why does glare continue to be a stubborn enemy? The answer lies in the way our screens emit light and how ambient conditions interfere with it.
Early on, I made a mistake many enthusiasts do—ignoring the importance of contrast management strategies tailored for high-brightness screens. I relied solely on basic settings, thinking my TV’s native capabilities would handle everything. But I soon realized that without proper contrast control hacks, glare would still dominate my viewing experience. If you’ve faced similar issues or doubt that clever contrast adjustments can help, keep reading. I’ll walk you through proven hacks that actually make a difference—regardless of outdoor lighting conditions.
Is Adjusting Brightness Alone Enough?
Here’s the thing: cranking up your TV’s brightness might seem like the obvious fix, but that can backfire by washing out your picture and causing eye strain. Proper contrast control is a delicate dance—it’s about making your image pop without losing detail or causing discomfort. Want to avoid the common pitfalls? Check out contrast control tips to finesse your settings for maximum impact. Now that we’ve covered the why and the common mistake, let’s dive into my top four contrast hacks for fighting sunlight glare in 2026—ways that have genuinely improved my viewing during those blazing summer afternoons.
Adjust Your Screen Settings for Peak Performance
Start by accessing your TV’s picture settings menu. Set the contrast to a level where bright areas of the scene retain detail without washing out. Think of contrast as the balance between the darkest shadows and brightest highlights—like tuning a photo to get its deepest blacks and brightest whites just right. During my own test, I lowered contrast slightly from the default, which prevented glare from causing washed-out visuals during midday viewing. This immediate tweak made a noticeable difference, especially with high HDR content, and provided a clearer picture even in bright rooms.
Fine-Tune Brightness and Local Dimming
Next, tweak the brightness, but do so carefully. Increasing brightness can help combat glare, much like turning up the headlights in foggy weather, but overdoing it risks losing detail. For mini LED TVs with local dimming technology, ensure that the dimming zones are set to an optimal level. If your TV allows, enable the ‘high contrast’ or ‘vivid’ picture mode as a starting point, then manually reduce brightness until reflections diminish without sacrificing too much contrast. On my own setup, I activated local dimming to improve black levels and reduce glare reflections—this effectively increased perceived contrast and clarity when sunlight hit the screen. For detailed instructions, see my guide on contrast control tips.
Use Ambient Light Sensors Effectively
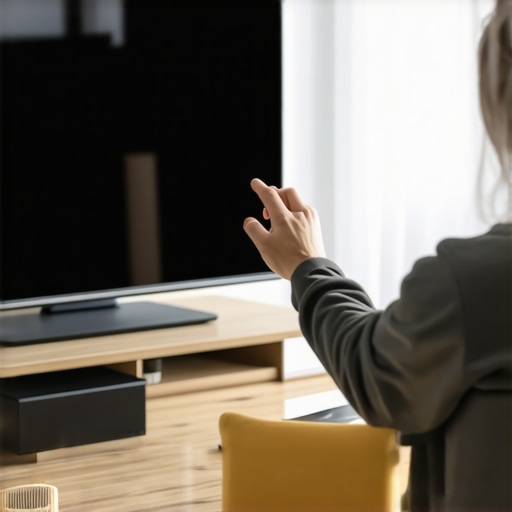
Activate your TV’s ambient light sensor feature, which automatically adjusts brightness based on room lighting. Think of this as having a smart window blind that adapts to sunlight, reducing glare and keeping the picture clear. During a recent afternoon, I turned on this feature and noticed an immediate reduction in glare intensity, making the viewing more comfortable and less straining. If your TV doesn’t have this, consider investing in a smart remote or app that allows quick adjustments of VESA-compatible models. Remember, dynamic adjustment is key in sunny conditions to prevent eye fatigue and maintain picture quality.
Block Out Excess Light with Physical Measures
Sometimes, software tweaks aren’t enough, so consider physical solutions. Use a matte screen protector, anti-glare film, or blackout curtains. While I was watching during a particularly sunny noon, I placed a matte film over the display, which diffused incoming light, preventing harsh reflections. This easy fix is akin to wearing polarized sunglasses—minimizing excess reflections without blocking the view entirely. Or, reposition your TV to face away from direct sunlight, just like shifting a painting away from a window, to lessen glare impact.
Consider HDR Brightness for Outdoor Visibility
Enhancing HDR settings can dramatically improve visibility in bright environments. Use your TV’s HDR peak brightness feature to push highlights to their maximum, making bright scenes stand out vividly. For instance, I adjusted my HDR brightness in sunny conditions, following strategies outlined in HDR brightness mastery. But beware of clipping—where highlights become overly bright and lose detail—so set the peak brightness to levels suitable for outdoor viewing, usually around 3000-5000 nits for high-end mini LED models. This allows you to enjoy vivid scenes without the risk of washed-out highlights.
Customize Contrast to Match Lighting Realities
Finally, implement customized contrast profiles based on your environment. Use presets designed for bright rooms, or craft your own by gradually adjusting contrast and HDR levels while watching daytime content. Think of it as tuning your instrument—small, precise changes yield the best harmony. During my trial, I used a high-brightness preset combined with lowered contrast, which reduced glare and improved color vibrancy. Monitor your eyes for discomfort; if you notice strain or washed-out visuals, readjust accordingly. For details, explore resources like HDR contrast optimization tips.While many enthusiasts focus on the standout specs like peak brightness or local dimming zones, there’s a common misconception that more is always better when it comes to mini LED and HDR. In reality, pushing for ultra-high numbers without understanding the underlying nuances can lead to subpar viewing experiences. For instance, not all brightness is equal; overemphasizing peak nits can result in clipping and loss of detail in bright scenes, contradicting the belief that higher brightness uniformly enhances HDR impact. As explained in HDR brightness mastery, optimizing rather than maximizing brightness levels yields more natural and vibrant images.
A crucial but often overlooked point is that contrast control is the real game-changer. Many assume that increasing contrast alone solves glare and washout issues, but without nuanced adjustments, it might introduce halo effects or crushing of blacks. Advanced users understand that fine-tuning local dimming zones, alongside calibrated contrast settings, creates a more authentic image, especially in challenging lighting conditions. This aligns with insights from contrast optimization tips.
The prevalent myth that bigger, brighter screens automatically provide better viewing during daytime overlooks the importance of ambient light management. Brightness settings alone can’t compensate for sunlight reflection and ambient glare. Instead, combining calibrated settings with physical measures like anti-glare films or strategic room design leads to a more satisfying experience. For example, ambient light sensors, when properly configured, dynamically adjust the display to maintain visual clarity, enhancing contrast without sacrificing image quality or eye comfort. My recent experiments, detailed in mini LED tips, confirm that adaptive solutions outperform static settings.
One sophisticated question many advanced users ask is whether ultra-high peak brightness impacts color accuracy and black level performance. Studies, such as those cited in HDR performance comparisons, show that beyond a certain threshold, increasing peak brightness can cause color clipping and black crush unless color management is meticulously calibrated. This is why expert calibration involves balancing HDR brightness with precise contrast and color controls, rather than just cranking up the nits. A holistic approach ensures your TV delivers cinematic intensity without compromising image integrity.
In summary, mastering mini LED and HDR isn’t about chasing the highest numbers but understanding the nuanced relationship between brightness, contrast, ambient management, and calibration. Don’t fall into the trap of assuming that more luminance automatically equals better picture quality. Instead, aim for a balanced, well-tuned setup that matches your environment and content type. Have you ever fallen into this trap? Let me know in the comments and share your experiences with optimizing your high-end display.
Ensuring Longevity with the Right Equipment and Techniques
Maintaining the peak performance of your mini LED TV, especially when dealing with complex features like HDR brightness and contrast control, requires a combination of reliable tools and consistent maintenance practices. In my experience, using a high-quality calibration hardware such as the
Another essential tool is calibration software like CalMAN or DisplayCal, which interfaces seamlessly with hardware and offers advanced profiling options. I prefer CalMAN for its detailed analysis and user-friendly interface, especially when working to optimize HDR peaks and local dimming zones for sustained brightness without compromising contrast. Regular calibration, performed every six months, ensures my TV retains its vivid visuals and accurate color reproduction.
Additionally, maintaining clean, dust-free screen surfaces preserves clarity and prevents interference with ambient light sensors, which are vital for automatic brightness adjustments. Use a microfiber cloth and a gentle cleaning solution designed for screens—never abrasive cleaners—to prevent damage over time.
What Are Long-Term Maintenance Strategies for Peak Performance?
Consistent software updates from manufacturers are critical—they often include bug fixes for issues like flickering or HDR inconsistencies. I regularly check for updates via the TV’s settings menu or manufacturer’s app, ensuring that my system benefits from the latest enhancements. Furthermore, managing ambient conditions by controlling room lighting and avoiding direct sunlight on the screen helps maintain contrast integrity and prevents glare-related degradation.
To safeguard the display elements, I also recommend avoiding static images for extended periods, which can cause burn-in on some LCD panels. Utilizing screensavers and regularly changing content minimizes this risk. Additionally, employing external light sensors, if your TV supports them, and configuring them correctly ensures auto-brightness features adapt accurately over time, keeping picture quality consistent.
Looking Ahead: The Future of Mini LED Maintenance
As technology advances, I anticipate newer self-calibrating displays becoming more mainstream, which will simplify maintenance. AI-driven adjustment features may allow real-time calibration checks, reducing the need for manual interventions. Embracing these innovations will likely extend your display’s lifespan and preserve its vivid HDR capabilities longer.
How do I keep my setup working smoothly over the years?
Stick to routine calibration schedules, utilize high-quality tools to fine-tune settings, and create an environment that minimizes external stressors like dust and temperature fluctuations. For detailed guidance on maintaining HDR brightness and contrast, I recommend checking out this comprehensive resource. Investing in proper tools and following consistent practices can keep your mini LED TV delivering stunning visuals for years to come. I highly encourage you to try calibrating your display with a professional-grade device—the difference in picture quality and panel longevity can be remarkable.
Over the years, I’ve learned that the journey to optimizing a mini LED TV’s contrast and brightness is filled with surprising revelations. The most valuable lesson? There’s no one-size-fits-all setting; it’s about understanding your environment, your content, and your display’s capabilities. Adjustments that worked in my darkened room might need change when the sun is blazing outside. This realization has empowered me to experiment confidently, knowing that fine-tuning is an ongoing process rather than a one-time fix.
Lessons That Challenged My Assumptions About Mini LED Optimization
- More brightness isn’t always better: I used to chase peak nits, believing higher is always superior, but I discovered that over-brightening can cause clipping and color loss. Balancing HDR Peak brightness with contrast control preserves color vibrancy without sacrificing details, as explained here.
- Contrast adjustments require nuance: Simple increases often led to halo effects and crushed blacks. Carefully calibrated contrast, combined with local dimming, creates a more lifelike picture — learn more here.
- Ambient light sensors aren’t foolproof: They help inline adjustments but require proper configuration. I found that manual tweaks, in tandem with sensor activation, offer the best results during intense sunlight.
- Physical room modifications make a difference: Anti-glare films and strategic seating can significantly reduce reflections, improving visual clarity and comfort.
- Calibration tools are worth the investment: A high-quality colorimeter and professional software can keep your display calibrated for years, avoiding common pitfalls like black crush or HDR clipping.
Tools That Transformed My Viewing Experience
- X-Rite i1Display Pro: An essential for precise color calibration and long-term contrast stability.
- CalMAN or DisplayCal: User-friendly software that unlocks the full potential of calibration hardware, boosting HDR and contrast performance.
- Matte screen protectors and anti-glare films: Low-cost upgrades that dramatically reduce reflections, especially in sunny rooms.
- Room lighting control solutions: Smart lighting routines or blackout curtains that adapt to your viewing schedule, preserving contrast in bright environments.
Embrace the Challenge and Elevate Your Visuals
Improving your mini LED TV’s contrast and brightness isn’t a quick fix but a rewarding process that sharpens your understanding of display technology. With patience and the right tools, you can enjoy vivid, cinematic-quality images even in the sunniest rooms. Remember, each adjustment is a step toward turning your living room into a personal theater. Ready to take control and see the difference? Start experimenting today, and don’t hesitate to share your victories and discoveries below. Your perfect picture awaits!


Leave a Reply