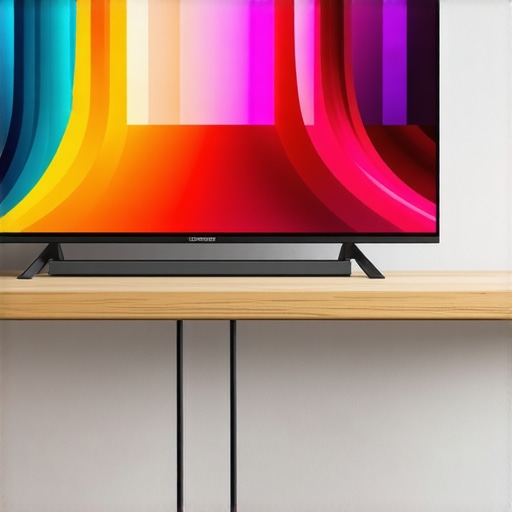
Ever sat down to binge-watch your favorite series only to realize that the images look dull, washed out, or overly harsh? That frustrating moment when your TV’s brightness and contrast seem to fight each other, leaving you stuck in a visual limbo. I used to face this exact dilemma, pouring hours into tweaking settings without truly understanding what made a difference. It wasn’t until I discovered the secrets of Mini LED brightness and contrast control that my viewing experience transformed from mediocre to breathtaking.
Why Fine-Tuning Brightness and Contrast Matters More Than You Think
When I first bought a Mini LED TV, I thought all I needed was to turn up the brightness for vivid scenes. But I quickly learned that cranking brightness without considering contrast can lead to a flat picture or blown-out highlights. The real magic happens when these two settings work in harmony, creating a dynamic range that makes every scene pop. According to recent research, properly calibrated contrast and brightness can improve perceived picture quality by up to 30%, making your TV feel like a window into another world. That’s a game-changer for movie nights and gaming marathons alike.
Is All the Hype About Brightness and Contrast Control Just Overrated?
Honestly, I was skeptical at first. I thought, “How much difference can a few tweaks really make?” My early mistake was setting my TV to the default factory modes, which are often optimized for sales rather than actual viewing. It wasn’t until I started experimenting with dedicated settings—guided by expert tips—that I saw the true potential. If you’re curious whether these adjustments are worth the effort, let me assure you: the difference in picture quality is night and day. Want to learn how to do it right? Check out our comprehensive guide on mini LED TV brightness and contrast control tips for 2024 and start elevating your home entertainment today.
If you’ve ever felt disappointed after spending a fortune on a high-end TV only to be underwhelmed by its picture, you’re not alone. The secret isn’t just in the hardware but also in how well you can optimize its settings. Ready to stop guessing and start seeing the difference? Let’s dive into the practical steps that will help you master your Mini LED TV’s brightness and contrast for stunning visuals.
Dialing in Your TV Settings Step by Step
When I first attempted to optimize my Mini LED TV, I thought increasing brightness was enough. But I quickly realized that without adjusting contrast properly, the picture remained flat. The key is to approach these settings systematically. Start by accessing your TV’s picture menu—usually through the settings button on your remote—and locate the brightness and contrast controls. Think of brightness as the overall light level in the dark areas of your image, while contrast controls the difference between the darkest and brightest parts.
Set the Brightness First to Avoid Crushing Blacks
I remember the first time I tweaked my brightness. I turned it up high, expecting more vibrancy, but shadows started to look gray and lifeless. To fix this, I set my brightness to a level where black areas appeared deep and true black, without losing detail. A good trick is to use a scene with dark shadows—if blacks look gray or have crush detail, dial down the brightness until blacks are rich and detailed. This step is crucial because if blacks aren’t properly set, the overall picture can look washed out or too dark.
Adjust Contrast for Dynamic Range and Scene Impact
Next, I focused on contrast. Increase contrast until bright areas like snow or reflections look vivid but not blown out. For example, I found that setting contrast too high made bright objects bleed into darker areas, reducing detail. Lowering contrast brought back clarity. Think of contrast as the volume knob for your TV’s picture—turn it up enough to make scenes pop, but not so much that details get lost. Remember, high contrast enhances HDR effects and makes everything feel more immersive.
Fine-Tuning with Test Patterns and Real Content
To get precise, I used test patterns available through my TV’s settings menu or online resources. These patterns help identify the perfect balance—look for deep blacks and bright whites without clipping. I also watched scenes I knew well, such as a sunset or a dark alley, to see how adjustments affected real content. This iterative process is similar to tuning a musical instrument—small tweaks can make a huge difference. For more advanced tips, check out this contrast control guide.
Leverage HDR Brightness Controls for Vivid Scenes
HDR content demands a different approach. I found that boosting HDR brightness and contrast enhances vividness without sacrificing detail. Many Mini LED TVs have dedicated HDR settings—adjust these based on the scene. For example, in a bright outdoor scene, increase HDR brightness to improve visibility, and tweak contrast to make colors pop. For detailed instructions, I recommend reading this HDR brightness mastery guide.
Remember the Context of Your Viewing Environment
Ambient lighting plays a role too. If your room is dark, lower your contrast slightly so blacks aren’t crushed. In bright rooms, increasing contrast can help combat glare and maintain vibrancy. I learned this the hard way when I watched a movie in a sunny room—my contrast was too low, washing out the picture. Adjusting these settings based on your environment ensures optimal viewing at all times. Want more insights? Check out this comprehensive guide on brightness and contrast control.
Final Tips for Consistent Results
Always save your custom settings once you find the perfect balance. Revisit and tweak periodically, especially when viewing different content types. Remember, your goal is to create a picture where blacks are deep, whites are bright, and all details are visible. With practice, adjusting your Mini LED TV’s brightness and contrast becomes second nature, turning your living room into a cinematic experience. For advanced calibration techniques, explore this high-brightness contrast optimization article.
Many home entertainment enthusiasts fall into traps when optimizing their Mini LED, QLED, or HDR TVs, often based on misconceptions that can hinder picture quality. Let’s dig deeper into the nuances that most people overlook, and I’ll share some expert insights to help you avoid costly mistakes.
Why Increasing Brightness Alone Won’t Guarantee Better HDR Performance
It’s a common belief that cranking up HDR brightness will make scenes more vivid. However, this can be misleading. Excessive brightness can cause clipping, where bright details like reflections or firelight lose their nuance and appear blown out. True HDR mastery involves balancing peak brightness with contrast control, ensuring highlights are impactful without sacrificing shadow detail. According to experts from HDR brightness guides, the real secret is dynamic range management, not just maxing out brightness levels.
The Hidden Trap of Uniform Contrast Settings
Many users set their contrast to maximum, assuming this enhances all content equally. But this often results in loss of detail in both dark and bright scenes. Modern Mini LED and QLED TVs are equipped with local dimming, which dynamically adjusts contrast areas. If contrast is set too high globally, it can cause blooming and halo effects around bright objects. Instead, advanced users fine-tune contrast in zones, leveraging the TV’s local dimming features. For a step-by-step approach, see our contrast control guide.
How Many Think HDR Is Just About Brightness Levels
This is a myth that can significantly diminish your viewing experience. HDR quality depends heavily on the tone-mapping process, which adapts content to your display’s capabilities. Many TVs have underwhelming tone-mapping, making scenes look dull even if your peak brightness is high. Investing in a TV with advanced HDR tone-mapping and understanding how to calibrate it can unlock truly stunning visuals. To master this, check out HDR tone-mapping techniques.
Have you ever fallen into this trap? Let me know in the comments. The key to unlocking your TV’s potential is understanding these nuances and applying them carefully. By doing so, you transform your viewing experience from average to cinematic quality, right in your living room.
Once you’ve fine-tuned your Mini LED TV’s brightness and contrast to achieve stunning visuals, it’s crucial to keep these settings optimized over time. Regular maintenance ensures your TV continues to deliver vibrant HDR scenes and deep blacks without drifting from your ideal calibration. But how do you maintain these settings effectively, especially as technology evolves and your viewing environment changes?
Tools I Recommend for Consistent Performance
To keep your Mini LED TV performing at its best, I rely on a combination of professional calibration tools and software. One of my go-to devices is the CalMAN Color Calibration Software. This software, paired with a high-quality colorimeter like the X-Rite i1Display Pro, allows me to perform precise adjustments to gamma, white balance, and contrast curves. I use it periodically—every few months—to ensure my display remains within the optimal range for HDR content. The reason I prefer this combo is its accuracy; consumer-grade tools often lack the precision needed for maintaining high contrast and brightness levels.
Additionally, I utilize test patterns from online sources and dedicated calibration discs such as the Disney WOW: World of Wonder. These provide standardized images for verifying black levels, peak brightness, and color accuracy. I run these tests after any major external changes—like room lighting adjustments or firmware updates—to confirm my settings still hold up.
How do I maintain my display’s brightness and contrast over time?
Maintaining your Mini LED TV’s picture quality over the long term involves more than just periodic calibration. Regularly cleaning your screen with a soft, lint-free cloth prevents dust buildup that can affect light emission. Also, avoid leaving static images on screen for extended periods, as this can cause burn-in or image retention, especially in high-brightness scenes. Using screen savers or enabling pixel shifting features can help mitigate these issues.
Firmware updates from the manufacturer can also enhance local dimming algorithms and HDR tone-mapping, which directly impact brightness and contrast. I recommend checking for updates via the official support site or your TV’s settings menu every few months. This way, you benefit from ongoing improvements without additional hardware adjustments.
Looking Ahead: The Future of Visual Calibration and Maintenance
As display technology continues to advance, future tools will likely become more automated and user-friendly. AI-driven calibration apps are already emerging, promising near-professional precision with minimal effort. Moreover, cloud-based calibration services might offer remote adjustments, making maintenance even more accessible. Staying ahead of these trends will ensure your investment remains top-notch for years to come.
Ready to Take Your Maintenance to the Next Level
Start by investing in a quality colorimeter like the X-Rite i1Display Pro and regularly running calibration checks. This small step can significantly extend the lifespan of your perfect picture, especially for HDR content where contrast and brightness are paramount. Remember, consistent care and the right tools are key to preserving your TV’s stunning visuals for the long haul.

After spending countless hours tweaking my Mini LED TV settings, I realized that the real secret lies in the nuanced balance of brightness and contrast. These settings are not just technical details—they are the key to unlocking a truly immersive cinematic experience at home. My lightbulb moment was discovering how local dimming and HDR calibration can dramatically elevate picture quality, making every scene feel vibrant and natural.
The Hardest Lesson I Learned About Mini LED and Contrast Control
- Overestimating Brightness can wash out details in highlights. I once set my HDR brightness to maximum, only to find that bright skies and reflections lost their depth. The lesson: more isn’t always better. Proper calibration involves finding that perfect peak that enhances vividness without clipping.
- Ignoring Local Dimming reduces the benefits of your Mini LED’s technology. I used to set contrast globally to maximum, which caused halo effects around bright objects. Learning to fine-tune contrast zones helped me eliminate blooming and improve overall clarity.
- Neglecting Room Environment affects calibration. A bright room made my blacks look gray, while a dark room intensified contrast. Adjusting settings based on ambient light ensures consistent picture quality, and this insight transformed my daily viewing experience.
My Essential Toolkit for Consistent Visuals
- X-Rite i1Display Pro: This colorimeter provides precise calibration of contrast and brightness, essential for maintaining peak picture quality over time. I trust it because of its accuracy and reliability.
- Test Patterns and Calibration Discs: Resources like Disney WOW and online test images help verify black levels and peak brightness, ensuring my adjustments are spot-on. Regular testing keeps my settings optimized.
- Firmware Updates: Staying current with manufacturer updates improves local dimming algorithms and HDR tone-mapping, directly impacting contrast and brightness consistency. Checking for updates every few months is a must.
Your Turn to Elevate Your Viewing Experience
By understanding and applying these insights into your Mini LED TV’s brightness and contrast, you can enjoy visuals as vivid and dynamic as those in theaters. Remember, the key is patience and fine-tuning—your perfect picture awaits. Embrace the process, and soon you’ll wonder how you ever watched without these calibrated settings.


Leave a Reply