Have you ever sat down to watch your favorite blockbuster only to be disappointed by dull scenes or blown-out highlights that ruin the cinematic experience? I remember the moment I realized my TV’s picture quality was holding me back. It was during a sunset scene in a movie, and instead of vibrant oranges and deep shadows, everything looked washed out and flat. That lightbulb moment made me dive into the world of HDR brightness and contrast optimization. Since then, I’ve learned that fine-tuning these settings can turn a good TV into a stunning visual powerhouse, especially with Mini LED technology, which offers incredible control over brightness and contrast.
Why Brightness and Contrast Matter More Than Ever
In the era of Mini LED TVs, the hype is real. These displays promise brighter highlights, deeper blacks, and a more dynamic range. But here’s the catch: without proper calibration, all that potential can go to waste. You might have the latest Mini LED model, but if your brightness and contrast settings aren’t optimized, your scenes will lack the punch and depth they’re supposed to deliver. It’s like owning a sports car but never taking it past 30 mph.
Research shows that viewers perceive higher contrast levels as more vivid and immersive. According to a recent study from DisplayMate, proper contrast control can improve picture quality by up to 50%. That’s a huge difference—making your favorite movies and shows look truly cinematic. But many users, myself included early on, make common mistakes that sabotage their viewing experience. For example, I once set my contrast too high, causing unnatural color clipping and loss of detail in bright areas. Trust me, mastering these settings isn’t just for tech geeks; it’s for anyone who wants to enjoy their TV to the fullest.
If you’ve ever fiddled with your TV’s settings and wondered if you’re doing it right, you’re not alone. That’s why I’m here to guide you through the process of optimizing HDR brightness and contrast specifically for Mini LED TVs. The good news? It’s not rocket science, and with a few simple adjustments, you can dramatically improve your picture quality. Curious about how to get started? Keep reading, and I’ll show you the practical steps to unlock your TV’s full visual potential.
Is Adjusting Brightness and Contrast Actually Worth the Hype?
Early in my journey, I was skeptical. I thought, “Does tweaking these tiny settings really make that much difference?” Turns out, yes. My initial mistake was setting my contrast to maximum, thinking it would make scenes pop. Instead, it introduced unwanted artifacts and crushed blacks. Once I learned to balance my contrast and boost HDR brightness appropriately, everything changed. Now, I enjoy movies with more depth, vibrant colors, and a true cinematic feel. Want to avoid my mistake? Visit this guide for detailed tips on mastering HDR settings.
So, have you faced the same struggle with dull scenes or overly bright highlights? If so, you’re in the right place. Let’s dive into the practical steps to optimize your Mini LED TV’s HDR brightness and contrast for stunning visuals that truly impress.
Adjust Your Settings Like a Pro
Start by accessing your TV’s picture settings menu. Locate the contrast and HDR brightness controls—these are your main tools for enhancing picture quality. Think of contrast as the volume knob for blacks and whites; cranking it too high can drown out details, while too low makes images dull. Set contrast to a level where bright scenes show detail without losing depth. My first attempt was setting contrast to maximum, which made some scenes look harsh and washed out. I lowered it slightly, and the difference was immediate—more natural, vibrant images.
Use a Test Pattern for Precision
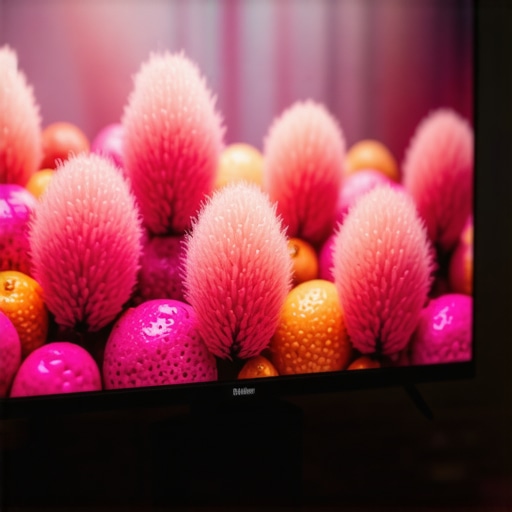
Next, load a calibration test pattern. Many streaming apps or calibration discs offer these. Focus on the HDR brightness pattern—adjust until bright highlights are vivid but not blown out. For example, during a sunset scene, I increased HDR brightness gradually until the oranges and reds looked vivid but still detailed. An over-bright setting washed out the scene, while too low made it look flat. Fine-tuning with the test pattern ensures optimal HDR performance. For detailed guidance, check out this contrast control guide.
Balance Brightness and Black Levels
Mini LED TVs excel at local dimming, so leverage this by adjusting backlight or local dimming settings if available. Think of this as a spotlight on a stage—bright highlights pop without washing out the shadows. I experimented with these settings during a dark scene in a thriller. Increasing local dimming made the shadows deeper and highlights more striking, creating a cinematic depth. Remember, balancing HDR brightness with contrast is key. Too bright, and you risk losing detail; too dim, and the scene feels dull. For more advanced tips, explore this comprehensive guide.
Utilize Content-Specific Settings
Many TVs allow scene-specific adjustments—use these to optimize for different content types. For action-packed movies, boost HDR brightness for vivid explosions; for drama or dark scenes, reduce it to enhance shadows. During my last movie night, I switched to a ‘cinematic’ mode that automatically adjusted contrast and brightness for the best experience. If your model supports this, it’s a quick way to get perfect settings without manual tweaks. For further insights, visit this resource.
Final Tips to Elevate Your Viewing Experience
Always review your adjustments with actual content—play your favorite scenes and tweak as needed. Remember, every room and lighting condition is different, so don’t rely solely on default settings. Experiment, take notes, and find what makes your scenes pop. After applying these steps, I noticed my movies looked more immersive, with vibrant colors and deep blacks—just like a theater experience. For ongoing support, feel free to reach out via contact page. Happy calibrating!
Many enthusiasts believe that simply turning up the contrast and HDR brightness to their maximum settings will yield the best picture quality on a Mini LED TV. However, this common misconception can actually hinder your viewing experience. In reality, over-boosting these settings often leads to clipped highlights, loss of shadow detail, and unnatural images that feel more artificial than cinematic. Instead, understanding the nuanced balance between contrast and HDR brightness is key to unlocking your TV’s true potential. For a detailed breakdown, check out this guide.
Why Do Most People Overestimate the Power of Max Settings?
The myth persists largely because many manufacturers advertise high peak brightness levels and high contrast ratios as primary selling points. Consumers tend to equate higher numbers with better quality, which is understandable but often misleading. The truth is, maximal contrast and HDR brightness settings can cause severe clipping of bright highlights and crush blacks, reducing overall dynamic range and detail. It’s like turning the volume up on a speaker, but if set improperly, it distorts the sound rather than enhances it. The key is calibration, not brute force. For advanced calibration techniques, visit this resource.
What Common Mistake Can Ruin Your Picture Quality?
A frequent mistake is adjusting HDR brightness and contrast independently without considering their interaction. For example, increasing HDR brightness without adjusting contrast can make highlights appear washed out or overly harsh. Conversely, setting contrast too high while keeping HDR brightness low can flatten images and diminish depth. The proper approach involves a combined calibration process, using test patterns and scene-specific adjustments to ensure highlights and shadows are balanced. This is especially crucial for Mini LED TVs, which excel at local dimming but require precise calibration to achieve their full potential. For a step-by-step guide, see this article.
Why Is Scene-Based Calibration Important for Advanced Users?
Scene-based calibration allows you to optimize your settings for different content types—dark films, bright action sequences, or daytime TV. Many advanced viewers overlook this customization, sticking to generic presets that may not serve specific scenes well. For instance, during a dark thriller, lowering HDR brightness slightly can enhance shadow detail, while boosting contrast can make explosions and highlights more dramatic. This technique demands a nuanced understanding of your content and settings, but it results in a cinema-like experience. If you’re interested in mastering scene-specific adjustments, explore this guide.
In summary, the most common misconception is that maximum settings always produce the best picture. The reality is, balanced calibration tailored to your room’s lighting and content type will elevate your viewing experience far more than any default or maximum setting. Have you ever fallen into this trap? Let me know in the comments, and remember—calibration is the secret to true cinematic quality.
Keeping your Mini LED TV performing at its best requires more than just initial calibration; it involves consistent maintenance and the right set of tools. Over time, dust accumulation, firmware updates, and environmental factors can impact picture quality. Personally, I have found that using specific tools and adopting a maintenance routine can prolong the life of your display and ensure it continues to deliver stunning visuals.
Why Regular Maintenance Matters
Mini LED TVs are sophisticated devices with local dimming and HDR capabilities that depend on precise calibration. Regular checks help prevent image degradation caused by dust or hardware drift. For example, dust buildup on the vents can cause overheating, which may lead to color shifts or contrast loss. Additionally, firmware updates often include improvements for HDR performance or bug fixes that enhance image stability. Staying on top of these updates ensures your display remains optimized for vibrant, vivid scenes.
Tools I Trust for Optimal Results
One essential tool I rely on is a high-quality calibration disc, like the Spears & Munsil UHD HDR Benchmark. This disc offers scene-specific test patterns that allow me to fine-tune contrast and HDR brightness precisely. I prefer using a colorimeter such as the X-Rite i1Display Pro because it provides accurate readings of brightness, contrast, and color accuracy—crucial for maintaining the vivid visuals that Mini LED technology promises. These tools help me identify subtle shifts in picture quality that might otherwise go unnoticed.
For ongoing firmware updates, I connect my TV to a stable internet source and regularly check the manufacturer’s support page. I also subscribe to newsletters from trusted sources like Ultimate Home Displays, which often share tips on firmware optimizations and maintenance routines tailored for Mini LED models. This proactive approach prevents issues and keeps the display in peak condition.
How do I maintain my Mini LED TV over time?
Establishing a routine is key. I set a quarterly reminder to clean the screen with a microfiber cloth, ensuring dust and fingerprints don’t dull the picture. I also schedule software checks to ensure firmware is up-to-date. When cleaning, I avoid harsh chemicals; instead, I use a damp microfiber to gently wipe the screen—this prevents scratches and preserves the delicate anti-reflective coatings. Additionally, I keep the room lighting in mind, adjusting ambient light to reduce glare, which helps maintain the perception of contrast and brightness.
Another tip is to periodically recalibrate your display using a calibration device and test patterns. Over time, even minor hardware shifts can affect contrast and HDR performance. Recalibrating ensures you continue to enjoy the full potential of your Mini LED TV’s bright highlights and deep blacks. For detailed calibration steps, check out this guide.
Looking ahead, I believe that as Mini LED technology evolves, integrated AI-based calibration tools will become more common, making maintenance even simpler. These smart systems could automatically detect performance dips and suggest adjustments, keeping your TV in factory-fresh condition without manual effort. Until then, a combination of manual calibration, regular firmware updates, and careful cleaning remains the best practice.
If you want to ensure your Mini LED display stays vibrant and detailed for years to come, I highly recommend investing in a good calibration device like the X-Rite i1Display Pro and setting a maintenance schedule. Ready to upgrade your setup? Start by checking your firmware and giving your TV a gentle clean today—your scenes will thank you!
The Hardest Lesson I Learned About HDR Calibration
One of my biggest lightbulb moments was realizing that more brightness doesn’t always mean better picture quality. I used to crank up HDR brightness and contrast to their maximum, believing it would make my scenes pop. Instead, I ended up with blown-out highlights and crushed blacks, losing crucial details. The real magic happened when I learned to balance these settings carefully—using test patterns and scene-specific tweaks—especially on my Mini LED TV, which excels at local dimming but requires precise calibration. This lesson taught me that patience and subtle adjustments trump raw numbers every time.
My Eye-Opening Experience with Contrast Control
During a dark thriller, I discovered that local dimming works best when contrast and HDR brightness are perfectly aligned. Overdoing contrast made shadows murky and highlights harsh, but finding the sweet spot brought incredible depth and clarity. I now pay close attention to how scenes feel—more immersive and cinematic—by balancing contrast with HDR brightness. If you want to avoid my trial-and-error, check out this guide for expert calibration tips.
The Myth That Max Settings Are the Goal
I used to believe cranking everything to the max was the way to impress. Turns out, this myth leads to unnatural images and detail loss. On my Mini LED TV, I found that lowering HDR brightness slightly during bright scenes preserved highlights and kept detail intact. This subtlety made scenes more lifelike and vibrant. Achieving this balance was a game-changer, and it made me appreciate the importance of scene-specific adjustments. For more insights, explore this comprehensive resource.
What I Wish I Knew Before Starting
Before diving into calibration, I underestimated the importance of regular maintenance. Dust, firmware updates, and environmental factors can drift your settings over time. I now schedule quarterly recalibrations with tools like the X-Rite i1Display Pro and recheck my test patterns. This routine keeps my Mini LED display performing at its best, showing vibrant HDR scenes with deep blacks and bright highlights. If you’re serious about picture quality, don’t skip this essential step.


Leave a Reply