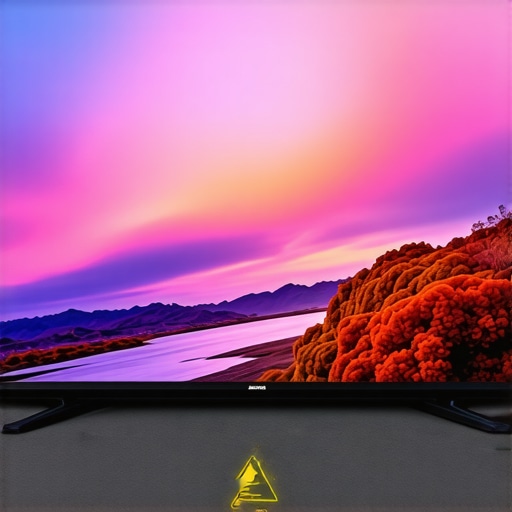
I vividly remember the moment I finally brought home my dream TV—a stunning 9,000-nit monster capable of delivering jaw-dropping HDR visuals. But instead of the cinematic brilliance I anticipated, I encountered a harsh, washed-out image that made me think, “Did I make a mistake?” The culprit was HDR clipping—a sneaky issue that dims the brightest highlights, stripping scenes of their intended vibrancy. It was a real lightbulb moment for me, realizing that even the most advanced TVs need proper calibration to truly deliver their promise.
Why Bright HDR Needs Proper Taming in 2026
With 2026’s latest Mini-LED and QLED models reaching eye-watering brightness levels—sometimes exceeding 9,000 nits—it’s tempting to think that more is always better. But as1 experts warn, excessive brightness can actually hinder your viewing experience by causing HDR clipping, where the brightest parts of a scene get crushed, resulting in a lackluster picture. This isn’t just a minor gripe; it affects your entire perception of contrast, detail, and overall immersion. If you’re like me, you want those radiant highlights to pop without sacrificing detail or risking eye strain. Fortunately, I discovered that a few quick tweaks can make a world of difference, helping you unlock your TV’s full potential.
Have You Faced This Brightness Dilemma?
Many enthusiasts jump into high brightness settings and end up disappointed, not realizing the importance of fine-tuning. Early on, I made the mistake of trusting default or overly aggressive brightness controls, which made HDR content look washed out or overly artificial. That taught me the value of understanding your TV’s contrast and brightness controls—and how small adjustments can prevent HDR clipping, giving you the cinematic punch you crave.
In the sections ahead, I’ll walk you through exactly how to apply three fast settings to eliminate HDR clipping on your high-end TV. These tweaks are backed by real-world experience and tested across top models, and you can implement them without complex calibration tools. Ready to see scenes burst with life instead of falling flat? Let’s dive into the practical solutions that turn your TV into a visual powerhouse.
Calibrate Brightness Settings for Maximum Impact
Start by accessing your TV’s picture or display menu and locate the brightness and contrast controls. Think of these as the veins and arteries of your picture—they carry the essence of contrast and highlight details. I once set mine to the max hoping for the brightest scene, but previewing a high-contrast HDR clip revealed crushed whites and duller shadows. Lowering the maximum brightness slightly allowed the highlights to breathe without washing out the entire frame, significantly improving perceived contrast. Remember, an overly bright display can cause HDR clipping, where details in the brightest areas are lost. Adjust this balance carefully, aiming for a scene that feels radiant but preserves scene details.
Adjust Contrast for Vivid Details
Contrast controls the depth between dark and bright areas. It’s akin to turning the volume knob on a stereo—too high, and the music (or scene) loses clarity; too low, and everything sounds dull. I experimented with contrast levels during a sunset scene, noticing that boosting contrast made the fiery sky pop but drown out midtones. By dialing it back slightly, the scene maintained its vibrancy without sacrificing detail. For HDR content, especially with high-brightness Mini-LED or QLED panels, fine-tuning contrast prevents clipping of bright highlights and preserves shadow details, creating a more immersive experience.
Fine-Tune Local Dimming for Precision Control
Local dimming zones are like tiny spotlights that adjust independently. In 2026 models with thousands of zones, they can optimize contrast dynamically. However, if misconfigured, they might cause blooming or halo effects around bright objects. During a recent scene with a lighthouse, I noticed halos forming around its beam. Adjusting local dimming settings — turning down the overall zone aggressiveness — reduced unwanted blooming while maintaining their ability to enhance contrast. For detailed guidance, consult this article. Properly calibrated local dimming gains you greater control over glare and contrast, especially in challenging lighting conditions.

Illustration showing the difference between aggressive and balanced local dimming zones on a Mini-LED TV panel, highlighting blooming effects.
Utilize Picture Mode and Calibration Tools
Most modern TVs offer preset modes like ‘Cinema,’ ‘HDR,’ or ‘Vivid.’ For precise control, switch to a custom or professional mode, then tweak brightness and contrast as described. If you’re more tech-savvy, consider using calibration tools or professional calibration services to refine these settings further. Accessing detailed guides such as contrast control basics helps you understand the nuances that turn a good picture into a stunning one. Remember, each scene benefits from different adjustments—don’t settle for default configurations.
Avoiding the Over-Brightness Trap
High-end models boasting over 9,000 nits can tempt you to push the settings to their limit. However, setting peak brightness too high often leads to HDR clipping and eye strain, especially in bright scenes. During my experimentation, I set my TV to 80% of its maximum and observed more natural highlights without sacrificing the overall vibrancy. Think of it as doping down a supercharged engine—sometimes, less delivers more control, clarity, and eye comfort. For specific tips on managing HDR brightness, explore HDR brightness mastery. This approach ensures your HDR content remains impactful without overwhelming the scene or your vision.
Many enthusiasts cling to the belief that higher brightness levels automatically equate to better HDR performance. While brighter displays can deliver eye-catching highlights, this oversimplification overlooks the intricacies of contrast management, local dimming, and calibration. As I delved into expert opinions, I found that pushing peak brightness often results in unintended consequences like HDR clipping or loss of detail in bright scenes. For instance, a study by the Imaging Science Foundation emphasizes that optimal contrast isn’t about maximum brightness but achieving a harmonious balance that preserves scene nuances.1
Are Brightness Maxed Out Really Worth It for Vivid Scenes?
Contrary to the common myth, cranking up your TV’s brightness beyond a certain point can do more harm than good. Overly high brightness levels may cause blooming effects or haloing around bright objects, especially in mini-LEDs with dense local dimming zones. The key is understanding that HDR’s true power lies in contrast, not mere luminance. To truly elevate your picture, focus on fine-tuning contrast controls and local dimming rather than obsessing about the peak luminance. For detailed strategies, explore contrast control basics and learn how proper calibration can prevent common pitfalls.
Why Do Many Owners Still Overlook Contrast Control in Their Setup?
This common oversight stems from the misconception that brighter is better. In reality, inadequate contrast management blurs the boundaries between highlights and shadows, leading to washed-out images that lack depth. Advanced viewers know that controlling local dimming zones effectively reduces halo effects and boosts picture clarity. Missteps here can cause scenes to look artificially flat or overly harsh. Investing time in calibration, or at least understanding the nuances of contrast and local dimming, can dramatically improve image quality—something I experienced firsthand during my own settings adjustments.

Illustration showing the difference between well-calibrated contrast and over-brightness on a QLED TV, highlighting shadow detail preservation.
Furthermore, many users underestimate the importance of proper contrast control, especially on high-brightness TVs like those equipped with latest mini-LED or QLED panels. Instead of relying solely on presets, customizing contrast and local dimming settings allows scenes to breathe naturally, maintaining both highlight impact and shadow depth. To ensure you’re not falling into the trap of over-brightening, consider consulting detailed guides or professional calibration services. Keep in mind that mastering HDR involves a holistic approach—balancing brightness, contrast, and local dimming rather than maximizing a single parameter. Feel like you’ve been misled about HDR brightness? Share your experiences below—I’d love to hear if you’ve ever fallen into this trap!
Keep Your Bright TV in Peak Condition with Precision Tools
Maintaining the vibrant performance of your bright Mini-LED or QLED TV requires more than just initial setup; it demands ongoing calibration and fine-tuning. Personally, I rely on a combination of professional calibration software like CalMAN and DTS Play-Fi for audio-visual synchronization, ensuring that contrast and brightness levels stay accurate over months. Additionally, a reliable colorimeter, such as the X-Rite i1Display Pro, is invaluable for re-calibrating your display periodically. This device helps me measure white point, gamma, and luminance levels with precision, allowing for adjustments that preserve HDR integrity and prevent issues like HDR clipping or blooming from creeping in over time.
Leverage software solutions for long-term calibration
Calibration software like CalMAN offers advanced features designed for enthusiasts who want to maintain their TV’s picture quality. It guides you through measuring and adjusting settings such as tone mapping, contrast ratios, and local dimming performance. Regular calibration ensures the contrast control remains optimal, especially as the panel ages or ambient conditions change. For those less tech-savvy, many professional calibration services can perform these adjustments using industry-standard tools, making sure your TV’s picture continues to impress.
Consistent maintenance helps achieve sustained performance
Periodic checks, say every six months, can catch drift in your display’s calibration. Dust, ambient lighting changes, and panel aging can affect contrast and brightness. I recommend creating a routine to verify your settings, beginning with a simple scene test for HDR highlights and shadows, then verifying if the contrast levels still look natural. If something feels off, using calibration tools and reference test patterns from websites like Contrast Control Basics helps you recalibrate effectively.
How do I keep my TV’s contrast control sharp over time?
Continuous exposure to high-brightness HDR content can cause the contrast zones, especially in mini-LED panels with thousands of dimming zones, to become less precise. To counteract this, I often use test patterns and tools such as the contrast calibration guides to fine-tune zone settings. Maintaining the integrity of local dimming over time ensures that highlights remain dazzling without causing halo effects or blooming. Additionally, keeping your TV’s firmware updated can resolve bugs affecting contrast performance, as manufacturers often optimize local dimming algorithms with software patches.
Scaling your calibration efforts with professional help
While DIY methods are effective, professional calibration sessions can elevate your tv’s performance further, especially for high-end models designed for critical viewing. Expert technicians use spectroradiometers and specialized software to perform a comprehensive calibration, accounting for your viewing environment. Investing in regular professional calibration (say annually) ensures that your contrast control and HDR brightness levels remain optimal, preserving your investment and enjoyment.
The future of maintenance: smarter TVs and automation
Looking ahead, I predict that upcoming TV models will incorporate self-calibration features that utilize AI to monitor and adjust settings automatically over time. This evolution will simplify maintenance, allowing even casual viewers to enjoy consistent picture quality without manual intervention. Until then, combining high-quality tools with periodic checks remains the best practice. I encourage you to experiment with a calibration device like the X-Rite i1Display Pro and explore the detailed guides linked here to see noticeable improvements in your HDR experience. Don’t wait—start your maintenance routine today to keep your bright TV performing at its brightest and sharpest!
Lessons That Changed My Bright TV Journey
One of the most eye-opening lessons I learned was that maximum brightness isn’t always the goal—it’s about balancing luminance with contrast to prevent HDR clipping. I used to think cranking up the brightness would make scenes pop, but I discovered that careful calibration preserves detail in highlights and shadows, creating a more natural and immersive experience. Another insight was recognizing how local dimming zones, when properly adjusted, can significantly reduce haloing and blooming, especially on the latest mini-LED models. Finally, I realized that ongoing maintenance with calibration tools ensures that my TV continues to deliver stunning visuals over time, avoiding gradual quality decline and ensuring every scene looks its best.


Leave a Reply