Have you ever watched a movie or a sports game on your high-end TV and felt like the colors were shouting at you? I remember the first time I cranked up my new mini LED TV’s HDR settings, expecting stunning realism, only to be greeted by an oversaturated, almost cartoonish image that made me reach for the remote in frustration. That visceral moment of disappointment was a lightbulb—if I wanted the cinematic experience I was craving, I needed to understand how to fine-tune those brightness and contrast settings properly.
Why Over-Brightening Is Ruining Your Movie Nights
It’s a common trap. The industry pushes the idea that higher HDR brightness numbers mean better picture quality, but more often than not, it leads to washed-out images and a loss of depth. I learned this early on after making the mistake of setting my TV to the maximum brightness without adjusting contrast or local dimming first. The result? Bright scenes looked painfully artificial, colors lost their nuance, and shadow details disappeared into an unrecognizable gray mush. That’s when I discovered that mastering HDR isn’t just about boosting numbers—it’s about balance.
Today, I want to share the four critical settings I’ve used to restore realism and immersion to my TV viewing. These adjustments have transformed my experience, and I believe they can do the same for you. Whether you’re grappling with HDR clipping, haloing, or just too much glare, understanding these settings can help you get the picture you deserve. According to a recent HDR brightness guide, improper calibration can significantly diminish your viewing pleasure even on the most advanced screens.
Is Over-Adjusting HDR Settings Actually Worth the Hype?
In my early days of tweaking settings, I often thought more brightness must mean better images, leading me down a rabbit hole of overcompensation. I mistakenly believed cranking up the peak brightness would highlight every detail, but I overlooked how contrast and local dimming influence the overall picture. Trust me, I’ve learned that subtlety beats saturation every time.
Are you tired of your TV’s HDR looking overly bright or washed out? Have you faced the frustration of losing picture depth despite investing in high-end models? You’re not alone. By applying the right combination of the four settings I’m about to reveal, you can finally enjoy the vivid, lifelike images your TV is capable of delivering. Ready to transform your viewing experience? Let’s dive into the details that will make your HDR content truly pop without the pain of over-brightening.
Adjust Your Peak Brightness Carefully
Think of your TV’s brightness like a car’s headlight—more isn’t always better. When I first tried maxing out my mini LED TV’s HDR settings, the picture looked dazzling but oversaturated and unnatural. To correct this, I opened the HDR brightness guide and dialed down to a level where highlights retained detail without blowing out. Remember, setting peak brightness too high causes “blooming”—that halo around bright objects—damaging image clarity. Start by reducing peak brightness incrementally and compare the scene results until highlights look natural, mimicking real-world lighting.
Balance Contrast for Depth
Contrast acts like the ingredients in a recipe—too much and the dish becomes unpalatable; too little and it’s bland. I once struggled with over-contrast, making dark scenes look flat and gray. Using contrast controls, I increased the blacks to deepen shadows, then decreased whites slightly to prevent crushing bright areas. This balancing act preserves detail across the spectrum, giving scenes real depth. Adjust contrast slowly, toggling between settings and scenes, until you notice shadow detail and highlights coexist without losing fidelity.
Fine-Tune Local Dimming Zones
Imagine the TV screen as a city with districts that turn on or off independent lights; more zones mean better black levels and less haloing. I experimented with local dimming settings, increasing zones to improve blacks, but found that too many zones in a 2026 model can cause “blooming” around bright objects. Starting with a moderate setting, I gradually increased zones using settings from zone control tactics, watching for halos or blooming artifacts. This process helps you achieve deep blacks without distracting light bleed—crucial for cinematic immersion.
Prevent Over-Boosting by Testing Scenes
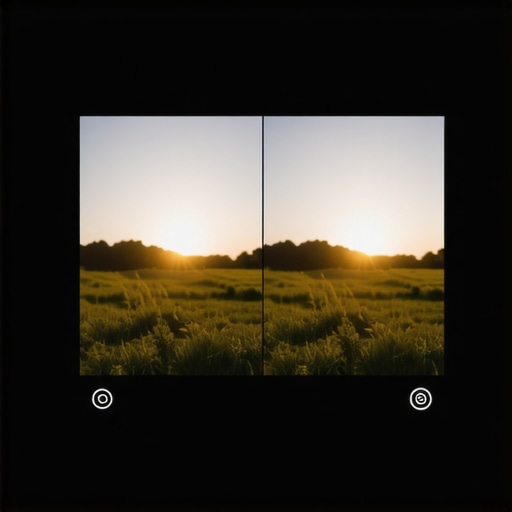
Once initial adjustments are done, I tested a variety of content—bright daytime scenes, dark cinematics, and high-contrast HDR clips. This real-world testing exposes issues like HDR clipping or excessive glare. I used quick settings from HDR clipping fixes to fine-tune brightness handling during peak moments. The key is to compare before-and-after images, ensuring contrast isn’t sacrificed and that highlights remain natural. This iterative approach guarantees your adjustments hold across diverse content, equipping your TV to perform optimally whether watching movie classics or fast-paced sports.
Make Small Micro-Adjustments for Perfection
Just as a chef tweaks seasoning one pinch at a time, small increments in settings can vastly improve picture quality. I found that adjusting brightness and contrast in 1-2% steps, rather than huge jumps, helped me avoid overcorrection. Pay special attention to preview scenes with bright backgrounds or dark shadows—these are revealing of your true calibration. Use tools and test patterns accessible through your TV settings or third-party calibration videos to guide your micro-adjustments. patience here is vital; a little experimentation leads to the seamless, realistic imagery that’s the goal, aligning with best practices outlined in mini LED TV optimization tips.When it comes to high-end displays, many enthusiasts and casual viewers alike fall into common misconceptions that hinder their ultimate viewing experience. Despite the impressive specs of QLED and Mini LED TVs, there’s a misconception that more brightness, higher contrast, or complex settings automatically equate to better picture quality. Let’s dig deeper into why this isn’t always the case and highlight some nuanced truths that are often overlooked.
Why does maximizing HDR brightness sometimes backfire?
Everyone tells you to crank up HDR brightness for vibrant highlights, but in my experience, exceeding certain levels can introduce issues like HDR clipping and haloing. High brightness isn’t inherently better if your contrast and local dimming aren’t calibrated correctly. Studies, such as those from the HDR brightness guide, emphasize that balance is key—overdoing it diminishes shadow detail and causes unnatural glow around bright objects. A common myth is that brightness alone determines cinematic quality, but in reality, contrast control and local dimming finesse play equally vital roles. 
Beware of the trap of obsessively increasing brightness in pursuit of HDR effects. Instead, focus on how the TV handles highlight roll-off and local dimming zones. Over-boosted brightness can lead to blooming, where bright objects create halos, destroying the scene’s realism. Achieving a natural-looking HDR experience requires adjusting peak brightness sensibly, then refining contrast and local dimming to support those highlights without sacrificing shadow richness. Contrast control is your best friend here.
Is contrast control overstated as a tool for better images?
This is a common trap, especially when users focus solely on increasing contrast settings. Higher contrast can indeed deepen blacks and enhance scene depth, but only if your local dimming zones are optimized. Over-adjusting contrast without considering the zone behavior often results in crushed blacks or blown-out whites, which hardly improves the viewing experience. Advanced calibration involves balancing contrast with luminance and ensuring that the local dimming dynamically adapts to each scene—something many miss. According to industry experts, techniques like fine-tuning local dimming zones and avoiding aggressive contrast boosts can significantly improve image fidelity without resorting to brute-force adjustments. Zone control tactics can help you achieve this precision.
Have you ever fallen into this trap? Let me know in the comments. Remember, understanding these hidden nuances can elevate your viewing, preventing you from making costly mistakes and unlocking your TV’s full potential.
Why Regular Calibration and Maintenance Matter for Your Bright TV
Maintaining the optimal performance of your high-end QLED or Mini LED TV requires more than just initial setup. Over time, settings can drift due to firmware updates, environmental changes, or even usage patterns. Regular calibration ensures that your HDR brightness, contrast, and local dimming zones continue to deliver the vibrant and detailed images you’re aiming for. Investing in proper maintenance extends the lifespan of your TV and preserves the cinematic quality that makes your viewing experience truly immersive.
Tools I Recommend for Sustained Performance
One of my go-to tools is the CalMAN calibration software. I personally use CalMAN because it offers precise test pattern analysis and color accuracy verification that surpasses built-in TV settings. Paired with a dedicated colorimeter like the X-Rite i1Display Pro, I can fine-tune contrast control and HDR brightness with confidence. These tools help me identify pixel-level inconsistencies and ensure my local dimming zones are optimized — vital for avoiding haloing or blooming issues, especially in scenes with high contrast.
Additionally, I rely on test patterns from HDR calibration guides to check for HDR clipping and to verify that peak brightness remains consistent. Regularly testing scene-by-scene performance helps me catch subtle drift and make micro-adjustments, prolonging the reference quality of my display.
How do I maintain my calibration over time?
Consistency is key. I set a routine to recalibrate my TV every six months, especially after firmware updates or environmental shifts like changes in room lighting. Before calibration, I ensure the ambient light is controlled to prevent skewed brightness readings. During adjustment, I focus on small incremental changes—like tuning contrast by just 1-2%—to maintain subtle gradations in shadow and highlight detail. Use the calibration tools to cross-verify settings, and always test with real HDR content to see how adjustments perform in everyday viewing scenarios.
Predictably, as new models continue to push the limits of HDR brightness and contrast, I foresee a future where smart calibration tools integrated into TVs will provide automatic, real-time adjustments. This will make maintenance easier and more accurate for casual users and enthusiasts alike. For now, however, investing in quality calibration equipment—like a colorimeter—and following a disciplined maintenance process will keep your display shining for years to come.
Don’t forget: proper calibration isn’t just a one-time event; it’s an ongoing process. I encourage you to try techniques like incremental contrast adjustments and scene-specific HDR testing. These small but consistent efforts will ensure your bright TV continues to impress, with vibrant highlights and deep blacks intact—making every viewing session a visual feast. Dive into advanced tools today and elevate your home entertainment experience to the next level!
🌟 Ready to perfect your TV’s performance? Start by experimenting with micro-adjustments using test patterns from HDR calibration guides. Precision is everything!
What I Wish I Knew When I Began Tuning My TV
- I used to believe that maxing out HDR brightness would make visuals pop, but I soon realized it caused more harm than good, washing out shadows and creating halos. Less is often more when it comes to peak brightness.
- Local dimming zones can make or break your viewing experience—initially, I thought more zones equaled better blacks, but I learned that too many can cause blooming, making it crucial to tune them carefully.
- Testing content across different scenes is essential. A setting perfect for a night scene might not suit a daytime sports match, highlighting the importance of scene-specific calibration.
- Small, incremental adjustments make a significant difference. Patience and testing with real HDR content truly elevated my picture quality — a lesson that’s still hard to learn but invaluable.
Tools That Changed My Calibration Game
- CalMAN calibration software: Provides precise analysis and ensures accurate color and contrast adjustments, helping me achieve professional-grade calibration myself.
- A quality colorimeter like the X-Rite i1Display Pro: Essential for measuring and verifying color accuracy, contrast, and luminance, making adjustments more reliable and consistent.
- Test patterns from HDR guides: Allow me to fine-tune and verify peak brightness, avoiding HDR clipping and ensuring scenes look luminous but natural.
- Regular calibration routines, ideally every six months, combined with real-content testing, keep my display performing at its best as technology and my environment evolve.
Keep Pushing Your Visual Boundaries
Your journey to perfect HDR isn’t just about setting numbers; it’s about discovering what looks best for your space and content. Embrace the nuances of contrast, local dimming, and dynamic testing — these are the secret ingredients that turn a good picture into a spectacular one. As new advancements in Mini LED TV technology continue to emerge, staying informed and calibrated will ensure you truly capture the potential of your high-end display. Don’t settle for generic settings; tailor your experience for maximum realism and immersion, and let your TV become the cinematic masterpiece you deserve. What’s the first scene you plan to optimize after reading this? Share your thoughts below! YES, your perfect picture might just be a micro-adjustment away.


Leave a Reply