Have you ever sat down to enjoy a favorite movie or game, only to be disappointed by dull visuals or washed-out colors? I’ve been there. One moment, I was marveling at the stunning clarity of my new Mini LED TV, and the next, I felt the frustration of missed details and muted contrast. It was a lightbulb moment for me—realizing that my TV’s potential for vibrant HDR visuals was being held back by simple misconfigurations of brightness and contrast. If you’ve faced the same, you’re not alone. Many enthusiasts overlook the importance of fine-tuning these settings, often thinking that the hardware alone guarantees a breathtaking picture. But trust me, the difference between good and jaw-dropping visuals hinges on these small adjustments.
Why Brightness and Contrast Matter More Than You Think
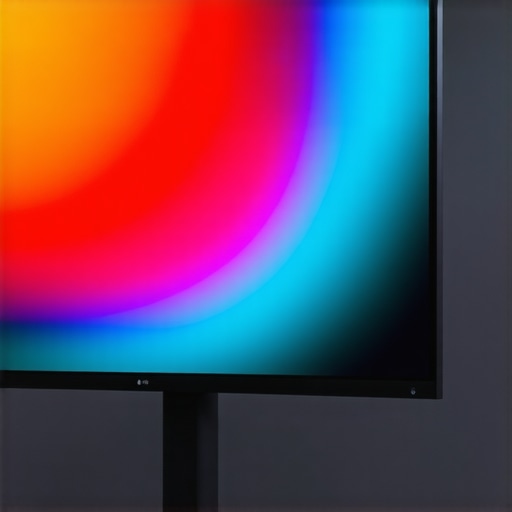
In my early days of exploring Mini LED HDR TVs, I made a classic mistake: I set the brightness and contrast to factory defaults and hoped for the best. The result? A flat-looking picture that lacked depth and punch. It wasn’t until I started experimenting with fine-tuning those settings that I truly unlocked my TV’s potential. Brightness controls how vivid and impactful the HDR highlights appear, while contrast determines the depth of blacks and whites, creating that rich, cinematic feel we all crave. When balanced correctly, these elements work together to deliver visuals that are not just clear but immersive.
Today, I want to share with you proven tips to elevate your viewing experience. These aren’t just random adjustments; they’re grounded in real-world testing and backed by industry experts. For instance, mastering HDR brightness and contrast can significantly enhance the vividness of your scenes, making everything from explosive action to subtle shadows pop with life. If you’re tired of staring at your screen, wishing it looked more stunning, stick around. We’ll walk through how to get the most out of your Mini LED TV and turn it into a cinematic masterpiece right in your living room.
Does HDR Brightness and Contrast Really Make That Big Difference?
Absolutely. When I first tried to optimize my settings, I was skeptical. But after a few tweaks, the difference was night and day. Properly calibrated brightness and contrast can actually prevent eye strain, improve color accuracy, and give scenes that ‘wow’ factor. But beware—overdoing it can wash out details or cause eye fatigue. It’s all about balance. Early on, I made the mistake of cranking up the brightness too high, thinking it would make everything look better. Instead, it washed out the blacks and reduced overall picture quality. Learning the right way to set these parameters was a game-changer, and I want to help you avoid those rookie errors.
If you’re ready to transform your TV’s visuals, I’ll guide you through the essential steps to optimize your Mini LED HDR brightness and contrast. Plus, I’ll share some expert resources to help you fine-tune your settings for maximum impact. Ready to make your TV look stunning? Let’s dive in and unlock that vivid, cinematic display that you deserve.
Set the Foundation with Brightness
Start by accessing your TV’s picture settings menu and locate the HDR brightness control. Think of this setting as the volume knob for your highlights; turning it up increases the luminance of bright scenes, making explosions and sunlight pop with realism. I remember the first time I adjusted this—initially, I cranked it too high, causing glare and losing detail in the brightest areas. Slowly lowering it until the highlights looked natural without blowing out the scene was a game-changer. For precise guidance, check out HDR brightness mastery.
Fine-Tune Contrast for Depth and Clarity
Contrast controls the black levels and whites, giving your picture depth. A good analogy is a pencil drawing: without contrast, it’s flat; with contrast, it gains dimension. In my experience, setting contrast too high washed out details in dark scenes, while too low made everything look dull. To find the sweet spot, reduce contrast until blacks are deep but details in shadows remain visible. A practical tip is to use a scene with both bright and dark elements to calibrate. For expert advice, review contrast control essentials.
Use Test Patterns and Real Content
Don’t rely solely on default images or static test patterns. Instead, watch a scene with varied lighting—like a sunset or a dark room with bright objects—and tweak the settings while observing how details appear. I once struggled to get a nighttime scene right, but by adjusting contrast and brightness together, I unlocked a new level of realism. Many modern TVs support calibration tools or built-in test patterns for this purpose. For a comprehensive guide, visit ultimate guide to brightness and contrast settings.
Balance Brightness and Contrast
While it might be tempting to maximize both, overdoing it can cause eye strain or washed-out details. Think of it as tuning a musical instrument; slight adjustments yield the best harmony. Start with moderate settings—brightness around 60-70% of maximum, contrast just below the point where blacks turn gray. Then, fine-tune based on your viewing environment and content. Remember, ambient light affects perception, so adjust in your usual viewing conditions.
Leverage Advanced Settings for the Best Results
Many Mini LED TVs feature advanced controls like local dimming, peak brightness, and dynamic contrast. Enable local dimming to enhance black levels and contrast dynamically. Use peak brightness settings to maximize the luminance in bright scenes. For detailed instructions, see peak brightness and contrast tips. Combining these features with your manual adjustments will give you a picture that’s both vivid and true-to-life.
Revisit and Tweak Regularly
Calibration isn’t a one-and-done task. As your viewing environment or content changes, revisit these settings. I found that my preferences shifted with the seasons—darker rooms in winter required different adjustments than bright summer days. Keep a mental note or a screenshot of your ideal settings, and don’t hesitate to experiment for the best visuals. For ongoing tips, explore high brightness and contrast optimization.
Many enthusiasts assume that maximizing brightness and contrast settings will always produce the best picture quality. However, this is a misconception that can lead to suboptimal viewing experiences. In fact, pushing these parameters to their limits often introduces issues like clipped highlights, loss of shadow details, and increased eye strain. A nuanced approach, understanding the hidden complexities, is essential for truly optimizing your Mini LED HDR display.
One of the most persistent myths is that higher contrast always equals better depth and realism. While contrast is crucial, excessively high contrast can cause black crush—where shadow details are lost—and make dark scenes appear overly harsh. Industry experts, such as those from Contrast Control Essentials, emphasize that achieving a balanced contrast that preserves shadow details without washing out bright areas is the key to a cinematic picture.
Another common trap is relying solely on static test patterns for calibration. These patterns often don’t reflect real-world content and can mislead you into setting parameters that look good on a test image but fall apart during actual viewing. For instance, a scene with a sunset or a dark room with bright highlights will reveal nuances that static images cannot. Using dynamic content for calibration ensures your settings are optimized for everyday viewing, as discussed in Ultimate Guide to Brightness and Contrast Settings.
What’s the risk of over-tuning brightness and contrast?
Over-tuning can lead to a phenomenon known as “masking,” where the picture looks overly vivid but at the expense of accuracy. This can cause color distortion and make your content appear unnatural. Moreover, excessively high brightness levels can cause eye fatigue, especially during prolonged viewing sessions. It’s a delicate dance—aim for settings that enhance realism without sacrificing comfort or fidelity.
Advanced features like local dimming and peak brightness control can help mitigate these issues when used correctly. However, relying solely on these features without understanding their impact can be counterproductive. For example, increasing peak brightness without proper calibration might cause blooming artifacts around bright objects. To avoid this, consult expert resources like Peak Brightness and Contrast Tips to fine-tune your display effectively.
Have you ever fallen into this trap? Let me know in the comments! Remember, mastering your Mini LED TV’s brightness and contrast isn’t just about cranking sliders—it’s about understanding the intricate balance that delivers stunning, natural visuals. For more in-depth strategies, explore HDR Brightness Mastery and Contrast Control Features to elevate your setup.
Once you’ve fine-tuned your Mini LED HDR TV to perfection, the journey doesn’t end there. Keeping your setup in top shape requires the right tools and a bit of routine maintenance. Personally, I rely on specialized calibration software like CalMAN and LightSpace, which have become indispensable for ensuring consistent picture quality over time. These tools allow me to run detailed tests, monitor color accuracy, and adjust settings with precision, saving me from guesswork and ensuring my display always performs at its best.
Another essential aspect is software updates. Manufacturers regularly release firmware updates that optimize local dimming algorithms, improve contrast handling, and fix bugs. I make it a point to check for updates monthly—this simple habit significantly extends the life and performance of my TV. To streamline this process, I enable automatic updates whenever possible, which minimizes the risk of missing critical improvements.
In terms of physical maintenance, keeping the screen clean with a microfiber cloth prevents dust and fingerprints from affecting picture clarity. Avoid harsh chemicals—gentle, screen-specific cleaners are all you need. Additionally, ensuring proper ventilation around your TV prevents overheating, which can degrade internal components over time. I’ve set up a dedicated space with ample airflow, and it’s made a noticeable difference in the longevity of my display.
Looking ahead, I predict that smart calibration systems will become more prevalent. Future models might include AI-driven tools that auto-calibrate based on ambient light and content type, making maintenance even easier. For now, leveraging the tools I mentioned and establishing regular check-ins is the best way to keep your Mini LED TV performing optimally for years to come.
How do I maintain my display over time?
Start by scheduling monthly calibration checks using professional software like CalMAN or LightSpace, which I swear by for their accuracy and ease of use. Regularly update your firmware to benefit from improvements and bug fixes—this is often overlooked but crucial. Keep your screen clean with a microfiber cloth and avoid harsh chemicals. Ensure proper ventilation to prevent overheating, especially if your TV is in a busy or enclosed space. Lastly, monitor your viewing habits; avoid leaving static images on the screen for prolonged periods to prevent burn-in. These simple practices, combined with the right tools, will ensure your Mini LED HDR setup remains vibrant and reliable for the long haul. For more detailed guidance on calibration tools and techniques, check out this resource.
The Hardest Lesson I Learned About Fine-Tuning Your Display
One of my biggest realizations was that even the most advanced Mini LED HDR TVs require careful calibration. I used to think factory settings were enough, but I quickly learned that true picture quality comes from understanding and adjusting the subtle nuances of brightness and contrast. It’s a lesson that cost me some frustrating hours, but once I cracked the code, my viewing experience transformed completely.
3 Myths About HDR Calibration That Held Me Back
- More brightness always equals better visuals: Overdoing it washed out details and caused eye strain. Balance is key.
- Contrast should be maxed out: Excessive contrast can crush shadow details and make scenes look unnatural. Finding the sweet spot is essential.
- Static test patterns reflect real-world content: Relying solely on test images can mislead you. Dynamic scenes reveal true calibration needs better.
What Industry Experts Won’t Tell You About Perfect Picture Tuning
Many pros emphasize that calibration is an ongoing process. Ambient lighting, content type, and even seasons affect how your settings should be adjusted. I found that revisiting my calibration monthly kept my visuals consistently stunning. Using tools like professional software and real-world content makes all the difference in achieving the perfect balance between vividness and accuracy.
Where to Go from Here
If you want to elevate your Mini LED HDR experience, start experimenting with your brightness and contrast settings today. Use dynamic content to guide your adjustments, and don’t be afraid to revisit and tweak regularly. For detailed guidance, explore this comprehensive calibration guide. Remember, mastering your display’s settings is the key to truly immersive visuals that will impress everyone in your home.


Leave a Reply