Ever sat down to watch your favorite movie, only to be disappointed by dull colors and shadows that refuse to pop? I’ve been there. One evening, I finally realized that my TV’s picture quality was holding back the cinematic magic I craved. It wasn’t just bad luck or a poor setup; it was a missed opportunity to unlock the true potential of my Mini LED TV. That lightbulb moment pushed me to learn everything about enhancing HDR brightness and contrast, and let me tell you—game changer.
Why Brightness and Contrast Matter More Than Ever
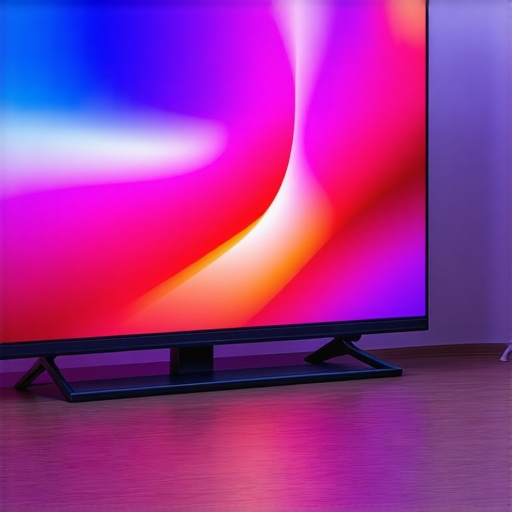
In 2024, our TVs are more than just screens; they’re windows into immersive worlds. But without proper HDR (High Dynamic Range) tuning, those worlds can appear flat, muted, or overly dark. Mini LED technology has made leaps and bounds, offering incredible brightness and contrast control. Still, many users struggle to dial in settings that make scenes sing. If you’ve ever felt your visuals are just “meh,” you’re not alone. The good news? With some simple adjustments and a better understanding, you can transform your viewing experience.
Trust me, I’ve made my share of mistakes early on—like cranking up the brightness without balancing contrast, which washed out colors and made blacks look gray. It’s a common rookie error. But once I discovered the importance of fine-tuning HDR brightness and contrast, everything changed. And here’s the thing: mastering these settings isn’t just about making scenes look good; it’s about capturing the full glory of your Mini LED’s capabilities. For a comprehensive guide, check out this expert resource.
Is Boosting HDR Brightness & Contrast Actually Worth the Hype?
It’s a fair question. Many skeptics worry that fiddling with picture settings can do more harm than good or that it’s just a gimmick. I get it. When I first started experimenting, I was nervous I’d end up with a picture that hurt my eyes or looked unnatural. The key is moderation and understanding how each setting influences the image. The good news? When done right, boosting HDR brightness and contrast can make colors more vibrant, details sharper, and scenes more lifelike. But, of course, it’s a delicate balance—overdo it, and you risk losing picture quality. That’s where my biggest mistake came in: trying to maximize brightness without considering contrast. It’s a trap many fall into, and I almost did too. To avoid this, I recommend learning the fundamentals of contrast control and how to optimize your settings seamlessly. For a detailed walkthrough, explore this trusted guide.
Now, are you ready to stop settling for less and start enjoying jaw-dropping visuals? Let’s dive into the practical steps to maximize your Mini LED TV’s HDR brightness and contrast. Trust me, once you get the hang of it, your home theater will never look the same.
Crank Up the Brightness Step by Step
Start by accessing your TV’s picture settings menu. Find the HDR brightness or peak brightness setting—this controls how much light your TV emits for bright scenes. I remember the first time I did this; I slowly increased the HDR brightness from 0 to 100, watching scenes become more vibrant without washing out details. Don’t rush; small increments help you gauge the optimal level. For detailed guidance, visit this expert resource.
Set Contrast for Depth and Definition
Next, adjust the contrast control. Think of contrast like the difference between the lightest whites and the darkest blacks—crucial for depth. When I first tweaked this, I set it too high, which made bright parts look unnatural and crushed blacks into gray. The trick is to find a balance: increase contrast until bright scenes pop, but blacks remain deep. Use test patterns or scenes with mixed lighting to fine-tune. For more nuanced tips, check this guide.
Use a Calibration Pattern for Precision
To refine your settings, use a calibration disc or digital pattern. I used a test pattern that showed pure white, black, and gradients. Adjust your HDR brightness so whites are bright without blooming, then tweak contrast to deepen blacks without losing detail. During my first attempt, I kept toggling between the pattern and my favorite scenes, slowly dialing in the perfect balance. It was a bit messy at first, but patience paid off. This process ensures your TV displays scenes with maximum impact. For step-by-step instructions, visit this detailed guide.
Leverage Your TV’s Advanced Settings
Many Mini LED TVs have additional settings like local dimming, contrast enhancer, or dynamic tone mapping. Experiment with these after basic adjustments. I turned on local dimming and noticed blacks became deeper, making HDR content more immersive. But be cautious—some features can cause flickering or halos. Test with familiar content to see if the enhancements improve the picture without artifacts. For a comprehensive overview of these features, see this resource.
Fine-Tune for Your Viewing Environment
Ambient lighting impacts perception. I found that reducing room glare and dimming lights helped me see more detail and appreciate the enhanced contrast. Use your TV’s ambient light sensor if available, or manually adjust the overall brightness and contrast based on your room’s lighting. This step makes a noticeable difference, especially during HDR movies. For more tips, visit this guide.
Many enthusiasts believe that increasing HDR brightness and contrast settings independently will always lead to a better picture. However, this is a common misconception. In reality, tweaking these parameters without understanding their interplay can result in washed-out colors, loss of detail, or unnatural visuals. For example, cranking up HDR brightness while leaving contrast low may make bright scenes appear overly luminous but dull. Conversely, high contrast with low HDR brightness can deepen blacks but sacrifice overall luminance, making scenes look flat. The key is to find a harmonious balance tailored to your viewing environment. Expert calibration guides emphasize that the optimal picture emerges not from maximizing individual settings but from understanding how they work together to enhance the scene’s dynamic range. For a comprehensive approach, visit this detailed guide.

Another widespread myth is that higher HDR peak brightness always translates into better HDR content. While peak brightness is crucial for rendering dazzling highlights, pushing it beyond the recommended levels can cause blooming artifacts or halo effects, especially in localized dimming zones. According to a study by display scientists, overemphasizing peak brightness can lead to an unnatural viewing experience, as it overwhelms the eye and skews color accuracy. Instead, focus on achieving a natural contrast ratio that preserves detail in both bright and dark areas. This nuanced understanding helps avoid the trap of chasing numbers instead of actual picture quality. For advanced calibration, explore this expert resource.
Many users also assume that local dimming settings should be maximized for the best contrast. While local dimming can improve black levels, overdoing it may introduce flickering or blooming around bright objects. The optimal setting depends on your specific model and viewing conditions. My own experience shows that moderate local dimming, combined with proper contrast adjustments, yields the most natural and immersive HDR scenes. Testing different levels with calibration patterns ensures you don’t fall into the trap of over-optimizing for artificial metrics. For detailed tips, check this guide.
Maintaining your Mini LED TV in peak condition ensures you continue to enjoy stunning visuals and vibrant HDR performance for years to come. Over time, dust accumulation, firmware updates, and calibration drift can diminish picture quality. That’s why I recommend a combination of specific tools and regular maintenance routines to keep your display operating flawlessly.
Use a Calibration Disc for Long-Term Accuracy
One of the most reliable methods I’ve found for ongoing calibration is using a dedicated calibration disc like the Spears & Munsil UHD HDR Benchmark. This disc provides precise test patterns that allow you to verify and adjust your HDR brightness, contrast, and color accuracy periodically. I personally keep a calibration disc handy and run a quick check every few months. It helps me catch any drift in picture quality early, ensuring consistent vividness and detail. For detailed calibration steps, see this guide.
Regular Firmware Updates Enhance Stability and Features
Manufacturers frequently release firmware updates that improve performance, fix bugs, or add new features. I make it a habit to check for updates through the TV’s settings menu or via the manufacturer’s app at least once every few months. Keeping your firmware current not only ensures you have the latest enhancements but also optimizes HDR handling and contrast management. For the latest updates, visit the support page of your TV brand or contact support.
Maintain Cleanliness for Clearer Visuals
Dust and fingerprints on your screen can reduce brightness and contrast. I use a microfiber cloth and a gentle screen cleaner suited for delicate displays to wipe down my TV regularly. Avoid harsh chemicals that can damage the coating. A clean screen ensures your HDR settings work as intended and that you experience the full punch of your Mini LED’s brightness. For more cleaning tips, explore this resource.
Adjust Settings with the Right Tools
If you’re serious about long-term calibration, consider investing in a colorimeter like the X-Rite i1Display Pro. This device measures your display’s output with high precision, allowing you to create custom calibration profiles. I’ve found that pairing a colorimeter with calibration software like Calman or Portrait Displays’ SpectraCal gives me confidence that my HDR brightness and contrast are perfectly tuned, even after firmware updates or environmental changes. Although this setup involves a learning curve, it pays off with consistently professional results. For more on advanced calibration, visit this guide.
How Do I Maintain My Mini LED’s Peak Brightness Over Time?
Peak brightness can diminish as your TV ages or if it’s used extensively at high settings. To prevent this, I recommend avoiding prolonged maximum brightness usage and enabling any local dimming or eco modes that help distribute wear evenly across the display. Regularly performing calibration checks, as mentioned earlier, can also reveal when brightness levels are starting to fade so you can adjust accordingly. Manufacturers sometimes provide calibration routines in their firmware, which can help restore peak brightness temporarily. Staying proactive with these maintenance steps ensures your HDR content continues to impress.
Looking ahead, I predict that integrated AI-based calibration tools will become standard, making it even easier to keep your Mini LED display in optimal shape without external hardware. Until then, combining these practical tools with disciplined maintenance routines will keep your visuals stunning for years.
Ever wondered how some viewers manage to make their Mini LED TVs look stunningly vibrant and lifelike while others settle for dull, washed-out images? The secret often lies in the subtle art of fine-tuning HDR brightness and contrast. Through my own journey with these settings, I discovered that unlocking your TV’s full potential isn’t just about cranking up the sliders—it’s about understanding their interplay and making precise adjustments. This knowledge can elevate your home entertainment to a whole new level, making every scene feel more immersive and true to life.
Insider Lessons That Changed My View on HDR Settings
- Don’t Rush Brightness Adjustments: I used to max out HDR brightness immediately, thinking brighter was better. Instead, I learned to increase it gradually, watching how each step affected scene details and overall image quality. Patience is key.
- Balance Contrast for Depth: Cranking contrast too high made blacks look unnatural and crushed shadow details. I found that setting contrast to complement the HDR brightness creates a richer, more dynamic picture.
- Use Test Patterns for Precision: Relying on calibration disks with test patterns helped me fine-tune these settings accurately rather than guesswork, ensuring consistency over time.
- Understand Local Dimming Impact: Activating local dimming improved blacks but sometimes introduced artifacts. Learning the optimal level for my specific model prevented visual distractions and preserved picture integrity.
- Room Lighting Matters: Adjusting my ambient lighting environment made a noticeable difference in how HDR settings appeared, allowing me to enjoy vivid scenes without glare or reflections.
My Go-To Tools for Perfecting Your Visuals
- HDR brightness mastery guide: A comprehensive resource that helped me understand the nuances of peak brightness and avoid artifacts.
- Contrast control essentials: This guide was invaluable for learning how contrast and HDR brightness work together to enhance scene depth.
- Calibration patterns and software: Using these tools regularly kept my picture calibrated and vibrant over time.
- Manufacturer firmware updates: Staying current with updates improved my TV’s HDR performance and added new features for better control.
Your Next Step in Visual Excellence
Now that you understand the importance of balancing HDR brightness and contrast, it’s your turn to experiment and find what works best in your viewing environment. Remember, the goal isn’t to chase numbers but to create scenes that truly pop with vibrancy and depth. With a little patience and the right tools, you’ll transform your Mini LED TV into a window to breathtaking worlds. Don’t wait—start tweaking today and see the difference for yourself.
What’s been your biggest challenge in calibrating your TV’s picture settings? Let me know below and share your journey to stunning visuals!


Leave a Reply