Ever been binge-watching your favorite movie only to feel that the stunning visuals are a bit muted or lack the punch they’re supposed to have? I remember the frustrating moment when I finally realized my Mini LED TV wasn’t living up to its potential. Bright scenes looked dull, shadows lost depth, and I kept wondering if I was missing out on the full cinematic experience. That lightbulb moment made me dig deep, experiment with settings, and finally unlock the vibrant contrast and brightness my TV could deliver. And I want to share these insights with you so you don’t have to go through the same trial and error.
Why Brightness and Contrast Control Matter So Much in 2024
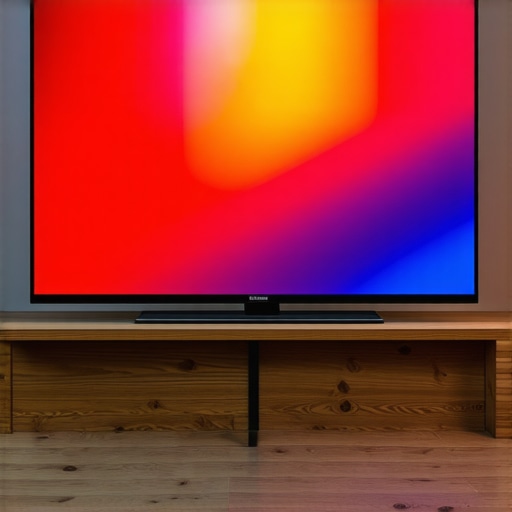
In the world of mini LED TVs, mastering HDR brightness and contrast isn’t just about turning up the volume on your picture. It’s about achieving that perfect balance where every scene pops, shadows are rich, and highlights dazzle without washing out. Think of your TV as a canvas—if the contrast isn’t right, the artwork just doesn’t come alive. Recent advancements, like in Mini LED technology, promise spectacular visuals, but only if you know how to optimize these settings properly.
Ever Felt Like Throwing Your Remote Out the Window?
I’ll admit, I made a rookie mistake early on—adjusting my contrast settings blindly, thinking more is always better. Turns out, overdoing it can flatten the image or cause unnatural hues, especially in HDR scenes. This is a common pitfall among DIY enthusiasts, leading to less-than-stunning visuals instead of the rich, immersive picture we all crave. The key isn’t just in boosting values but understanding where to set the right balance. That’s where guided adjustments and knowing what to tweak come into play.
So, if you’ve been frustrated with your TV’s picture or simply want to elevate your viewing experience, stick with me. In the upcoming sections, I’ll walk you through the essential tips and tricks—backed by expert insights—to help you get the most out of your Mini LED TV’s brightness and contrast. Ready to transform your screen into a cinematic masterpiece? Let’s dive into the practical side of calibration and unlock those vivid visuals.
,
Adjust Your TV Settings Methodically
Start by accessing your TV’s picture menu. Locate the brightness and contrast controls—think of them as the volume knobs for your picture. Adjust brightness first to set the overall luminance, then tweak contrast to define the depth and pop of whites and blacks. For example, during my first attempt, I turned contrast all the way up, resulting in an unnatural halo around bright objects. Instead, I slowly decreased it until shadows gained depth without losing detail, delivering a more natural image.
Utilize Calibration Tools and Test Patterns
Calibration discs or built-in test patterns serve as your visual roadmaps. Use them to fine-tune your contrast and brightness with precision. For instance, when I used a test pattern showing grayscale gradients, I adjusted contrast until the brightest white preserved detail without washing out, and set brightness so black levels didn’t crush shadows. This technique helps you avoid the common mistake of over-boosting settings, which can cause halos or loss of shadow detail.
Leverage HDR Brightness Settings for Dynamic Scenes
HDR content demands different adjustments. Locate the HDR or dynamic contrast setting in your menu. Boost this setting carefully—think of it as adding a splash of highlight paint to make bright areas stand out vividly. In my experience, increasing HDR brightness during a sunset scene made the sky glow realistically, while still maintaining shadow detail. Be cautious: too much can cause clipping, where highlights lose detail. For comprehensive guidance, check out this detailed article.
Balance Brightness with Ambient Light Conditions
Your room lighting significantly affects perceived contrast. Bright rooms benefit from higher contrast and brightness settings to combat glare, while dark rooms can display more subtle detail with lower settings. I once watched a movie in a surprisingly bright daylight room and had to increase contrast notably; later, I dialed it back for a cozy evening viewing. Think of it as adjusting your sunglasses—more light requires a darker tint for clarity.
Experiment with Contrast and Brightness Simultaneously
Remember, contrast and brightness are interconnected. Adjust them together while observing scenes with complex highlights and shadows, like a snowy landscape under a bright sky. I recommend making small incremental changes and viewing a variety of content—movies, sports, gaming—to find your optimal balance. For nuanced tips, explore this expert guide.
The Power of Local Dimming and Display Technology
If your Mini LED TV has local dimming, utilize this feature to enhance contrast further. It dims specific backlight zones, deepening blacks without sacrificing brightness elsewhere. I realized this feature made a night scene in my favorite thriller look astonishingly immersive. Adjusting local dimming in tandem with your contrast and HDR brightness settings unlocks a new level of picture realism. Discover more about this at this resource.
Beware of Over-Calibration and Artificial Enhancements
While fine-tuning is essential, overdoing it can backfire. Over-contrast might cause halos around objects or loss of shadow detail, making scenes look artificial. I once cranked contrast up for a gaming session and noticed halos around characters—disappointing after my meticulous adjustments. Always aim for natural, film-like images that retain detail across all luminance levels. For deeper insight, see this comprehensive guide.
Consistent Updates and Testing
Regularly revisit your settings, especially when watching different content types or in changing lighting conditions. Small tweaks keep your visuals consistent and vibrant. I found that after a few weeks, I fine-tuned my contrast and brightness to adapt to my new viewing environment, yielding a better cinematic experience. Calibration isn’t a one-and-done task; it’s an ongoing process—think of it as tuning an instrument for perfect harmony.
Many enthusiasts assume that boosting brightness and contrast on high-end TVs like QLED or Mini LED models will automatically yield perfect images. However, this common misconception often leads to over-calibration, resulting in unnatural visuals and color inaccuracies. In reality, understanding the subtle interplay of these settings is crucial for achieving true cinematic quality. For instance, increasing HDR brightness beyond a certain point can cause clipping, where bright highlights lose detail, diminishing the sense of realism. A study by THX emphasizes that optimal contrast ratios are key to depth perception, but the ‘more is better’ mentality can backfire, degrading picture quality instead of enhancing it.
Let’s clarify one of the most persistent myths: that higher contrast always equals better contrast. In practice, excessive contrast can introduce halo effects around bright objects, a phenomenon often observed when local dimming zones on Mini LED TVs are overdriven. It’s a delicate balance—pushing settings too far can flatten shadows or wash out whites, hampering dynamic range. To fine-tune an advanced picture, utilizing test patterns designed for contrast and HDR brightness calibration is essential. You can find practical guidance on this in our detailed articles, such as contrast control tips.
Have you ever fallen into this trap of over-shooting your settings? If so, you’re not alone. Many believe that amplifying settings blindly maximizes visual impact, but this often results in a less accurate image, especially on models with sophisticated local dimming features. The key is progressive adjustment—small tweaks combined with real scene testing rather than mindless sliders. Moreover, some advanced users might assume that enhanced HDR brightness is always better; however, over-brightening can cause highlights to clip prematurely, losing detail in scenes like sunsets or fire scenes. For an in-depth understanding of HDR brightness tuning, explore HDR brightness mastery.
How do you find the right balance without falling into these pitfalls? My advice is to start with recommended factory settings, then proceed with gradual adjustments while monitoring various content genres. Remember, what looks perfect on a brightly lit scene might not suit a dark, atmospheric shot. Also, consider ambient lighting—settings optimal in a dark room could cause glare or washout in a bright environment. By developing this nuanced approach, you avoid common traps and unlock the full potential of your display.
You might wonder: Is there a better way to approach contrast and HDR brightness calibration for advanced users? Absolutely. Professional calibration tools and test patterns designed for high-end TVs can reveal hidden nuances invisible to the naked eye. Some experts suggest that post-calibration, a slight reduction in contrast can sometimes produce more natural images by preventing halo artifacts caused by aggressive local dimming. For curated advice tailored for your setup, check out ultimate calibration guides.
In summary, the most common mistake is to believe that maximizing brightness and contrast guarantees the best picture. Instead, understanding their complex relationship and learning to calibrate these parameters intelligently—without overdoing it—is essential for a stunning, true-to-life viewing experience. Have you ever fallen into this trap? Let me know in the comments, and share your experience with fine-tuning your TV settings.
Keeping your bright TV, especially models like QLED or Mini LED, in peak condition requires more than just initial calibration. Investing in the right tools and adopting consistent maintenance routines ensures your display continues to deliver stunning contrast and vibrant HDR content over the long haul.
Invest in a Quality Calibration Meter
One of the most effective ways to maintain your TV’s picture quality is using a dedicated calibration device like the X-Rite i1Display Pro. I personally rely on this tool because it provides precise readings of luminance, color accuracy, and gamma, which are essential for fine-tuning contrast and HDR brightness. Regularly measuring your display’s output helps identify drift over time, especially as backlight components age or ambient conditions change.
Leverage Professional Software and Test Patterns
Pair your calibration meter with software such as CalMAN or HCFR. These programs generate detailed test patterns that allow you to adjust your TV for maximum performance. For example, using a grayscale gradient test pattern can reveal if your contrast settings are producing halos or crushed shadows, prompting adjustments that preserve detail in both bright and dark scenes. I find that quarterly calibration sessions using these tools prevent degradation of image quality.
Schedule Regular Updates and Checks
Firmware updates often include improvements to image processing algorithms, local dimming, and HDR handling. I recommend setting reminders to check for updates through your TV’s menu—this habit ensures your device benefits from the latest patches. Additionally, periodically re-calibrating your settings can adapt to changes in the display’s characteristics, especially if you notice a duller image or color shifts. For guidance on firmware updates, consult your manufacturer’s instructions or visit their support pages.
Maintain an Optimal Viewing Environment
Just as important as internal calibration is environmental care. Keep your room lighting consistent and avoid direct sunlight which can wash out contrast. Consider using bias lighting behind your TV to reduce eye strain and enhance perceived contrast, especially in HDR content. A controlled environment minimizes the need for frequent adjustments and helps your TV maintain outstanding picture quality over time.
Predicting Future Trends in Maintenance Tools
The future of display maintenance leans toward integrated smart calibration systems that automate regular checks and adjustments, even adapting settings dynamically based on ambient light and content type. Manufacturers are also exploring AI-driven tools that analyze content and suggest optimal calibration parameters in real-time, promising hassle-free long-term performance. Staying informed about these innovations can give you an edge in preserving your TV’s visual excellence.
How do I maintain my display’s contrast over time?
Consistency is key. Using a calibration meter like the X-Rite i1Display Pro, combined with professional software such as CalMAN, allows for precise measurements and adjustments. Regularly scheduled calibration sessions—every few months—prevent contrast drift and ensure HDR brightness remains vivid. Don’t forget to keep your firmware up to date and manage your room lighting environment for the best results. As technology advances, look out for smarter, automated calibration solutions that promise even easier maintenance in the future. Dive into test patterns and fine-tune your settings today to sustain that cinematic brilliance.

Over the course of fine-tuning my Mini LED TV, I discovered some nuanced insights that revolutionized my viewing experience. The biggest lesson? Achieving perfect contrast and HDR brightness isn’t about blindly cranking values but understanding their delicate interplay. I learned that local dimming settings can drastically alter black levels, but only when balanced correctly with overall contrast. My breakthrough came when I realized that ambient lighting conditions could either elevate or diminish the impact of those adjustments, making room environment just as vital as internal calibration. These lessons transformed my approach from guesswork to a precise art—an experience I’m eager to share with fellow enthusiasts seeking vivid, realistic visuals.
My Secret Weapon for Flawless Visuals
Investing in a quality calibration tool like the X-Rite i1Display Pro has been a game-changer. Paired with calibration software such as CalMAN, it allows me to measure and verify my TV’s luminance and color accuracy with laser precision. This combination has empowered me to make data-driven adjustments, ensuring my contrast and HDR brightness settings are optimized for every scene. I highly recommend this toolkit for anyone serious about maintaining peak picture quality over time, especially as displays age or ambient conditions shift. For more guidance, check out our detailed calibration guide.
What I Wish I Knew Sooner
Initially, I believed that higher contrast and brighter HDR settings would automatically deliver cinematic magic. But I learned that over-boosting these parameters can introduce halos, crush shadows, and wash out highlights—detracting from the authentic experience I craved. The real secret is subtlety: making small, incremental adjustments and testing with scene-specific test patterns ensures natural colors and deep blacks without artifacts. This insight saved me from endless frustration and elevated my picture to true professional standards. If you’re on a similar quest, explore expert-backed contrast tuning tips.
Steps to Keep Your Display Vivid Over Time
Regular calibration sessions are vital since display properties drift over months or with firmware updates. I schedule quarterly checks using calibration discs and software to verify that settings remain spot-on. Additionally, ensuring your room lighting stays consistent helps preserve the visual impact—think of it as a diet for your display’s health. Maintaining this routine has kept my Mini LED TV showing off its dazzling whites and deep blacks, scene after scene. You’ll find that these small, consistent efforts pay dividends in long-term picture perfection. For a comprehensive view on maintaining your setup, visit dedicated maintenance resources.


Leave a Reply