I remember the exact moment I watched a scene on my new Mini LED TV, expecting a cinematic masterpiece but ending up with washed-out colors and dull contrast. Frustration crept in as I realized I hadn’t fully grasped how to unleash my TV’s potential. That lightbulb moment made me dive deep into brightness and contrast tuning, transforming my viewing experience entirely. If you’ve ever felt disappointed when your TV’s picture doesn’t quite pop or seem as vibrant as promised, you’re not alone—and I’ve been there too.
Why Brightness and Contrast Can Make or Break Your Viewing Experience
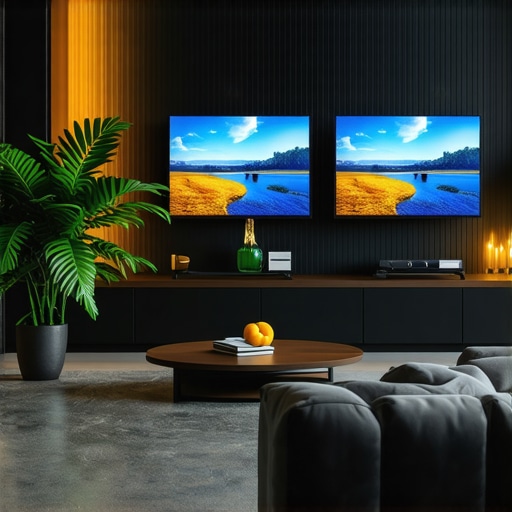
Mini LED TVs are celebrated for their impressive brightness levels and precise contrast control, which are crucial for stunning visuals. But many owners, including myself initially, overlook how to optimize these settings. Without proper calibration, even the most advanced display can appear lackluster, especially in HDR content. Brightness controls how vivid and luminous your picture appears, while contrast enhances depth and detail, making dark scenes richer and highlights more striking. Together, they create that captivating, lifelike picture we crave for movies, sports, and gaming.
However, the challenge lies in calibrating these settings correctly. Too much brightness can wash out details, whereas too little leaves scenes looking flat. Similarly, improper contrast can lead to loss of detail in shadows or highlights. Early on, I made the mistake of relying solely on default settings or blindly following generic recommendations. This misguided approach often resulted in eye strain or lost details in bright and dark areas.
The good news? Achieving that perfect balance isn’t as complex as it might seem. As highlighted in our comprehensive guide on maximizing HDR brightness & contrast, fine-tuning your Mini LED TV involves understanding your environment, content type, and the specific capabilities of your model. By paying attention to these factors, you can dramatically improve picture quality and enjoy your favorite content as intended.
If this sounds familiar and you’re eager to see real improvements, stay tuned. We’ll walk through practical steps to optimize brightness and contrast, turning your TV into the visual powerhouse it’s meant to be. Before that, though, let me address a common skepticism many share: “Is adjusting contrast and brightness really worth the effort?” You might be surprised what small tweaks can do. But first, a quick confession—my own early mistakes taught me the value of proper calibration and avoiding shortcuts that can hinder vibrancy.
Let’s dive into the essentials to master your Mini LED TV’s picture quality, starting with what you need to know about the fundamentals of contrast control and brightness tuning.
Adjust Your Environment Before Diving Into Settings
Start by controlling ambient lighting—bright rooms can diminish perceived contrast, much like trying to see details in a bright window. Dim the lights or close curtains to make your TV’s brightness and contrast adjustments more effective. This setup prevents glare and gives you a clearer view of subtle detail changes, similar to adjusting camera exposure for best results. I recall adjusting my room lighting during this process, which revealed hidden shadow details I hadn’t noticed before, making calibration much easier.
Access the Calibration Settings Manually
Navigate to your TV’s picture or display menu. For most Mini LED TVs, you’ll find settings labeled ‘Brightness’ and ‘Contrast’ within the advanced picture options. Avoid relying solely on picture presets; instead, choose a custom mode to fine-tune. This is crucial because factory presets are often overly conservative or exaggerated, similar to how a default photo filter can distort real colors. Remember, your goal is to create a balance that enhances vividness without sacrificing detail, leveraging your TV’s full contrast range and HDR capabilities.
Perform Stepwise Brightness Adjustments
Start with the TV’s default or ‘Standard’ preset
Apply a high-dynamic-range (HDR) test pattern or shot with a broad range of shadows and highlights. Use scenes from action movies or HDR demos for the best results. Slowly increase the brightness value—think of it as turning up the lamp to see more in the dark—until blacks appear deep but without losing shadow details. Over-brightening leads to dull blacks, akin to overexposing a photo. During my first attempt, I kept increasing brightness until dark scenes lost their depth, which I corrected by stepping back after each small adjustment.
Fine-tune by watching a HDR scene
Play a familiar HDR movie scene that includes a variety of dark areas and bright highlights. Adjust the brightness so dark sections are rich and deep, but avoid losing shadow details—like keeping thunderclouds dark yet textured. Remember, the goal isn’t just to make everything bright but to preserve contrast. Refer to detailed guides like HDR brightness mastery for precise tips.
Set the Contrast to Enhance Depth
Contrast controls the difference between the darkest black and the brightest white. It’s analogous to the contrast in a photograph—too little and everything looks washed out; too much and details are lost in highlights or shadows. Increase contrast gradually while observing scenes with bright sunlight or snow, where details should be crisp. Avoid the temptation to max out contrast which can cause artifactual halos or clipped highlights. Use a well-calibrated test pattern to identify the point where white becomes overly aggressive, or consult dedicated resources like maximize HDR contrast for guidance.
Utilize Test Patterns for Precision
Employ test images or videos designed for calibration. These might include grayscale ramps, shadow detail charts, or HDR scenes with embedded contrast markers. Adjust settings while watching these patterns—stop when shadow areas show discernible tonal variations and highlights are not clipped. I found these test patterns invaluable, particularly when subtle tweaks made a significant difference. Some TVs have built-in calibration tools, but external sources like online test videos work well too.
Refine Your Settings Over Multiple Viewing Sessions
Once initial calibration feels right, revisit your adjustments over multiple viewing sessions at different times of day. Changes in ambient light or content type can influence perceived picture quality. Compared to my first rough calibration, fine-tuning after a few days helped me settle on a balance that worked broadly across genres. Patience here ensures your settings are robust and not merely a quick fix. For ongoing tips, check resources like Mini LED TV calibration tips.
Mastering brightness and contrast involves a mix of careful environment control, methodical adjustments, and ongoing refinements. Every step enhances your Mini LED TV’s ability to display vibrant, punchy visuals that truly rival the cinema experience. Through precise calibration, colors leap off the screen, shadows reveal depth, and your entertainment reaches new heights of realism—like flipping a switch from dull to dazzling.
Many enthusiasts assume that increasing HDR brightness or maximizing contrast is the key to stunning visuals, but this oversimplifies a complex process. A common myth is that higher brightness always equals better picture; in reality, excessive brightness can wash out detail and cause eye strain, especially if your calibration isn’t fine-tuned. Advanced viewers understand that the real secret lies in nuanced adjustments that balance luminance with detail preservation, a principle emphasized by experts like those in the contrast control essentials guide. One trap many fall into is to set contrast to maximum, believing it yields the deepest blacks, but this can lead to clipping bright highlights and losing dynamic range.
Why do we often overlook the importance of local dimming zones in Mini LED TVs?
Many assume that the sophistication of Mini LED technology automatically guarantees optimal contrast and HDR performance, but neglecting to calibrate local dimming zones can cause bloom effects or uneven black levels. Proper calibration, as discussed in our Mini LED tips, ensures these zones work harmoniously, enhancing contrast without artifacts. Overlooking this nuance is a mistake that degrades image quality, especially in complex scenes with mixed lighting.
Furthermore, many confuse a TV’s peak brightness with its real-world HDR impact. Some models boast impressive numbers but fail to deliver in actual viewing conditions because environmental factors or incorrect settings diminish their effectiveness. In fact, a 2024 study from the Society of Imaging Science and Technology highlights that perceptual brightness and contrast depend more on calibrated, context-aware settings than raw numbers alone. This insight underscores the importance of tailored calibration over one-size-fits-all presets.
To avoid these pitfalls, consumers should focus on fine-tuning contrast and brightness with relevant test patterns, carefully adjusting to their viewing environment. An overly bright room demands different settings than a dark home theater. Remember, the goal is to create a balanced image that preserves shadow detail and highlights, delivering an immersive experience. Regularly revisiting your calibration with resources like the ultimate guide helps ensure your settings stay optimized.
In summary, the real challenge isn’t just pushing sliders to extremes but understanding the intertwined nuances of HDR performance, local dimming technology, and your viewing context. Mastering this deeper layer leads to a more vivid, accurate picture, elevating your home entertainment to professional levels. Have you ever fallen into this trap? Let me know in the comments.
Keep It Running: Tools I Trust for Calibration and Maintenance
Maintaining optimal picture quality over time requires reliable tools and consistent methods. My go-to device is a professional-grade colorimeter, specifically the X-Rite i1Display Pro, which I use to verify and fine-tune my TV’s brightness, contrast, and color accuracy. This device provides precise measurements, allowing me to make informed adjustments rather than relying on guesswork. Regular calibration with such tools ensures my settings remain accurate despite environmental changes or aging components.
Complementing hardware, I utilize calibration software like CalMAN, a professional-grade solution that interfaces seamlessly with my colorimeter. CalMAN offers detailed test patterns and automation features, simplifying the calibration process and ensuring consistency. I particularly appreciate its ability to create custom profiles tailored to my viewing environment and content type, like HDR or SDR, which helps maintain vibrancy and contrast over time.
For ongoing maintenance, I schedule bi-annual calibration sessions. This routine helps catch any drift in display performance, especially since Mini LED and QLED panels can lose precision after extensive use. Additionally, I keep my firmware updated—new releases often include enhancements to local dimming algorithms and contrast management, which are vital for preserving picture fidelity. Firmware updates can be downloaded directly from the manufacturer’s website or through the TV’s settings menu.
Another useful practice is ambient light monitoring. Using a light meter, I measure my room’s lighting conditions periodically to ensure my HDR settings aren’t overly influenced by changing illumination. Supplies like the Sekonic Light Meter are portable and accurate, helping me adapt my environment for consistent viewing quality.
What’s the Future of Maintenance and Calibration?
Looking ahead, I predict that integrated, AI-powered calibration tools will become more prevalent. These systems could automatically adjust settings in real-time based on ambient conditions and content, reducing manual effort and increasing accuracy. Some advanced TVs already include adaptive picture modes that respond to room lighting, but the next step involves intelligent calibration that self-cores over time. This evolution promises a future where your display stays pristine without regular manual tweaks.
To really elevate your setup, I recommend trying an advanced calibration tip: use your colorimeter to create custom HDR profiles tailored to your room’s lighting. Precise calibration makes a dramatic difference in preserving contrast and brightness nuances, especially in challenging scenes. By investing in the right tools now, you can ensure your investment continues to deliver stunning visuals for years to come.
For detailed guidance, check out the mini LED innovation guide. And remember, consistent maintenance isn’t just a chore—it’s your pathway to consistently breathtaking images.
Lessons That Changed My View on Mini LED Calibration
- One unexpected insight was realizing how ambient light drastically influences calibration—dim lighting transformed my ability to fine-tune settings effectively, revealing details I never noticed in bright rooms.
- I learned that factory presets are often misleading; customizing contrast and brightness requires patience and understanding, rather than accepting defaults that can dull your viewing experience.
- A key lesson was that peak brightness numbers don’t guarantee stunning visuals—it’s about balancing luminance with shadow detail to achieve that immersive impact I had been missing.
- And perhaps most importantly, I discovered that regular recalibration ensures your TV maintains its visual magic, especially as firmware updates or room conditions change over time.
My Go-To Arsenal for Stunning Visuals
- Colorimeter devices like the X-Rite i1Display Pro provide the precise measurements necessary to fine-tune contrast and brightness, making calibration less guesswork and more science.
- CalMAN software streamlines adjustments with detailed test patterns, helping me achieve consistent settings tailored to HDR and SDR content—an essential for true picture perfection.
- Online test patterns and videos serve as quick, accessible tools for spot-checking shadow detail and highlight clipping, keeping my calibration sharp without expensive hardware.
- Regular firmware updates from the manufacturer often incorporate improvements in local dimming, making it vital to keep my TV’s software current for optimal contrast performance.
Take the Leap and Elevate Your Viewing Experience
Now is the perfect moment to embrace the nuances of brightness and contrast calibration. With patience and the right tools, you can unlock your Mini LED TV’s full potential, experiencing vivid scenes and deep shadows that truly pop. Remember, the journey to perfect picture quality is ongoing—regular recalibration keeps your display performing at its best. Don’t settle for average when extraordinary is within reach. Are you ready to transform your home entertainment with this knowledge? Share your calibration stories or questions below—I’d love to hear how you plan to enhance your setup.


Leave a Reply