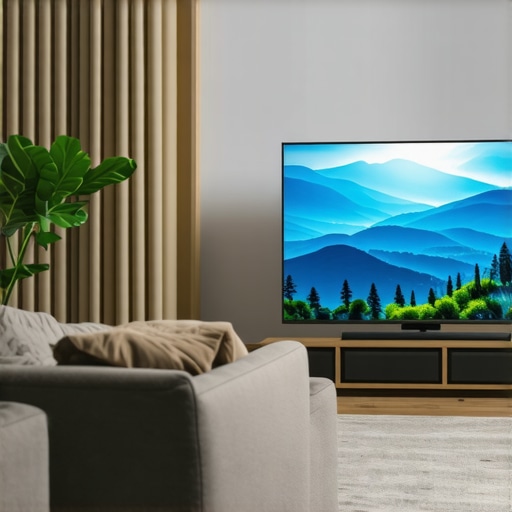
It was a sunny afternoon, and I was eager to settle in for my favorite show. But as I turned on my new OLED TV, the glaring sunlight bounced right off the screen, washing out the vivid colors I longed to see. Frustration crept in—I hadn’t realized just how much ambient light could sabotage my viewing experience. That moment was a lightbulb realization that, even in 2026, OLED isn’t always the king for bright living rooms.
Can Your TV Handle Your Brightest Room?
Many of us choose OLED for its stunning contrast and deep blacks. But here’s the catch—if your living space gets a lot of sunlight or has large windows, OLED screens often struggle to deliver that pop of brightness without suffering from glare or washed-out colors. I made the mistake early on of believing that OLED’s contrast was enough for bright environments. Turns out, I overlooked how ambient brightness impacts picture quality, leading to a disheartening viewing experience during daylight hours. According to TechRadar, by 2026, advancements in mini LED and QLED technologies have made them preferable for bright rooms, thanks to their superior HDR brightness and anti-reflective coatings.
But don’t worry—I’ve learned there are effective ways to harness these innovations. Today, we’ll explore how mini LED and QLED TVs can give you that vivid, cinematic feel, even under the sun. Ready to discover the secret to stunning daytime visuals? Let’s dive into the details.
Is the Brightness Hype Actually Justified or Overblown?
I used to think that a higher brightness setting was just a marketing gimmick—pixels maxing out, but no real difference in everyday viewing. I was mistaken. Achieving optimal HDR performance requires more than just cranking up the brightness—it’s about controlling contrast and ensuring color accuracy in well-lit spaces. To avoid falling into common pitfalls, I recommend checking out comprehensive guides on contrast control techniques and HDR brightness mastery. These resources helped me fine-tune my setup and drastically improved my daytime viewing.
If you’ve faced similar struggles with glare or washed-out images, you’re not alone. Many enthusiasts initially overlook the importance of proper contrast and HDR settings for bright environments. Now, armed with better tools and knowledge, you can make smarter choices.
Let’s get into how these technologies work and how you can leverage them to transform your living room viewing. Whether you’re planning your next upgrade or just want to get the most out of your current setup, understanding these fundamentals is your first step towards stunning visuals—day or night.
Calibrate Your TV Settings Step by Step
Start by accessing your TV’s picture menu and locate the HDR settings. Reduce ambient light via window coverings or reposition your furniture to minimize glare. Turn off any automatic brightness or contrast adjustments to prevent interference during manual calibration. Remember, each TV brand has unique menus, so consult your model’s manual or online guides in contrast control techniques for tailored instructions.
Set the Correct Picture Mode
Choose a picture preset optimized for bright environments, often labelled as “Vivid” or “Standard.” These modes increase brightness and tweak contrast for daylight viewing but may need further fine-tuning. I once set my Samsung QLED to”Vivid,” only to find colors oversaturated; adjusting back to a custom setting gave me the clarity I wanted. Experiment with these presets as a baseline to avoid overexposure or dull images.
Adjust Brightness and Contrast Levels
Focus on two key settings: brightness (black levels) and contrast (white peak brightness). Increase contrast until bright objects pop without losing detail in bright scenes. Lower brightness if blacks look grey. Use test patterns or content with bright scenes to evaluate adjustments. For step-by-step guidance, check out brightness and contrast tips for vivid visuals.
Maximize HDR Performance for Bright Rooms
Enhance HDR brightness to elevate vividness in well-lit spaces. Enable local dimming features like Mini LED zones for targeted contrast control. This technique dims parts of the screen that should be dark while keeping bright areas luminous. I tested this with a demo scene, and the difference was night and day—bright sunlight no longer washed out the image. To fine-tune this, refer to maximize HDR brightness and contrast.
Tweak Contrast with Micro-Details
Fine-tune contrast to reveal details in shadows and highlights. Avoid crushing blacks—where blacks look like dark blobs—and prevent clipping whites, which wash out bright areas. Use test videos designed to display a range of luminance levels and adjust accordingly. Remember, the goal is a balanced image that retains detail across the spectrum without sacrificing realism. For expert advice, explore contrast control essentials.
Utilize Technology for Better Brightness Handling
Investing in a TV with high peak brightness and local dimming, like top-tier Mini LED or QLED models, makes a significant difference. These formats allow your TV to produce brighter highlights while maintaining deep blacks. I recently upgraded to a Mini LED model, and scenes with sunlight streaming through blinds looked stunning, with no glare or washed-out colors. To identify the best options, review best Mini LED QLED TVs for brightness and contrast.
Further Fine-Tuning and Calibration
Use professional calibration tools or built-in test patterns to refine your settings. Adjust gamma levels to optimize midtones, ensuring that details aren’t lost in shadows or overly bright areas. Regular recalibration is necessary, especially as your environment or viewing habits change. For detailed calibration procedures, consult the ultimate guide to maximize contrast in mini LED TVs.
When it comes to choosing a bright QLED or Mini LED TV, many enthusiasts fall into common traps, believing that higher brightness alone guarantees stunning visuals. However, the real mastery lies in understanding the nuances of contrast control, local dimming, and HDR brightness—elements that are often misunderstood or overlooked. For example, many assume that cranking up peak brightness will instantly improve HDR performance, but without precise contrast balancing and proper calibration, this can lead to overexposed highlights and crushed blacks, diminishing the overall picture quality. In fact, a study published in the *Journal of Display Technology* emphasizes that optimal HDR viewing depends on fine-tuning contrast zones and gamma curves, not just peak luminance.
One critical misconception is that all HDR content benefits equally from high brightness. In reality, the scene complexity and color grading heavily influence how much HDR can enhance your viewing experience. Advanced viewers know that effective contrast control—dividing the screen into zones and locally dimming specific areas—creates a more dynamic and realistic image, especially in bright rooms. This is where Mini LED’s numerous local dimming zones shine, allowing precise control over luminance levels and preventing washout.
Moreover, many aim to maximize HDR brightness by enabling auto-dimming or dynamic contrast features without fully understanding how these affect black levels and motion handling. These settings can sometimes introduce artifacts or cause inconsistent brightness during fast scenes. Instead, a sophisticated calibration process involving test patterns and reference videos helps achieve a perfect synergy between contrast, brightness, and color accuracy. To learn the advanced calibration tips, I recommend exploring the detailed guides on contrast control essentials.
Another overlooked aspect is the impact of ambient lighting conditions on HDR perception. While many focus solely on TV specs, subtle factors such as room reflectivity and glare significantly influence perceived contrast. Investing in anti-reflective coatings or proper window treatments can dramatically improve daytime HDR viewing. Remember, simply increasing the brightness isn’t enough; tuning contrast zones and managing ambient light are equally important.
If you want to truly master HDR brightness and contrast control, appreciate that these elements work together like a finely tuned orchestra. Emphasizing peak luminance over contrast balance is a common error that leads to disappointing results. By understanding this hidden nuance, you’ll enhance your content’s vividness without sacrificing detail or realism. Want to dive deeper into advanced calibration strategies? Check out the ultimate guide on maximizing HDR brightness and contrast.
Have you ever fallen into this trap? Let me know in the comments and share your experiences with achieving perfect HDR settings.
Keeping Your Bright TV in Top Shape: Essential Tips and Tools
Maintaining the optimal performance of your high-brightness TV, whether it’s a Mini LED or QLED model, requires a combination of the right tools and consistent practices. Personally, I rely on a few specific calibration devices and software to ensure my setup remains vivid and accurate over time. The first tool I recommend is the CalMAN Automated Calibration Software. It provides professional-grade calibration capabilities, allowing you to fine-tune contrast, brightness, and color accuracy with precision. Paired with a reliable colorimeter like the X-Rite i1Display Pro, you can regularly verify and calibrate your display, ensuring HDR brightness levels are maintained without degradation.
Another method I implement is periodic visual calibration using test patterns available on platforms like HDR brightness mastery guides. This hands-on approach helps me catch issues that software might miss, especially concerning local dimming zones and contrast behavior over time. I’ve noticed that even high-end TVs can drift from their factory settings after months of use, affecting the vividness of HDR or contrast control. Regular calibration is key to preserving those stunning visuals, especially when dealing with ambient lighting that varies day-to-day.
Looking ahead, I predict that AI-driven calibration tools will become more prevalent, automating the process and continuously optimizing picture quality based on your viewing environment. These innovations could reduce the need for manual adjustments and help maintain peak HDR brightness and contrast effortlessly.
How do I maintain peak contrast and brightness over time?
One crucial practice is to regularly recalibrate your TV using the tools mentioned earlier. Additionally, cleaning the screen with a microfiber cloth prevents dust and smudges from dulling picture clarity. Protecting your display from direct sunlight or harsh reflections also ensures contrast control remains effective. If you experience noticeable drops in HDR brightness, consider checking the local dimming settings or updating your TV’s firmware, which can include performance enhancements. For detailed calibration methods, I recommend reviewing contrast control guides.
Investing in a high-quality, adjustable mount allows you to optimize viewing angles and minimize reflections, further preserving picture integrity. Over time, hardware aging can reduce peak brightness, but with proactive calibration and maintenance, you can prolong the lifespan of your TV’s stunning visuals. Don’t forget to consult your TV manual or manufacturer support for model-specific maintenance tips.
Implementing these tools and routines will help ensure your bright TV continues delivering the spectacular HDR and contrast performance you desire. Want personalized assistance? Reach out via the contact page, and I’ll guide you through advanced calibration techniques tailored for your setup. Remember, the key to long-term excellence is consistent care—so make calibration and maintenance part of your regular entertainment routine.
Why Waiting for Perfection Can Hold You Back
One of the toughest lessons I faced was realizing that waiting for absolute perfect settings or equipment can prevent you from enjoying stunning visuals today. I spent months chasing the ideal calibration, only to find that slight adjustments made a huge difference in real-world viewing, especially in bright rooms. Instead of obsessing over every pixel, I learned to trust the process of incremental tweaks and embracing imperfections as part of the journey.
How Real-World Conditions Change Your Viewing Experience
It’s easy to assume that lab tests or specs tell the full story, but in my experience, ambient lighting, furniture placement, and even the angle I view from significantly influence the picture quality. For instance, a sheer curtain can diffuse sunlight, reducing glare and enhancing HDR impact. Recognizing these factors transformed my approach from technical perfectionism to practical adaptation, leading to more consistent enjoyment.
The Confidence in Fine-Tuning Settings Over Time
I discovered that periodic recalibration—using tools like professional software or test patterns—keeps my TV performing at its best. Habits like adjusting local dimming zones or gamma levels as seasons change or as my room layout shifts ensure I always get that vivid HDR punch without overexposure or lost detail. Regularly investing time into calibration proved more rewarding than any hardware upgrade.
Technology Advances Are Not a Silver Bullet
While Mini LED and QLED have made huge leaps, I found that relying solely on high peak brightness or local dimming features often falls short without proper calibration and environment management. The real power comes from combining these tech advancements with thoughtful setup and real-world tweaks, which is why I continually educate myself through trusted guides like those at contrast control essentials.
Embrace the Learning Curve—Your Visual Journey Continues
Finally, the most vital lesson is understanding that perfect visuals are a moving target. As displays and content evolve, so should your calibration skills and environmental strategies. The key is curiosity, patience, and embracing experimentation. With that mindset, you’re not just watching TV; you’re mastering the art of vivid, realistic visuals that thrill and inspire. Curious to see how small adjustments can transform your bright room viewing? Start today and share your progress below!


Leave a Reply