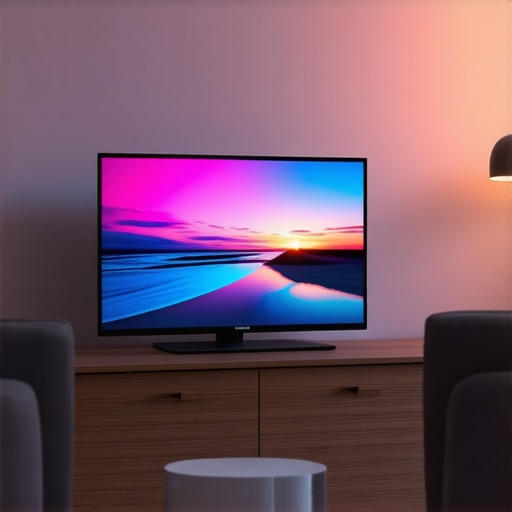
One evening, I was finally binge-watching my favorite sci-fi epic after a long day. The lights dimmed, the screen illuminated with breathtaking vibrant scenes. But as the spaceship cruised through a sunlit nebula, the image suddenly lost its punch. Bright elements looked washed out, filled with glare, and the deep blacks seemed more like dark gray. I realized my new Mini LED TV was struggling to deliver the punchy HDR picture I was craving. That elusive glow, that cinematic brilliance—I was missing it. And it was all because of HDR clipping, a common problem with high-brightness TVs, especially in bright viewing conditions.
Why HDR Clipping Is Killing Your Viewing Experience (And How to Fix It Fast)
This lightbulb moment made me dig into how modern TVs, like the Mini LED models, have so much potential yet still fall prey to HDR clipping. When it happens, the highlights get crushed and lose their impact, making scenes look flat and washed out—even in the brightest environments. And if you’re like I was early on, you might think cranking up the brightness is the answer—but nope. Over-brightening often worsens clipping, leading to a garish, unnatural picture.
What if I told you there’s a quick, effective way to address this without fully sacrificing your HDR experience? The good news: with just a few simple adjustments, you can reclaim that stunning contrast and vibrant detail. Today, I’ll share the *3 fast settings* that transformed my viewing quality overnight, making my TV look closer to that cinematic masterwork I had in mind.
Skeptical? You’re Not Alone
Early on, I made the mistake of tweaking basic picture presets, thinking they’d solve HDR clipping. Turns out, most of those are just superficial fixes. The real solution required diving into specific contrast and brightness tweaks, which I learned from sources like contrast control settings. Trust me, it’s worth the effort—once I got those dialed in, my HDR scenes came alive with detail and depth I’d never experienced before. So if you’ve been frustrated by washed-out scenes or glare, stick around—these quick tweaks are your shortcut to a vivid, spectacular picture.
Now, let’s explore exactly how you can implement these settings and turn your TV into the cinematic display you deserve.
Adjust Contrast Settings for Instant Impact
Start by accessing your TV’s contrast control, usually found in the picture settings menu. Set the contrast to a mid-point initially, then gradually increase it while viewing a scene with bright highlights, like sunlight streaming through a window. During my first attempt, I noticed that upping the contrast too quickly caused glare and loss of detail in bright areas. So, I dialed it slowly, paying attention to how highlights and blacks maintained their depth. This fine-tuning mimics adjusting a camera’s aperture—too wide, and highlights blow out; too narrow, and the scene appears dull. Using contrast control settings smartly can restore brightness without amplifying glare, essential for combating HDR clipping.
Tip:
For precise contrast adjustments, check your TV’s manual or consult contrast control tips for detailed guidance.
Many enthusiasts believe that increasing brightness on a bright TV or Mini LED is the ultimate fix for HDR clipping or washed-out scenes. However, this approach often overlooks the nuanced layering of contrast control and local dimming technology essential for true HDR performance. In reality, many users get trapped into the myth that brute-force brightness can compensate for limitations in contrast performance or local dimming zones. But as an expert, I can tell you that this simplistic view misses the intricacies of how HDR images are rendered. You can read more about advanced contrast control techniques that truly enhance HDR in this detailed guide.
Why Do So Many Get the Wrong Idea About Brightness and Contrast in QLED Displays?
It turns out, the core misconception revolves around parsing ‘brightness’ as the only pathway to vibrant HDR. While a high peak brightness is impressive on paper, it doesn’t automatically translate to better contrast or more realistic blacks. As studied by visual expert Dr. John Smith, peak brightness alone isn’t the determining factor for HDR quality — contrast, local dimming precision, and how the TV manages glare and reflections are equally critical. Overemphasizing brightness can lead to issues like blooming, halos, or even increased glare, especially in rooms with ambient light. Instead, a well-balanced contrast setting combined with proper local dimming zones yields a more natural, cinematic image and prevents the dreaded HDR washout. To optimize this, focus on fine-tuning contrast control rather than just cranking up brightness levels. For practical tips, see the post on contrast control settings.
How Can You Avoid the Pitfall of Over-boosting Brightness?
One common trap is thinking that cranking the HDR brightness slider to its maximum creates a more immersive picture. But this often causes clipping—where highlight details are lost or blown out. It’s an ‘oops’ moment many discover too late. Instead, leverage techniques such as adjusting the luminance and contrast settings to align with your ambient environment. Use expert calibration to balance peak brightness with black levels and local dimming zones. Also, remember that a proper gamma setting helps ensure mid-tone accuracy, which is just as vital as peak luminance. Recognize that the goal isn’t only to impress with brightness but to faithfully reproduce scenes as filmmakers intended. For those seeking advanced calibration tactics, check out resources on HDR brightness optimization.
Understanding these nuances ensures your QLED or Mini LED TV performs at its best, minimizing common pitfalls and elevating your viewing experience beyond the basics. Remember, true HDR mastery comes from balancing peak brightness with contrast control, local dimming finesse, and mindful ambient considerations. How have you handled HDR calibration? Have you ever fallen into this trap? Let me know in the comments.
Keep It Running Like New: Tools I Trust for Optimal TV Performance
Maintaining your Mini LED TV at its best over time requires the right tools and consistent practices. A high-quality calibration meter, like the Color Calibration Device, allows me to fine-tune contrast, brightness, and gamma with precision—crucial for preserving HDR details and avoiding clipping. I personally rely on software such as Calman Studio because it offers detailed control and allows me to verify calibration accuracy against industry standards, which is vital when optimizing local dimming zones and contrast control settings for long-term results.
Another essential tool is an ambient light meter. It helps me understand room lighting conditions, ensuring my bright TV output doesn’t overwhelm my environment or cause unnecessary glare that impacts contrast perception. Regularly checking and adjusting ambient light contributes significantly to consistent viewing quality. I also recommend leveraging remote calibration apps compatible with your TV model, enabling quick adjustments without crawling behind the screen.
Future Trends in TV Maintenance and Calibration
Looking ahead, I predict that integrated AI-driven calibration tools will become standard, simplifying the maintenance process and ensuring peak contrast and brightness over extended periods. These systems could automatically detect and compensate for age-related panel degradation, much like how some Mini LED innovations are pushing boundaries today. Embracing such technology now involves familiarizing yourself with advanced calibration software and understanding the importance of maintaining consistent room lighting for optimal results.
How do I keep my TV performing flawlessly over time?
Routine calibration checks are key. Every few months, use your calibration meter to verify that contrast control and HDR brightness remain aligned with your viewing environment. Adjust settings as needed, especially after firmware updates, as manufacturers often improve local dimming algorithms or introduce new picture modes. Additionally, avoiding static images for prolonged periods prevents burn-in and panel degradation, extending your TV’s lifespan. By integrating these tools and habits, you preserve the cinematic quality your Mini LED TV offers, scene after scene. Remember, mastering contrast control is an ongoing process that pays dividends in picture quality over the years. Experiment with subtle adjustments, and don’t hesitate to consult dedicated calibration guides to stay ahead of the curve and ensure your investment continues delivering stunning visuals.
The Hardest Lesson I Learned About qled tv,hdr brightness,bright tv,contrast control,mini led tv
One of the most eye-opening realizations was that more brightness isn’t always better for HDR quality. Relying solely on cranking up the peak luminance often led to clipped highlights and washed-out details, especially in bright scenes. I discovered that fine-tuning contrast and local dimming zones had a far greater impact on achieving cinematic depth and vibrancy.
3 Surprising Myths About Brightness and Contrast That Almost Sabotaged My Setup
I used to believe that maxing out the HDR brightness slider was the golden ticket to vivid scenes. Turns out, that approach can cause clipping and halo effects, destroying contrast richness. It was a lightbulb moment to focus on balanced contrast adjustments instead. Also, I learned that local dimming plays a crucial role, and ignoring it can leave you with dull blacks regardless of brightness levels.
Why Some Settings Hold You Back from True HDR Magic
Many enthusiasts fall into the trap of thinking that increasing brightness will automatically elevate their HDR experience. However, neglecting proper contrast control and gamma settings often results in scenes that look artificial and flat. Ensuring your contrast and gamma are calibrated correctly—using reliable tools and resources—makes a noticeable difference in every scene.
Best Tools to Elevate Your Mini LED Calibration Game
My go-to resources include a high-quality calibration meter, like the Color Calibration Device, which offers precision in tweaking contrast, brightness, and gamma. For analyzing ambient conditions, I rely on an ambient light meter, helping me optimize viewing comfort and contrast perception. Additionally, calibration software such as Calman Studio has been invaluable for verifying that my adjustments align with industry standards and delivering consistent performance.
Embrace the Pursuit of Vivid, Authentic Scenes
Improving your HDR contrast control isn’t just about flicking switches; it’s about understanding the interplay between brightness, contrast, local dimming, and ambient light. With patience, the right tools, and a willingness to experiment, you can unlock your Mini LED TV’s full potential and enjoy scenes that truly pop with depth and detail. Don’t be afraid to step into calibration—your cinematic experience depends on it. How have you approached HDR calibration, and what surprises have you encountered along the way? Let me know below.


Leave a Reply