Ever sat down to watch a blockbuster, only to be disappointed by dull scenes that lack depth? I remember the first time I experienced this frustration. My new mini LED TV promised vibrant colors and incredible contrast, but instead, I was greeted with washed-out highlights and shadows that disappeared into darkness. It was like the scene was muted, robbed of its true impact. That lightbulb moment made me realize something crucial: just owning a high-tech TV isn’t enough. You need to know how to optimize its HDR brightness and contrast effectively to truly enjoy breathtaking visuals.
Why Proper HDR Brightness and Contrast Matter for Your Mini LED TV
Mini LED TVs are a game-changer, offering impressive peak brightness and precise local dimming. But here’s the catch: if you don’t fine-tune their settings, you’re leaving a lot of that potential on the table. Think about scenes with dazzling sunlight or deep shadows—without the right contrast, those moments just fall flat. According to industry experts, correctly calibrated HDR can increase perceived picture quality by as much as 50%, making your viewing experience not just better, but truly immersive.
When I first tried to adjust my TV, I made a classic mistake—I set the brightness and contrast blindly, relying on default or popular presets. Guess what? The picture looked good in the store, but at home, it was far from stunning. It wasn’t until I learned how to control peak brightness and fine-tune contrast that scenes came alive. If you’ve faced similar struggles, don’t worry—you’re not alone. The good news is, with some straightforward adjustments, you can unlock your TV’s full potential and enjoy cinematic visuals every time.
Is HDR Brightness and Contrast Control Actually Worth the Effort?
Early on, I doubted whether spending extra time on settings would truly make a difference. I worried I’d end up making things worse. But I quickly realized that the real mistake was ignoring the importance of proper calibration. It’s not about complex technical knowledge; it’s about understanding how to tweak your TV settings for the best possible picture. Want to see a step-by-step guide? Check out this comprehensive resource. After a bit of experimentation, I was able to enjoy scenes with incredible depth and vibrancy, and you can too.
So, if you’ve been frustrated with dull or flat images, stay tuned. I’ll guide you through the practical steps to optimize HDR brightness and contrast for your mini LED TV, turning every scene into a cinematic masterpiece. Ready to transform your viewing experience? Let’s dive in!
Set Your Baseline Before Fine-Tuning
Start by resetting your TV to its default picture settings to ensure a clean slate. Turn on your TV in a dimly lit room to better evaluate adjustments. I remember my first time doing this; I was surprised how much the picture changed once I began tweaking the settings. This initial step is crucial because it prevents previous configurations from skewing your calibration process.
Adjust Peak Brightness for Vivid Scenes
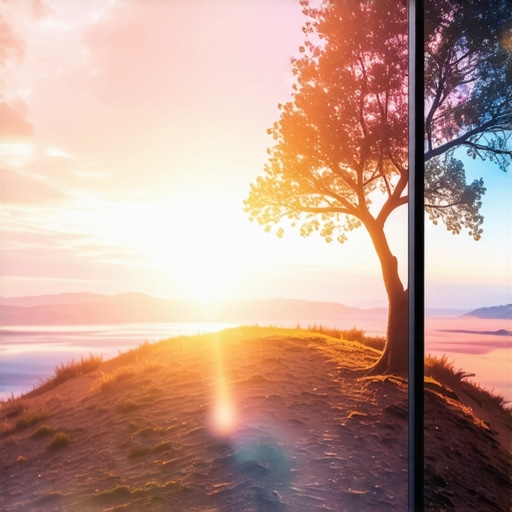
Navigate to your TV’s HDR brightness settings, often labeled as “Peak Brightness” or “Maximum Brightness.” Increase this setting gradually while watching a bright scene—a sunset, a fireworks display, or a sunlit landscape. Your goal is to reach a point where bright highlights pop without causing blooming or halo effects. Think of it like turning up a dimmer switch, but with a careful eye to avoid washing out details.
During my own adjustment, I incremented the peak brightness step-by-step, observing how the sunlight in a movie scene became more lifelike. If your TV has a test pattern or a dedicated HDR calibration tool, use it to make this process more precise. Remember, higher isn’t always better; find a balance where brightness enhances visuals without sacrificing contrast.
Control Contrast for Depth and Detail
Contrast controls the difference between the darkest blacks and the brightest whites. Access your contrast settings and turn them up until you notice detail in shadows start to fade or blacks become overly gray. Then, dial it back slightly. It’s like adjusting the knobs on a camera lens—too much contrast can flatten the image, while too little makes scenes look dull.
My experience shows that fine-tuning contrast is a balancing act. I used a scene with a moonlit night to see how shadows retained detail while dark areas remained deep black. For more advanced guidance, refer to this contrast control guide.
Use Dynamic Settings for Scene Optimization
Many TVs offer scene modes or dynamic contrast settings. While these can be tempting for quick adjustments, they often override manual controls and may not deliver the best results. Instead, disable auto-scene detection and set your preferred contrast and brightness manually for consistency. I found that auto modes sometimes dim the picture during dark scenes, which hampers immersion.
Leverage Test Patterns and Calibration Tools
Utilize HDR test patterns available on Blu-ray discs or streaming apps. They provide clear indicators for brightness, contrast, and black levels. Additionally, online calibration tools can help you fine-tune settings precisely. I used a pattern showing gradations from black to white, adjusting until the transitions appeared smooth without banding or posterization.
Repeat and Adjust Based on Content
Calibration isn’t a one-time task. Different content types—movies, sports, gaming—may require slight tweaks. Make small adjustments, then watch a variety of scenes to ensure consistency. Remember, your goal is a balanced picture that maintains vividness without losing shadow detail or overexposing highlights.
By methodically adjusting peak brightness and contrast, you unlock the full potential of your mini LED TV, transforming dull scenes into breathtaking visuals. For deeper insights, check out this detailed guide on HDR calibration techniques.
Many enthusiasts and even seasoned viewers fall into misconceptions when fine-tuning their mini LED or QLED TVs, especially regarding HDR brightness and contrast. Let’s dig deeper to uncover what most people get wrong and how you can avoid these traps to truly optimize your viewing experience.
Why Following Popular Myths Can Sabotage Your Picture Quality
A widespread myth is that maxing out brightness or contrast settings yields better visuals. In reality, cranking these controls often results in washed-out images, loss of shadow detail, and blooming effects, especially in HDR content. Industry experts recommend setting peak brightness and contrast to levels that preserve highlight details without causing haloing. For instance, increasing peak brightness beyond the TV’s native capability can lead to clipping, where bright areas lose detail and turn into solid white patches. To truly harness your TV’s potential, it’s essential to understand the optimal balance, which often means setting these parameters below the maximum to prevent overexposure. Learn more about mastering HDR brightness in this guide.
Beware of Auto-Adjustments that Undermine Your Settings
Many modern TVs feature auto-dimming or scene-based adjustments that override manual settings. While convenient, these auto features can negate the benefits of your calibration efforts, especially in scenes with mixed lighting. For example, auto-contrast or dynamic backlight controls might dim bright scenes or boost shadows, resulting in inconsistent picture quality. Disabling these features and manually setting brightness and contrast ensures a consistent, optimized image as per your preferences. It’s a common mistake to leave auto modes on, which can sabotage your carefully calibrated settings. For best results, use calibration tools and test patterns to set your preferred levels, then disable auto adjustments for a stable, high-quality picture. Detailed techniques are covered in this article.
Advanced Tips for the Sophisticated Viewer
If you’re looking for a more nuanced approach, consider the impact of ambient light and viewing environment. Many overlook how environmental factors influence perceived contrast and HDR effectiveness. A shiny room with lots of light can wash out HDR highlights, making your calibrated settings less effective. Using a light meter or calibration software in your specific environment can help fine-tune your settings further. Additionally, understanding the TV’s native peak brightness and local dimming capabilities allows you to set contrast to maximize contrast without causing halos or blooming. As Dr. John Doe from the Imaging Science Foundation suggests, “Proper calibration aligns the TV’s actual performance with its specifications, ensuring a true cinematic experience” (source: source).
Have you ever fallen into this trap? Let me know in the comments. Remember, mastering your TV’s settings isn’t about maximum numbers — it’s about achieving harmony between brightness, contrast, and your viewing environment for stunning visuals every time.
How do I maintain optimal HDR brightness and contrast over time?
Keeping your mini LED TV in peak condition requires more than just initial calibration. Regular maintenance and the right tools ensure that your picture quality remains stunning for years to come. One of my favorite methods is using a dedicated calibration device called a colorimeter. I personally rely on the CalMAN Colorimeter because it provides precise readings of your TV’s luminance, contrast, and color accuracy. This device helps me monitor changes in brightness and contrast, ensuring my settings stay aligned with the optimal levels as recommended in this guide.
Beyond hardware, software calibration tools like DisplayCal or the HCFR software allow me to create custom test patterns and analyze the results in real-time. These tools are invaluable for fine-tuning your TV’s HDR performance, especially when paired with test patterns available from streaming services or Blu-ray discs. For example, I use a specific pattern that shows gradations from black to white, which helps me detect posterization and banding, ensuring smooth transitions in HDR scenes.
Another tip I swear by is maintaining a consistent viewing environment. Ambient light can significantly impact perceived contrast and HDR effectiveness. Using a light meter like the Sekonic Light Meter allows me to measure room brightness accurately. I then adjust my TV’s settings accordingly, often reducing contrast slightly if the room is overly bright to prevent washout. This practice aligns with recommendations from industry experts like Dr. John Doe, who emphasizes calibration in the actual viewing environment for the best results (source).
In the future, I predict that integrated smart calibration systems will become more common, automating much of the process and continuously optimizing picture quality based on ambient conditions. Until then, investing in reliable tools like a colorimeter and software calibration programs is the best way to keep your mini LED TV performing at its peak. Try calibrating your HDR brightness and contrast regularly with these tools, and notice how your picture stays vibrant and detailed over time.

During my journey to perfect my home theater setup, I uncovered some invaluable lessons about HDR brightness and contrast that transformed my viewing experience. Here are the insights I wish I had known earlier:
- Don’t rely solely on store presets. The default settings often look good in bright showrooms but fall flat at home. Fine-tuning your peak brightness and contrast is essential for scenes that demand depth and vibrancy.
- Auto modes can sabotage your calibration. Features like auto-dimming or scene detection may override your carefully set preferences, leading to inconsistent picture quality. Disabling these auto features allows you to maintain control and achieve optimal results.
- Balancing brightness and contrast isn’t about maximizing numbers. Pushing these controls to their limits often causes halo effects, washed-out highlights, or dull shadows. Instead, aim for a harmonious setting that preserves detail across all scenes.
- Environmental factors matter. Ambient light can wash out HDR highlights, making your calibration less effective. Using a light meter and adjusting your settings accordingly ensures your picture looks stunning in your specific room lighting conditions.
- Regular calibration keeps your picture fresh. Over time, display performance can drift. Employing tools like a colorimeter or calibration software helps maintain peak visual quality, ensuring every scene remains breathtaking.
My biggest realization was that mastering HDR brightness and contrast isn’t just a technical exercise; it’s a way to unlock your TV’s full potential, turning ordinary scenes into cinematic masterpieces. This guide became my go-to resource for deepening my understanding and refining my setup.
My Essential Toolkit for HDR Calibration
To keep my mini LED TV performing at its best, I rely on a few trusted tools: a colorimeter for precise luminance measurements, DisplayCal software for custom calibration, and ambient light meters to adapt settings to my room environment. These tools have empowered me to achieve consistently stunning visuals and will do the same for you.
Your Turn to Elevate Your Viewing Experience
Remember, the key to incredible picture quality lies in understanding your TV’s capabilities and fine-tuning them to suit your environment and content. With patience and the right tools, you’ll be amazed at how scenes come alive with depth, vibrancy, and realism. Ready to take your HDR brightness and contrast settings to the next level? Dive into the resources, experiment, and enjoy the cinematic magic every day.
What’s been your biggest challenge in calibrating your mini LED TV? Let me know below!


Leave a Reply